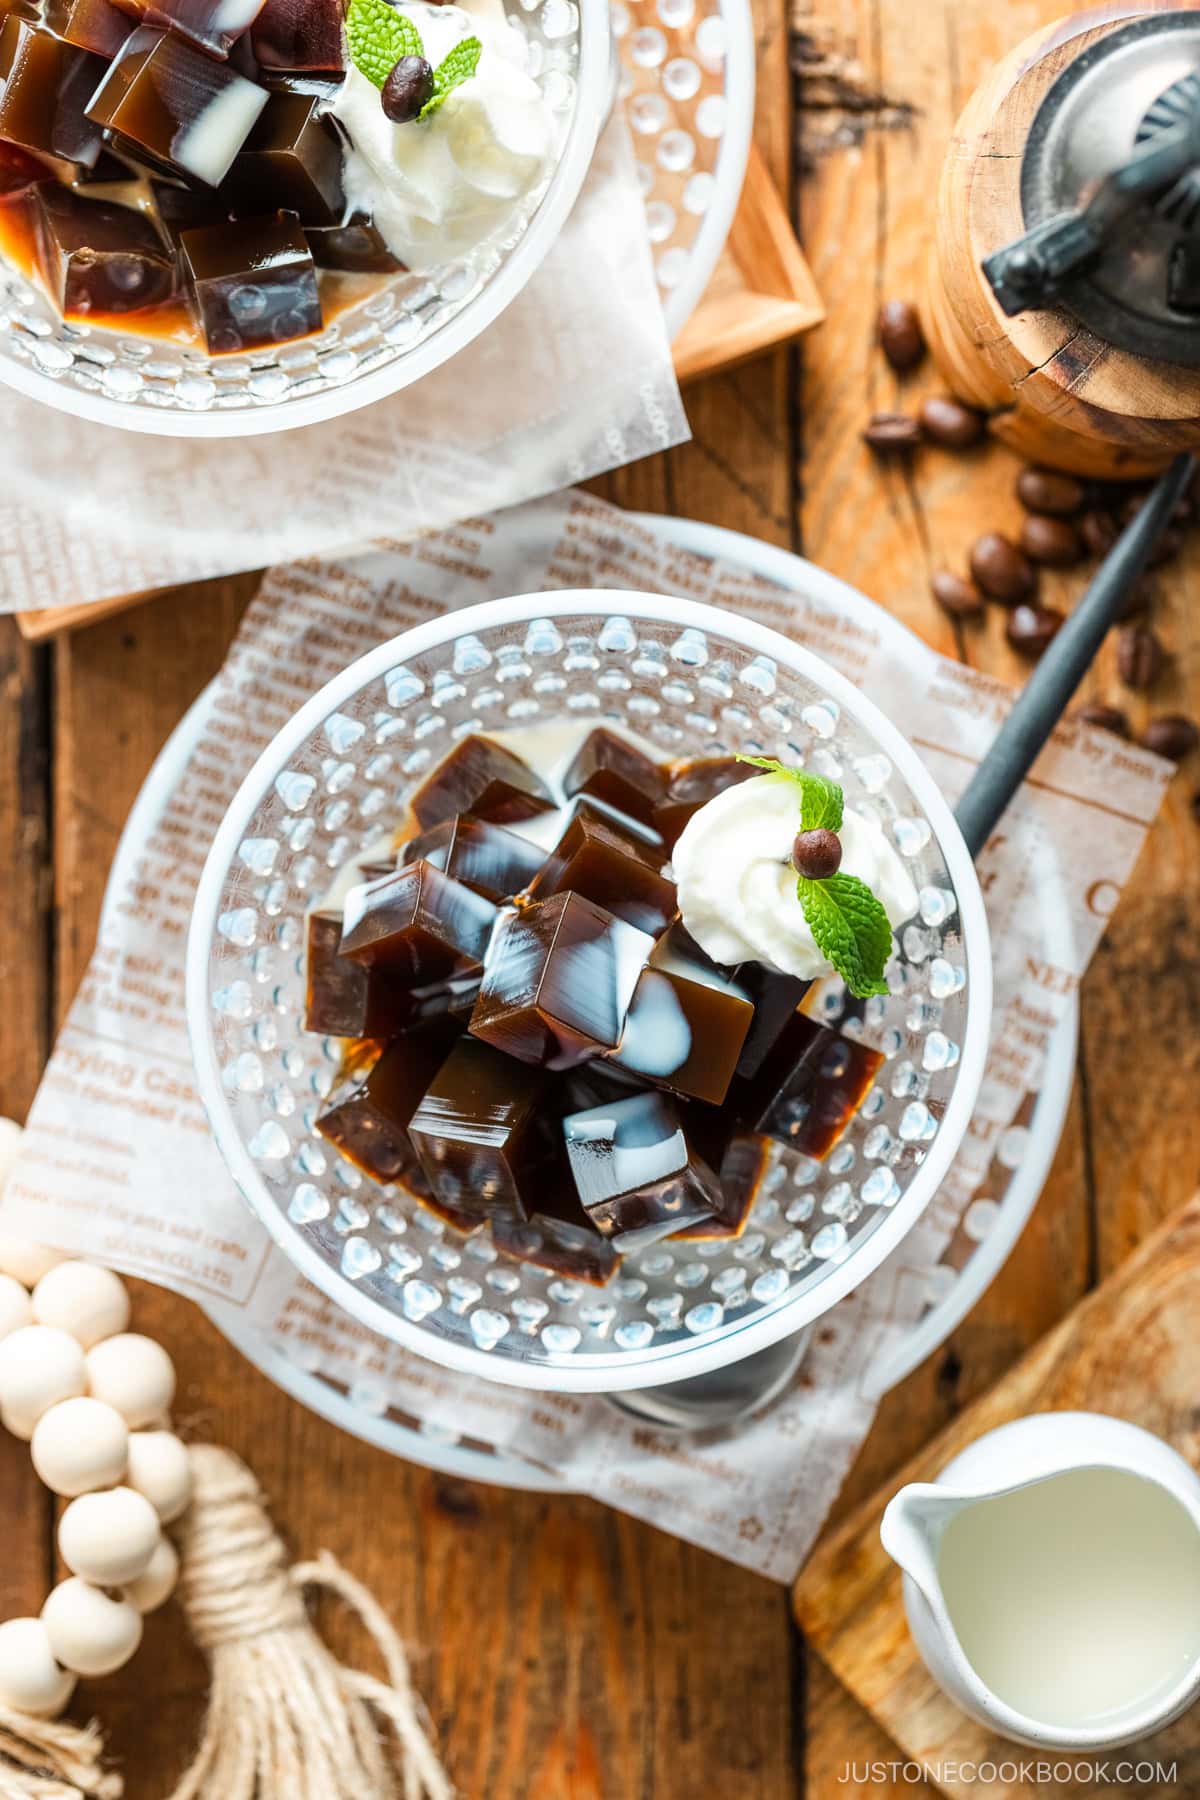
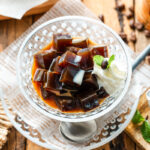
If you like coffee, then you‘ll love my easy recipe for chilled Japanese Coffee Jelly. It takes just 4 ingredients to cool down with this classic treat on a hot summer day. Top it with fresh whipped cream and sweetened condensed milk for a touch of silky richness.
Summertime in Japan gets hot and humid. Luckily, there’s no shortage of cold, sweet treats to help you cool down! One of my favorites is chilled Japanese coffee jelly (コーヒーゼリー). Translucent and jiggly, the glistening jelly is incredibly refreshing and soothing, with a bold coffee flavor and pleasant sweetness.
With just four ingredients, you can easily make this delicious coffee jello treat from scratch. It’s the perfect afternoon pick-me-up to grab from the fridge after a long, hot day—or any day!
Table of Contents
What is Coffee Jelly?
Japanese coffee jelly is a chilled gelatinous dessert flavored with sweetened strong coffee. Created during the Taisho period (1912–1926), it was Japan’s answer to British molded jellies made with animal collagen from calves’ bones. Japanese chefs put their own spin on the dish by using kanten (agar, 寒天, かんてん), a plant-based gelling agent used in traditional Japanese desserts. This makes coffee jelly a vegan-friendly snack.
Although not as common now in the UK and US, this treat is endlessly popular in Japan. You can find this coffee jelly dessert at many convenience stores (konbini), coffee shops, bakeries, and restaurants. It’s added to creative beverages and desserts, but I love it served the classic way in a small bowl with a dollop of whipped cream and a drizzle of sweetened condensed milk topping.
Why You’ll Love This Jelly Dessert
- Only 4 ingredients!
- Quick prep time — My recipe takes only 10 minutes of active time.
- Soft, bouncy texture — I add extra water to create a softer texture than standard kanten jelly.
- Pantry-friendly — Keep the ingredients on hand for whenever the craving strikes!
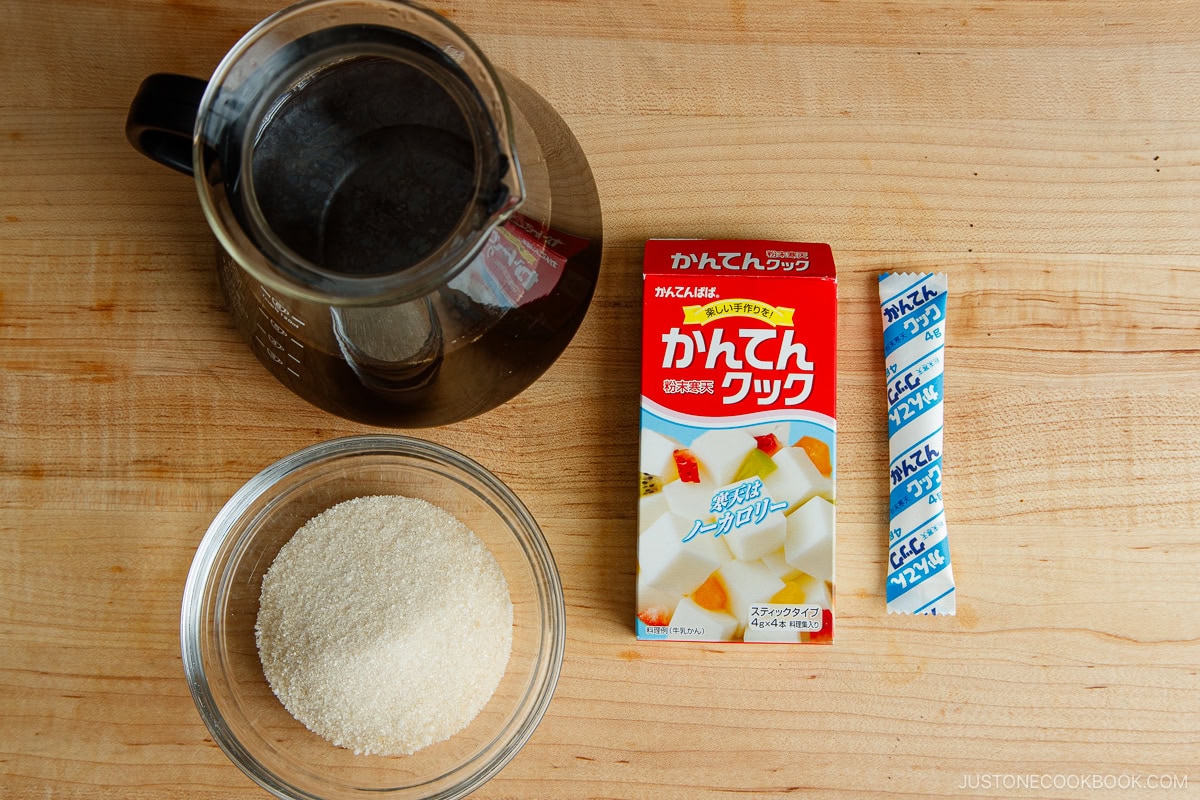
Ingredients for Coffee Jelly
You only need 4 ingredients to make coffee jelly from scratch:
- Strong-brewed coffee — brew it extra strong so the bold flavor shines through when chilled
- kanten (agar) powder — the granules are easy to use; I use a pre-measured packet for the ultimate convenience; find a Japanese brand called “Kanten Papa,” from a Japanese grocery store or use a similar product on Amazon
- sugar
- water
Substitution Tips and Variations
Try these variations in your coffee jelly:
- For a pantry-friendly and convenient option, use instant coffee powder or crystals instead of brewed coffee. Replace it with the same amount of water, then follow my recipe instructions for when to add the instant coffee powder. For a more intense flavor, try espresso powder! To skip the caffeine, use decaf coffee.
- If you can’t find kanten powder, substitute gelatin or agar-agar powder. For a soft set, I recommend substituting 8 g (4 tsp) powdered gelatin or agar powder for 1 stick packet (4 g, 2 tsp) of kanten powder. You could also use 8 g gelatin leaves/sheets (about 4.5 sheets). Test your gelatin first to make sure it sets (see below). Note: Gelatin produces a soft and wobbly jelly; it’s too soft to cut into cubes, so serve it with a spoon. Use more gelatin if you prefer a harder set.
How To Make the Best Coffee Jelly
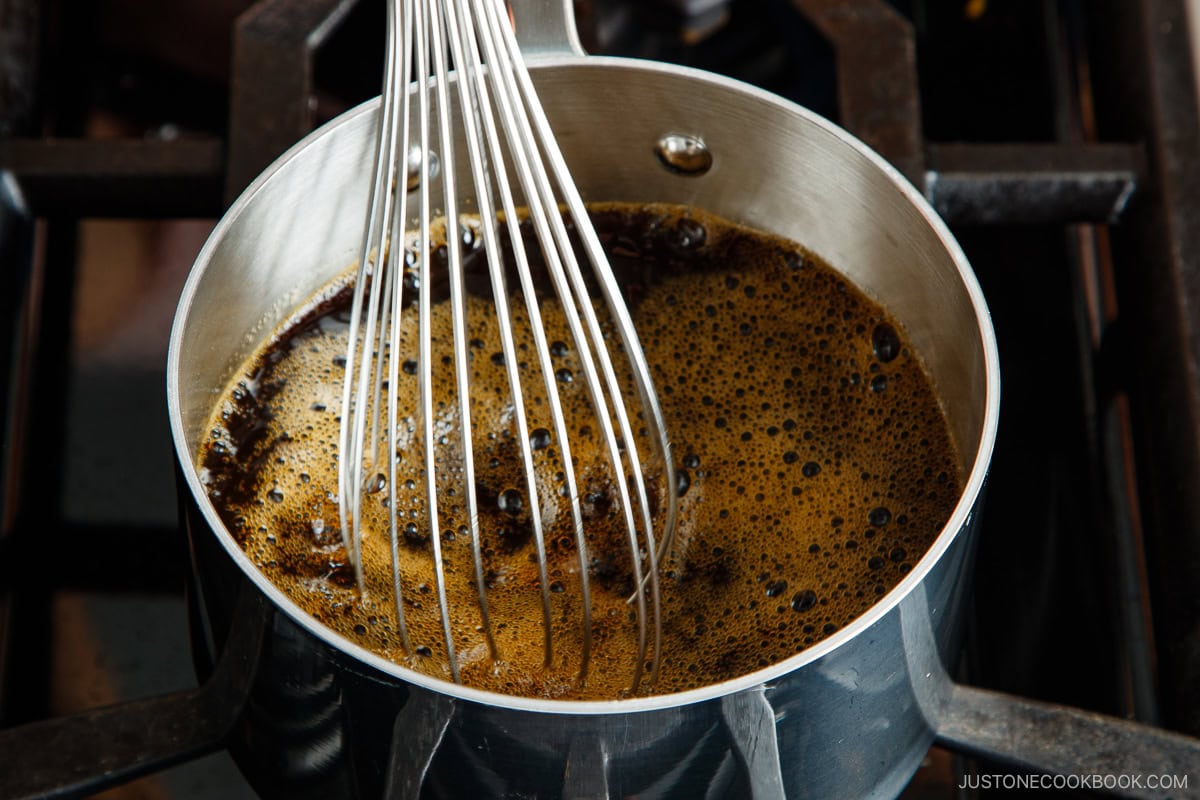
- Dissolve the kanten powder and cook. Add the kanten powder to the brewed coffee in a small saucepan. Mix constantly and simmer over medium heat for 2 minutes. Completely dissolve the kanten powder so the coffee jelly sets properly. Whisk in the sugar until dissolved.
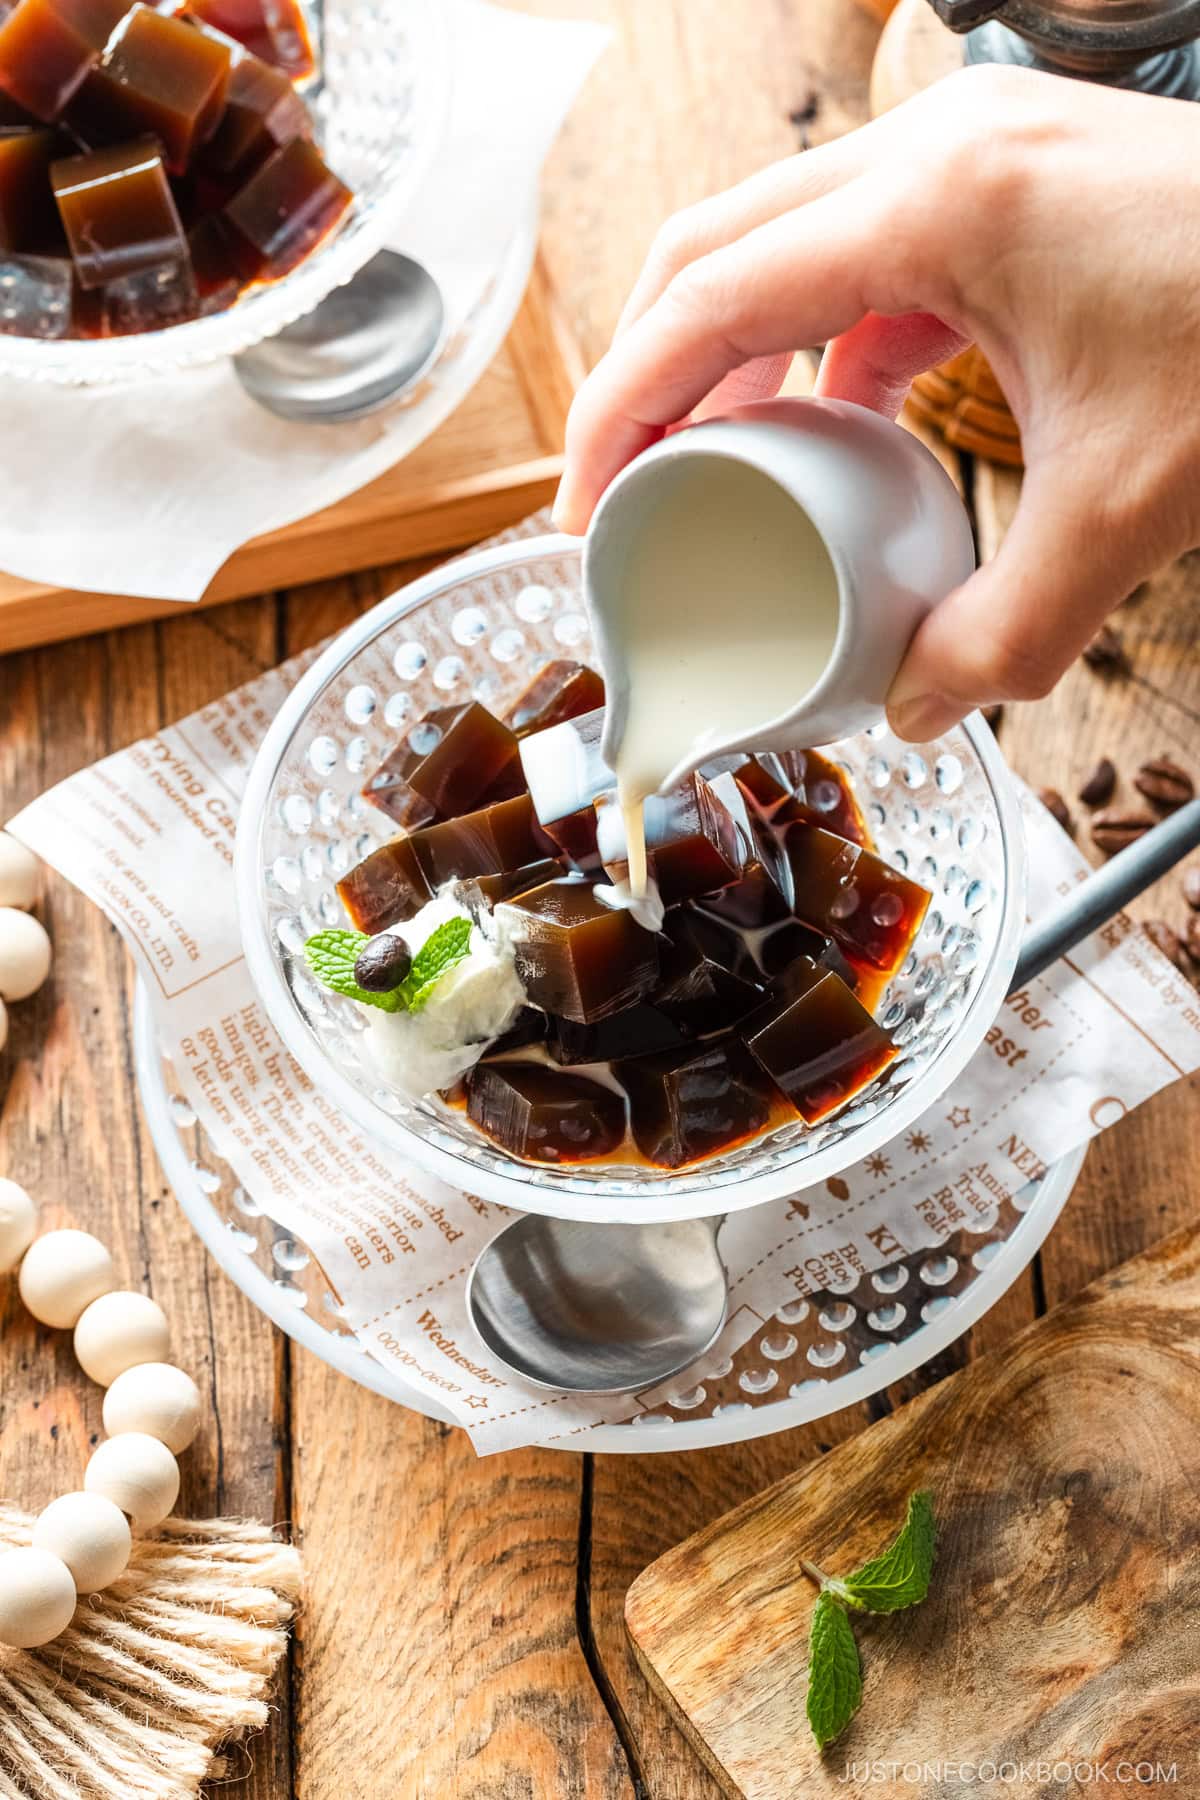
- Pour into a mold. Run the mold or pan under tap water first so the jelly doesn‘t stick, then add the coffee mixture. You could also pour the mixture into individual glass serving dishes.
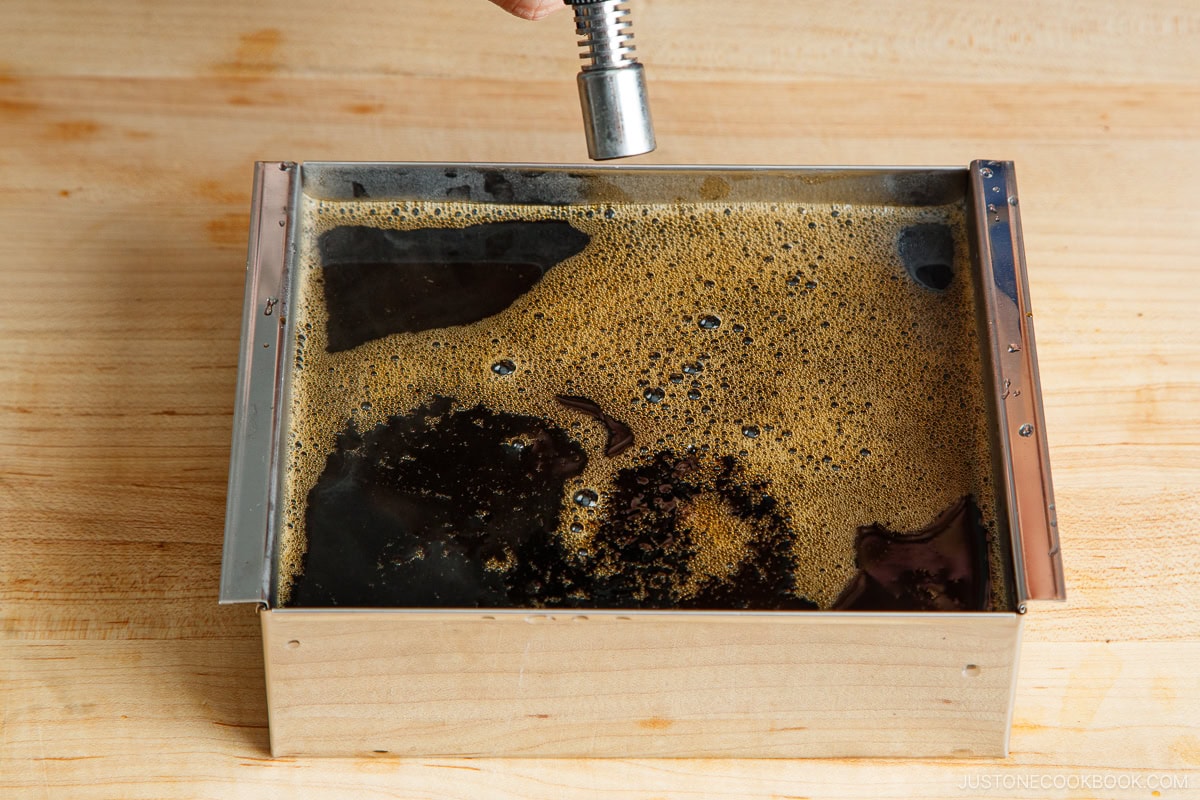
- Cool and chill. Pop the bubbles on the surface with a kitchen torch or utility lighter. Let it cool to room temperature, then cover with plastic wrap or a silicone lid. Chill in the fridge for 4–5 hours.
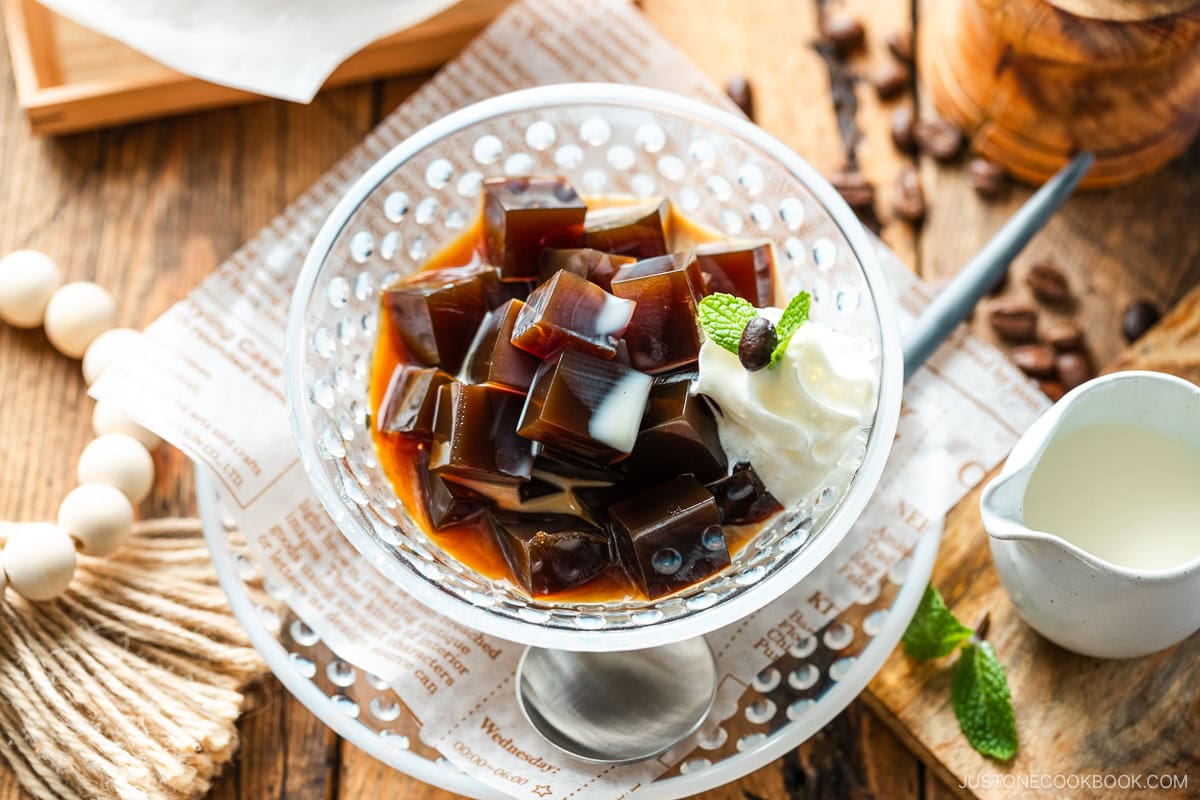
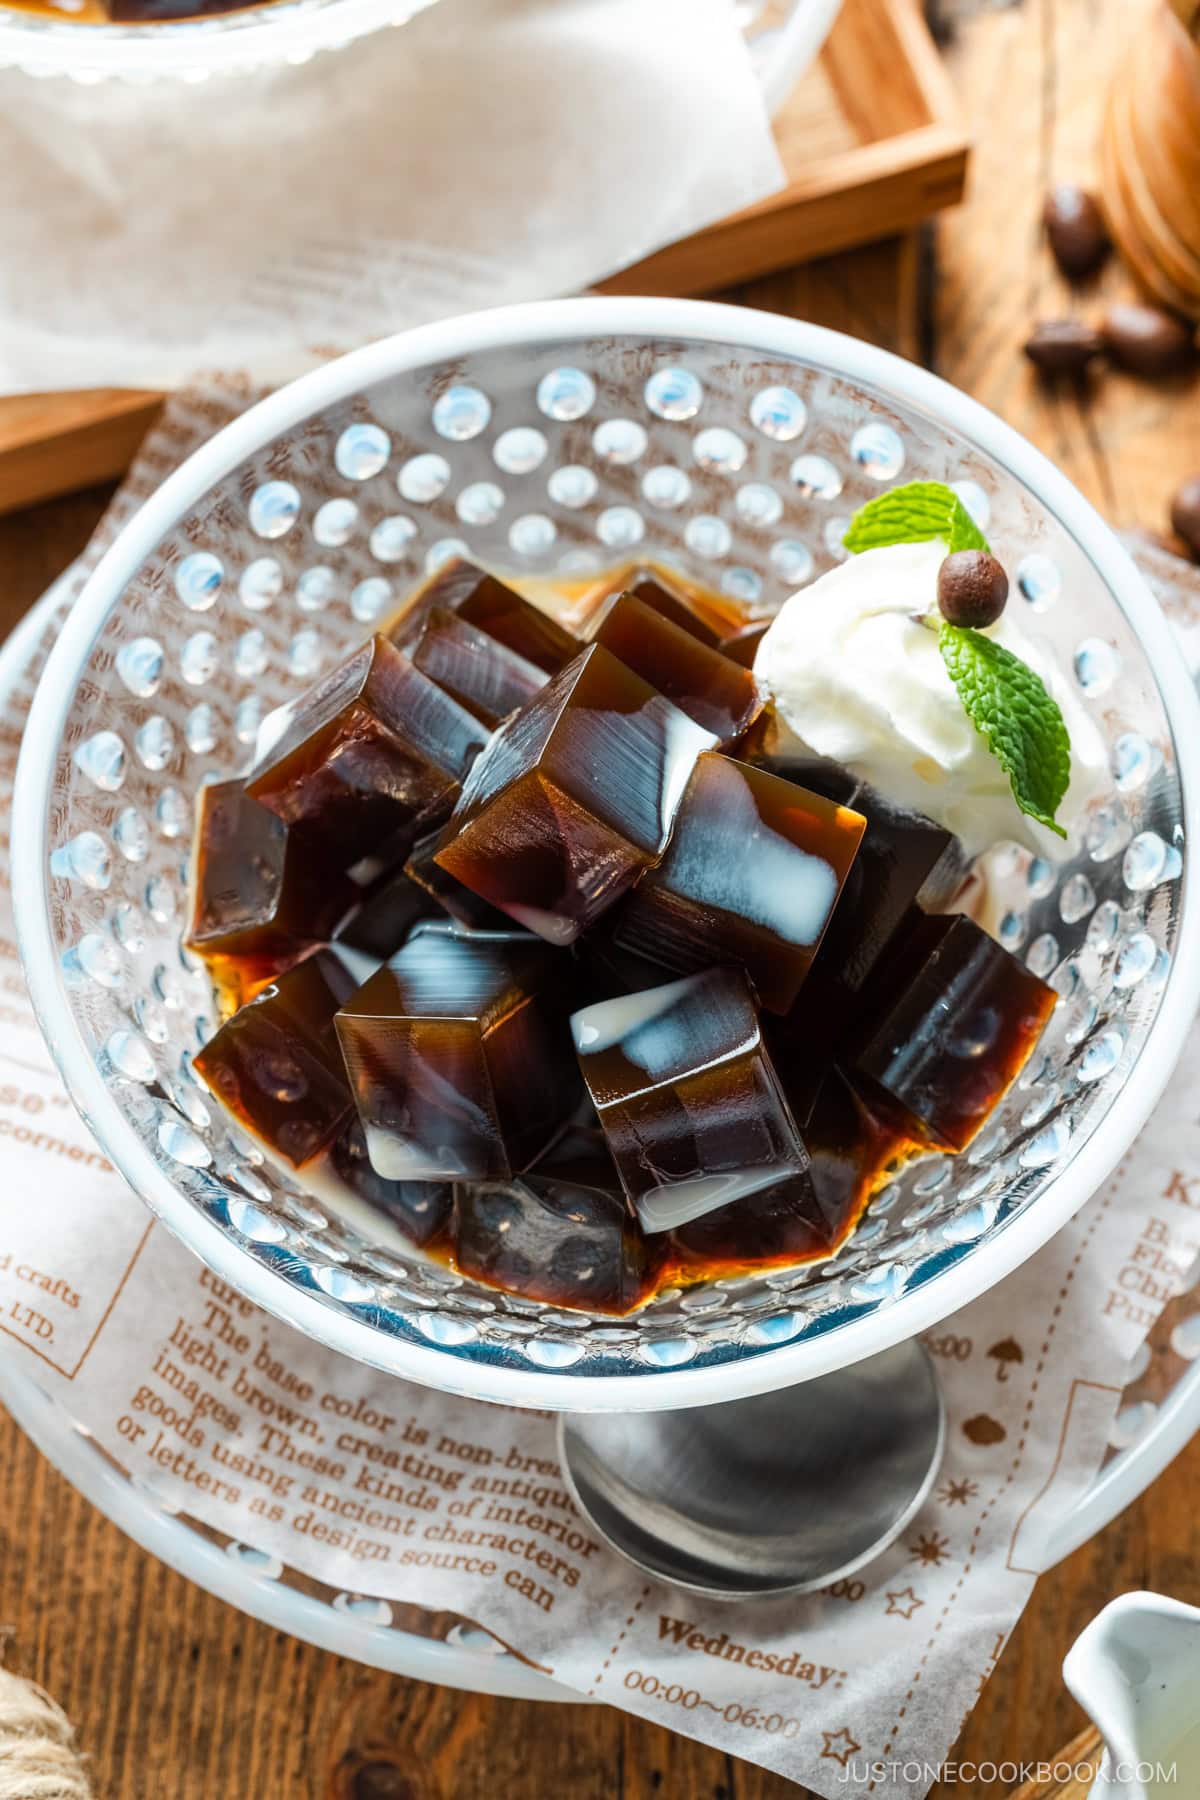
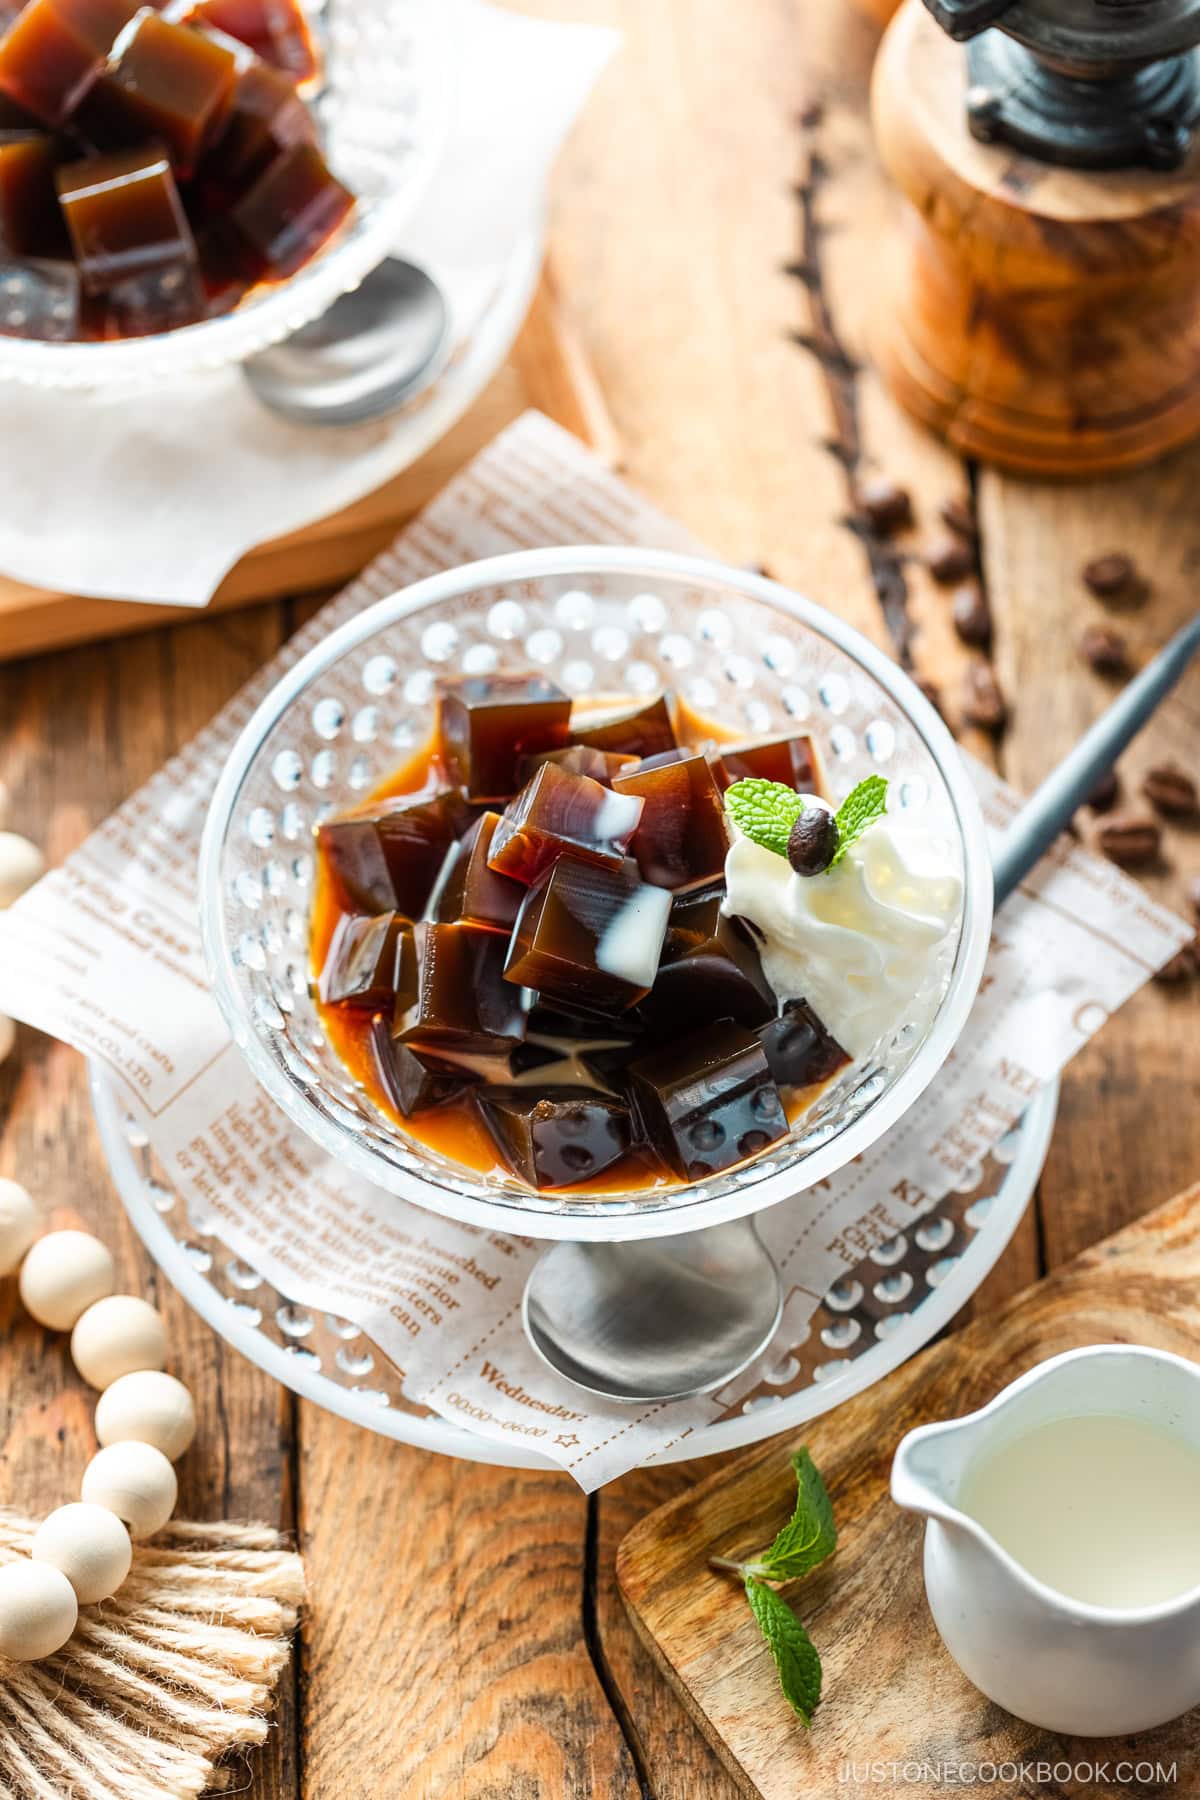
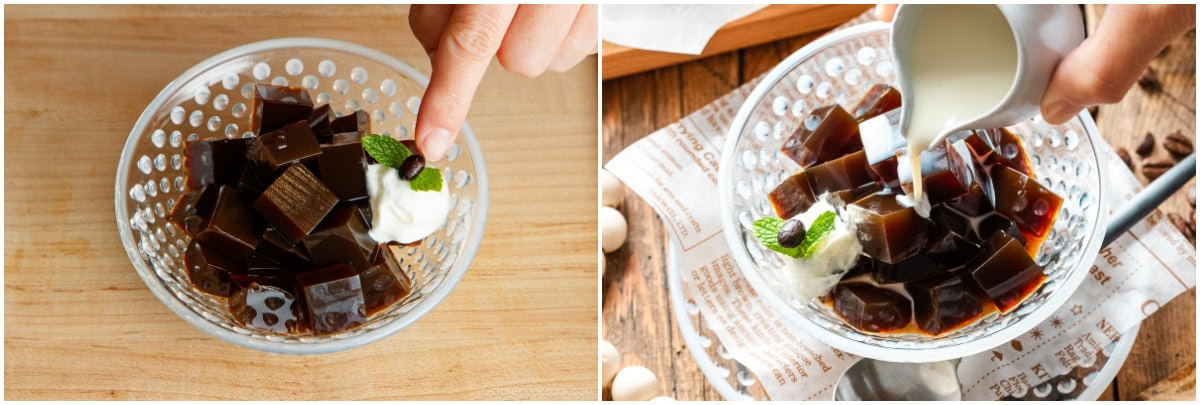
- Cut and serve. Remove from the mold and cut the coffee jelly into small cubes. Serve in small cups or bowls with your favorite topping.
Recipe Tips and Techniques
- Dissolve the kanten powder completely. The clear powder may be hard to see, but make sure to stir the kanten powder constantly and thoroughly during cooking. If you don’t dissolve it completely, the coffee jelly may not set.
- Make sure to cook the kanten long enough. You must heat the kanten powder for 2–3 minutes in a small pot to dissolve it properly. It solidifies in an hour or less at room temperature.
- Wet the mold or baking pan. This keeps the jelly from sticking. Run the mold or pan under running water and shake off the excess, but do not dry it. I use a Japanese stainless steel square mold called nagashikan (流し缶) with two parts. The inner pan lifts up the jelly and slides it off for effortless removal. No need to flip!
- Remove the bubbles on the surface for a translucent effect. To do so, quickly touch them with the flame from a long-stemmed utility/candle lighter or butane torch (also called a kitchen torch). You could also scoop them off with a spoon or pop them with a toothpick, although this is a time-consuming method.
- Test first if using gelatin or agar powder. In general, you’ll need roughly twice as much gelatin powder or agar powder as kanten powder. Since each brand is different, first test the gelatin or agar powder to see if it sets following the package instructions. Don’t heat gelatin too long or boil it because it won’t set.
How To Store
- To Refrigerate: You can keep the coffee jelly in the refrigerator for up to 2 days.
Fun Ways To Enjoy Coffee Jelly
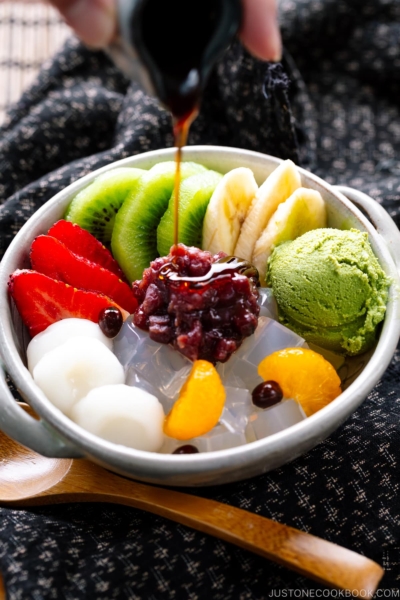
- Mix coffee jelly into other beverages and desserts. These translucent, bouncy cubes will level up your sweet snacks with additional flavor and unexpected texture! Layer them into your iced lattes, boba milk tea, milkshakes, and sundaes.
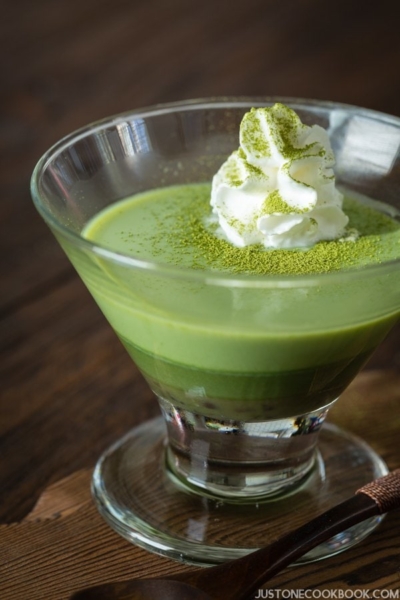
- Change up the toppings on your coffee jelly with sweetened heavy cream, a scoop of vanilla ice cream or matcha ice cream, chocolate shavings, or chocolate sauce.
FAQs
If your jelly failed to solidify, you might not have dissolved the kanten powder completely or cooked it long enough. Stir it constantly and boil or simmer it for 2–3 minutes. If you substituted powdered gelatin or agar-agar, the brand you used may require more or less to solidify than the amount I suggested. Test (substituting 8 g or 4 tsp powdered gelatin or agar powder for 4 g or 2 tsp kanten powder) to make sure the jelly sets. Follow the package instructions for how to dissolve the gelatin. Also, remember that gelatin won’t solidify if it’s heated for too long or boiled.
Nagashikan is a stainless steel mold with a removable bottom, commonly used for making jelly, Mizu Yokan, and Egg Tofu in Japan. I have a 15 x 14 cm rectangular Kansai-style mold that’s available on Amazon. You could use a baking pan or dish that is 8 x 8 inches (20 x 20 cm). It will create a flatter, single layer of jelly compared to the mold I used.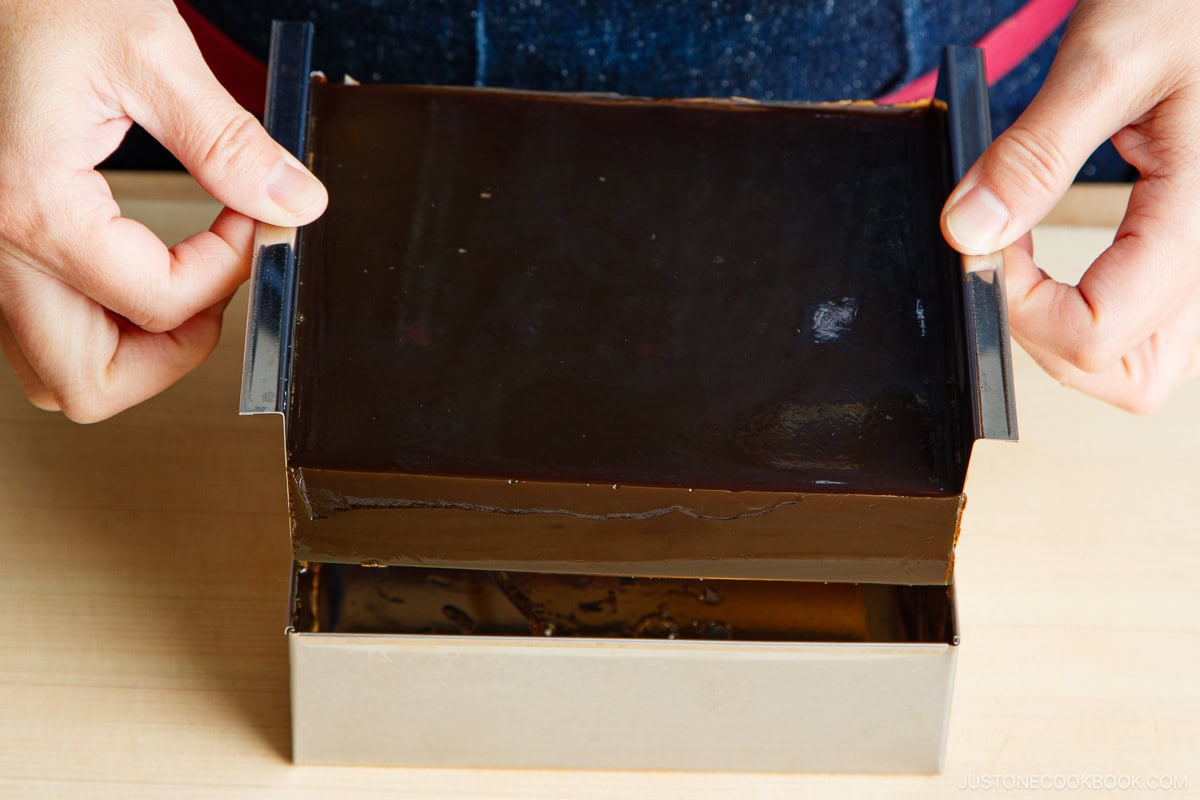
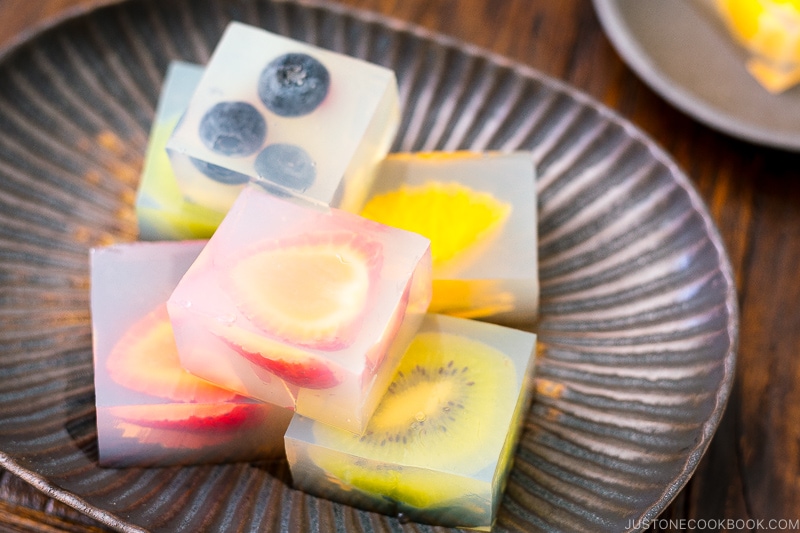
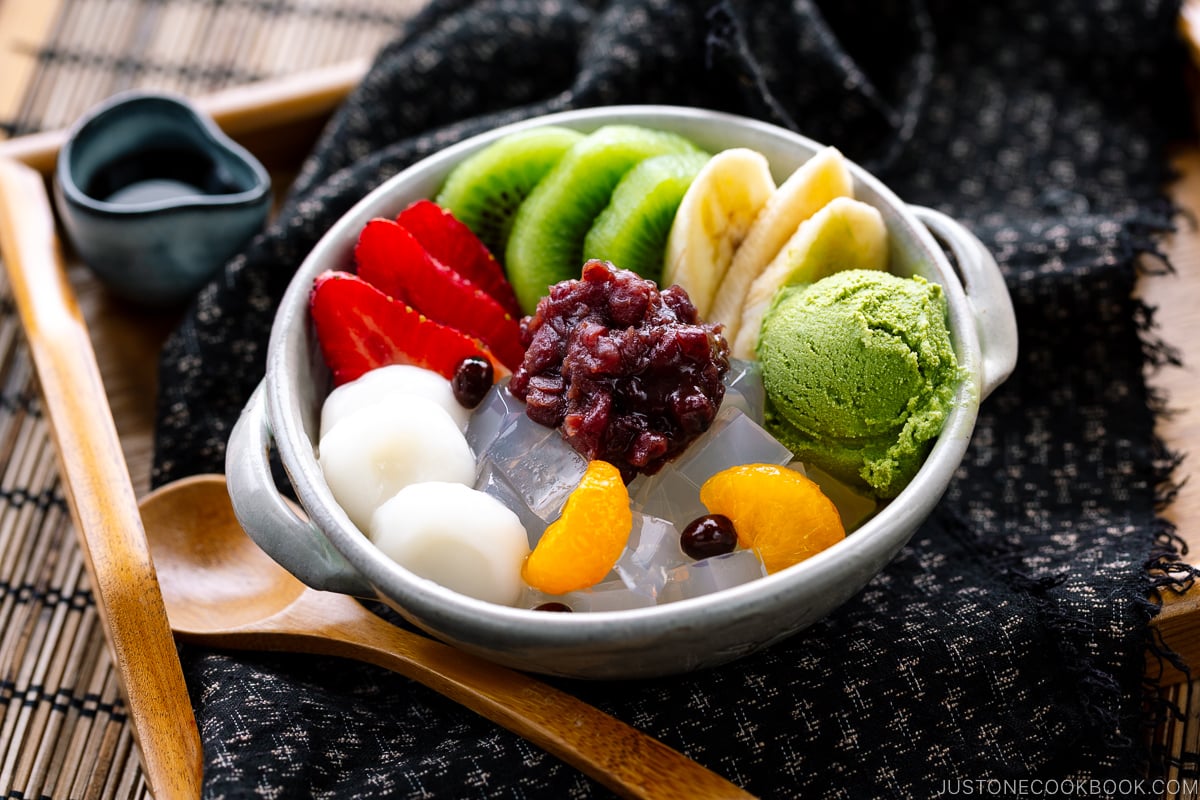
Other Jelly Recipes You Might Enjoy
Easy Japanese Coffee Jelly
Ingredients
- 2½ cups strong-brewed coffee (or substitute 2½ cups (600 ml) water and 2 Tbsp instant coffee powder/crystals; see the instructions for when to add the instant powder)
- 1 stick packet kanten (agar) powder (2 tsp, 4 g; see the end notes to substitute kanten bar, powdered gelatin, or agar powder)
- ⅓ cup sugar
For Serving
- 3 Tbsp sweetened condensed milk (skip for vegan/vegetarian)
- 3 Tbsp milk (skip for vegan/vegetarian)
- toppings of your choice (optional; whipped cream, coffee beans, and mint leaves)
Instructions
- Before You Start: Please note that this recipe requires a chilling time of 5 hours. Now, gather all the ingredients.
- In a small saucepan, add 2½ cups strong-brewed coffee. (To use instant coffee powder or crystals, add 2½ cups water now, but wait until Step 4 to add the instant powder). Then, add 1 stick packet kanten (agar) powder.
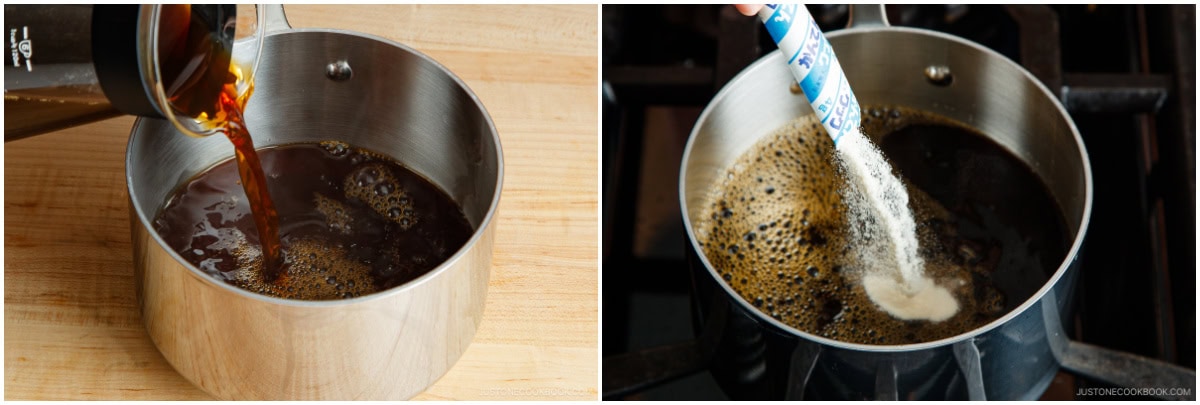
- Whisk well and bring the mixture to a gentle boil over medium-high heat. Once boiling, reduce the heat to low and cook for 2 minutes, continuously whisking the mixture. Tip: Kanten powder is hard to see, but be sure to dissolve it completely at this stage. If you don‘t, the mixture will not solidify. Learn more about kanten in the end Notes.
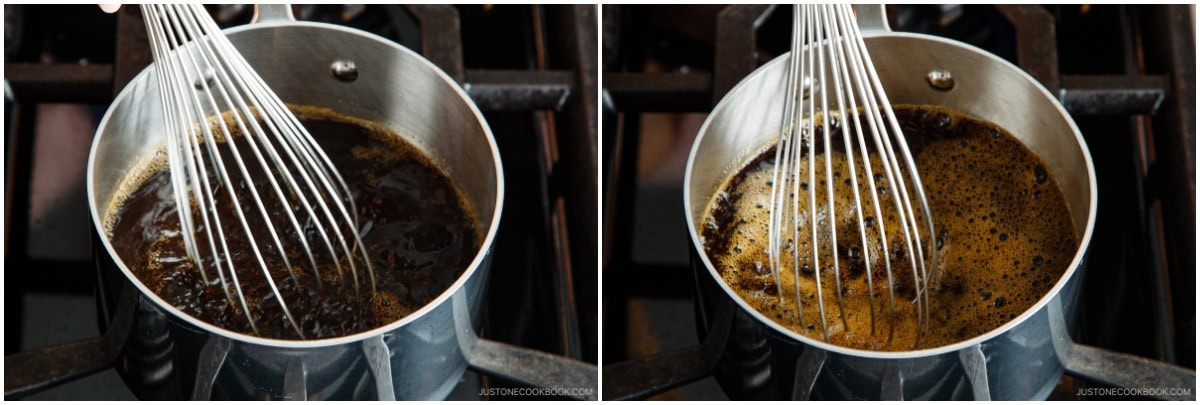
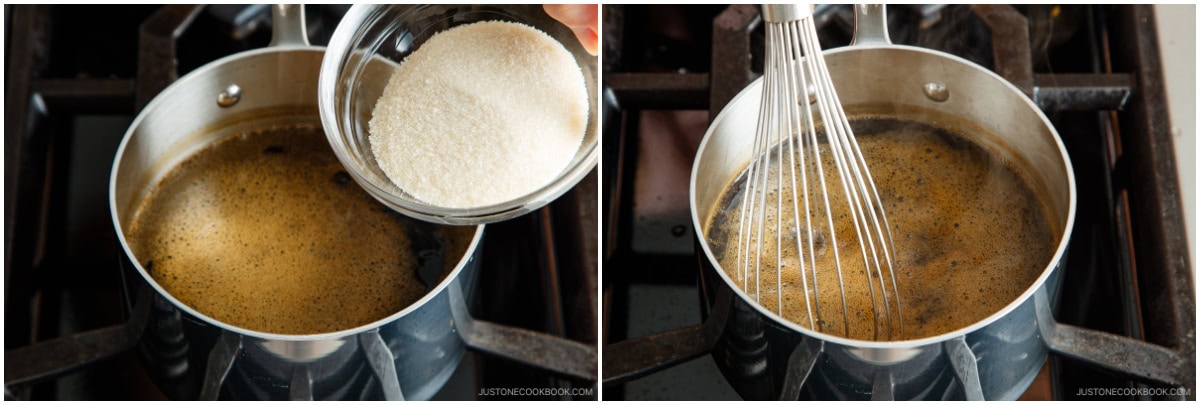
- Turn off the heat. Add ⅓ cup sugar (and 2 Tbsp instant coffee powder, if using). Whisk until the sugar has dissolved.
- Run a square or rectangular mold (I used a nagashikan that is 15 x 14 cm or about 6 x 5½ inches) under running tap water so the jelly doesn‘t stick. Shake off the excess water, but do not wipe it dry. Pour the hot mixture into the mold. Tip: If you don‘t have a nagashikan, you could use a baking pan or dish that is 8 x 8 inches (20 x 20 cm). It will create a flatter, single layer of jelly. Another serving option: To serve the jelly (without cutting) in individual glassware, let the hot mixture cool for 5 minutes, then pour it into the glass serving dishes.
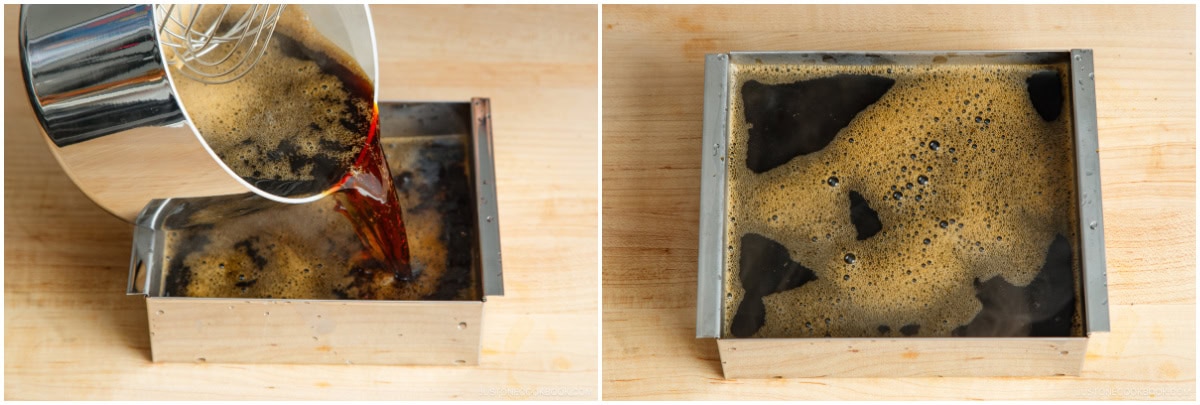
- Remove the bubbles on the surface by quickly touching them with the flame from a butane torch (also called a kitchen torch) or a long-stemmed utility/candle lighter. You also could scoop them off with a spoon or pop them with a toothpick, but those are both time-consuming methods. Once the bubbles disappear, let the mixture cool to room temperature on the countertop and solidify (about 45–60 minutes). The jelly will set before it reaches room temperature.

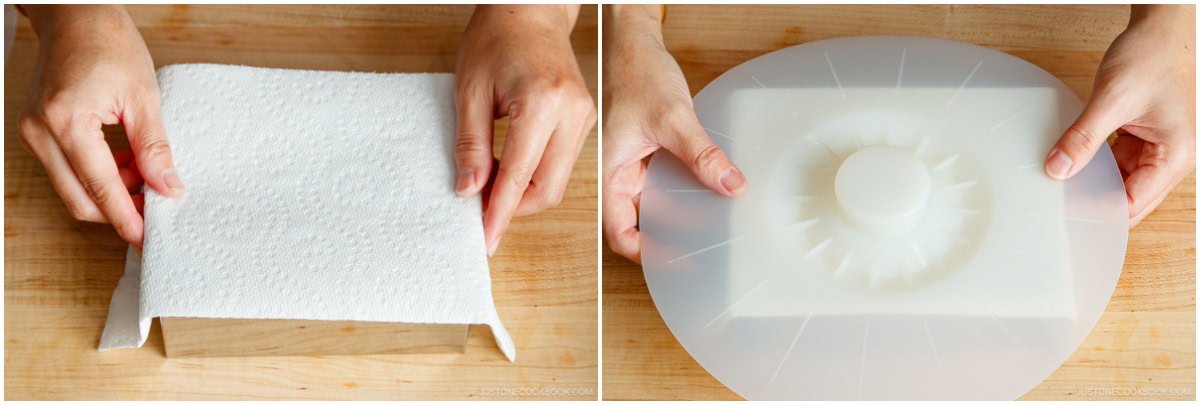
- Once the coffee jelly cools down, cover it with a paper towel and plastic (or a silicone lid) and refrigerate for 4–5 hours. Tip: The paper towel absorbs condensation.
To Make the Topping
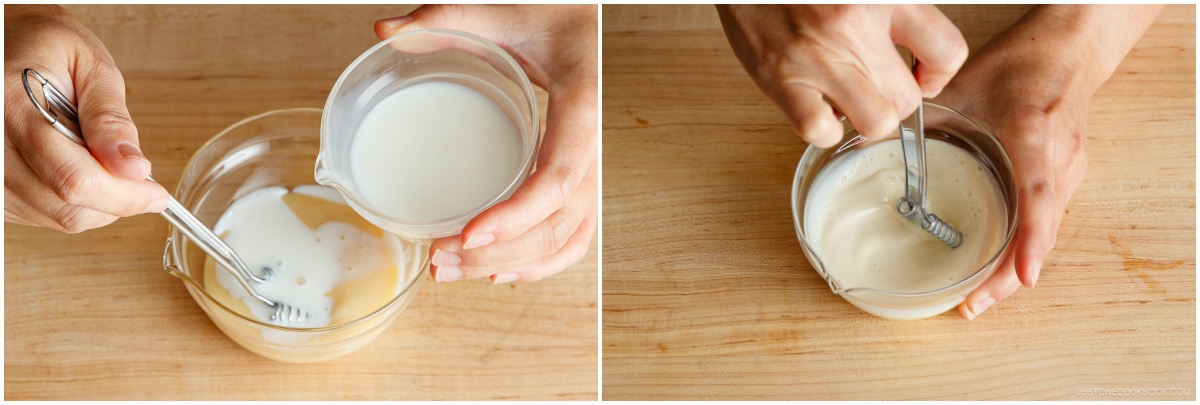
- Coffee jelly tastes great with a sweetened condensed milk topping. To make it, combine 3 Tbsp sweetened condensed milk and 3 Tbsp milk and mix well. Adjust the consistency and sweetness based on your preference. Add more sweetened condensed milk for a sweeter, thicker mixture.
To Serve
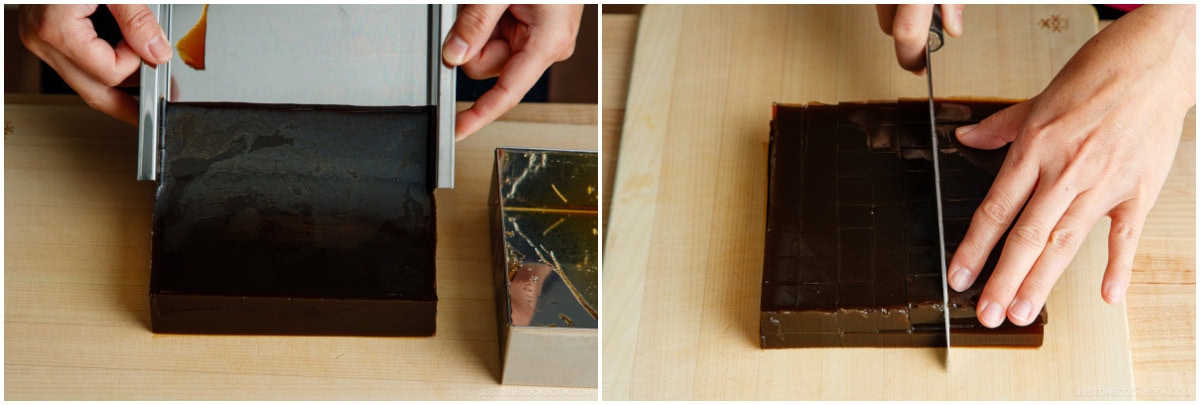
- Take out the nagashikan or pan from the refrigerator. Run a knife along the edges of the jelly. Then, lift the inner tray from the nagashikan.
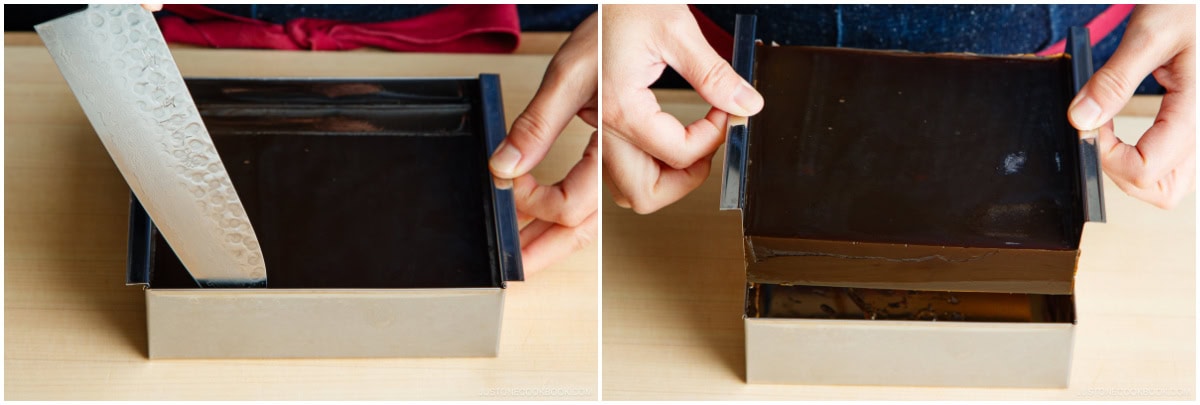
- Slide the jelly from the inner tray (or invert the pan to release the jelly) onto a cutting board. Cut into ½-inch (1.3-cm) cubes.
- Transfer the cubed jelly to individual serving dishes. If you poured and chilled the jelly in individual glass dishes, take them out of the refrigerator now. Serve with the toppings of your choice. I like to add whipped cream, mint, and a coffee bean on top. Drizzle with the sweetened condensed milk topping. Enjoy!
To Store
- You can keep the coffee jelly in the refrigerator for up to 2 days.
Notes
- kanten powder: 1 stick packet (4 g, 2 tsp)
- kanten bar: 1 bar (8 g)
- kanten threads: 24 threads (8 g)
- For a soft-set jelly (Japanese style) that you eat with a spoon, substitute 4 tsp or 8 g powdered gelatin or agar powder for 2 tsp or 4 g (1 stick) of kanten powder. You could also use 8 g (~4.5 sheets) gelatin leaves/sheets. Use more gelatin for a harder set, if you prefer.
- Kanten, gelatin, and agar (also called agar-agar) each produce slightly different jelly textures. Gelatin produces a soft and wobbly jelly; it’s too soft to cut into cubes, so serve it with a spoon.
- Test first to see if the gelatin or agar powder sets, as each brand is different.
- Gelatin won’t set if you heat it too long or boil it. Follow the package instructions for how to bloom and dissolve the gelatin.
- Agar is a broad term used outside Japan to translate the word kanten; the Japanese consider agar-agar and kanten different ingredients because they come from different algae.
Nutrition
Editor’s Note: This post was originally published on April 20, 2014. It was updated with a slightly revised recipe and new images on May 3, 2024, and republished on July 18, 2024.


Hi! This recipe ended out super good! I used a box of four packets of knox gelitine and the texture was perfect! Just wanted to share this for others who may use the same product <3 btw adding coffee creamer when serving makes it taste super good!
Hello, Livy! Thank you very much for sharing your experience with everyone!
We’re happy to hear that the texture was wonderful. Thank you for trying Nami’s recipe.
This recipe is delicious and so easy to follow. I used gelatin and it worked amazingly. Thank you for a great recipe. This one will be used many times to come.
Hi, Jessi! Thank you for trying Nami’s recipe and sharing your results with us!
We’re glad to hear you enjoyed it! Happy cooking!🤗
Nami you are the best, this was my favorite conbini treat every morning and I miss it so much now im back home! I will try and make this! I have some agaragar left in the pantry so I’ll see if that works!
Hi Nienke! Thank you so much for your kind feedback!
We hope you enjoy Nami’s coffee Jelly recipe. Happy Cooking!🤗
I just made this dish as the culminating dessert dish for our Japanese food night. I used 11g of gelatin with the cook times listed in the recipe. Everything dissolved and set nice. I will need to research pans since my jelly stuck. It was good. I tried a slight twist on the recipe with some Texas Pecan coffee. This was the first recipe I saw on this website. It is a delicious, refreshing dessert. YUM. Very good. Great recipe, great site.
Hi, Tom! Thank you for trying Nami’s recipe and sharing your experiences with us!
There is also a theory that if you wet the mold (or pan) with water before pouring the jelly in, it will come out quickly. We hope you will give it a try next!
Hi. What do you mean by “The paper towel helps absorb condensation”. What happens if one doesn’t use paper towel to cover the jelly pan?
Hi Kate! If you cover the jelly with plastic wrap, condensation will likely form under the wrap and drop onto the jelly. As long as you’re fine with it, it’s okay. 🙂
I used agar (kanten) bar since I couldn’t find kanten powder at our local Japanese grocery. It flopped. Texture was too firm, not what I expected.
Hello, Yuri. Thank you for testing Nami’s recipe. We’re sorry to hear that the texture wasn’t perfect for you.
Nami mentioned in the recipe notes that she added an additional 100 ml to the typical liquid amount. However, if the result was firmer, please add a little more water next time. Also, make sure to soak the Kanten bar in water for approximately 30 minutes first, then squeeze the water out, tear it into pieces, and finally cook the Kanten bar with coffee for about 2 minutes until completely dissolved. We hope your next try is successful!🤗
I use this recipe with agar powder. But I use same amount as kanten powder. Double amounts were too much. I wonder why other people has different results.
Hello there, Miho. Thank you very much for trying Nami’s recipe!
As Nami indicated on the recipe card, the textures vary depending on the brand.
You can read more about Kanten in this post. We hope this helps!
https://www.justonecookbook.com/agar-agar-kanten/
This is soooo so good! And very easy to whip up! I’ve made it a few times now and will make it many more times. I use agar powder and did almost 3 teaspoons agar yesterday, could use even slightly more. But very delicious melt-in-your-mouth goodness. I didn’t have cream yesterday and topped with about a tablespoon of condensed milk. Wow, You have just got to try that one time 😉 thank you so much for this recipe!!
Hi Ina! We are so happy to hear you enjoyed homemade Coffee Jelly!
Thank you very much for trying Nami’s recipe and for your kind feedback!
And Yes! condensed milk is sooo good too.😁
I actually made this twice in two days! the first time I overcooked the gelatin and it ended up not setting correctly (could you mention that for rookie cooks?) and the second time I used instant espresso instead of regular (because my regular instant coffee sucked). I think that about one rounded tablespoon of instant espresso is about the same strength.
And yes, I’m here because of Saiki K.
Either way, it’s delicious and perfect and I’m going to start running out of instant coffee real fast
Hi Joey! Thank you very much for trying Nami’s recipe and sharing your experience with us!
We are so happy to hear you enjoyed Homemade coffee jelly!
The texture and qq-ness of this coffee jelly’s recipe is simply perfecto!
Hi Tan, We are glad to hear you enjoyed this Coffee Jelly! Thank you for trying this recipe!
super excited to try coffee jelly! i’ve never made jelly or jello before and am realizing i don’t know how much it needs to be cooled before refrigerating. should it be cold, or lukewarm? thanks for the recipe!
Hi Shay,
When the jelly becomes less warm or closer to room temperature, you can place it in the refrigerator. 😉
We hope this helps!
Hi Nami, I attempted this recipe and followed every step, but for some reason my jelly refuses to set/solidify. What could have wrong?
Hi Michelle! Thanks so much for trying this recipe! It’s possible that kanten did not dissolve well… that’s what I read before for trouble shooting. The ratio should work well. Anything you made changes to the recipe?