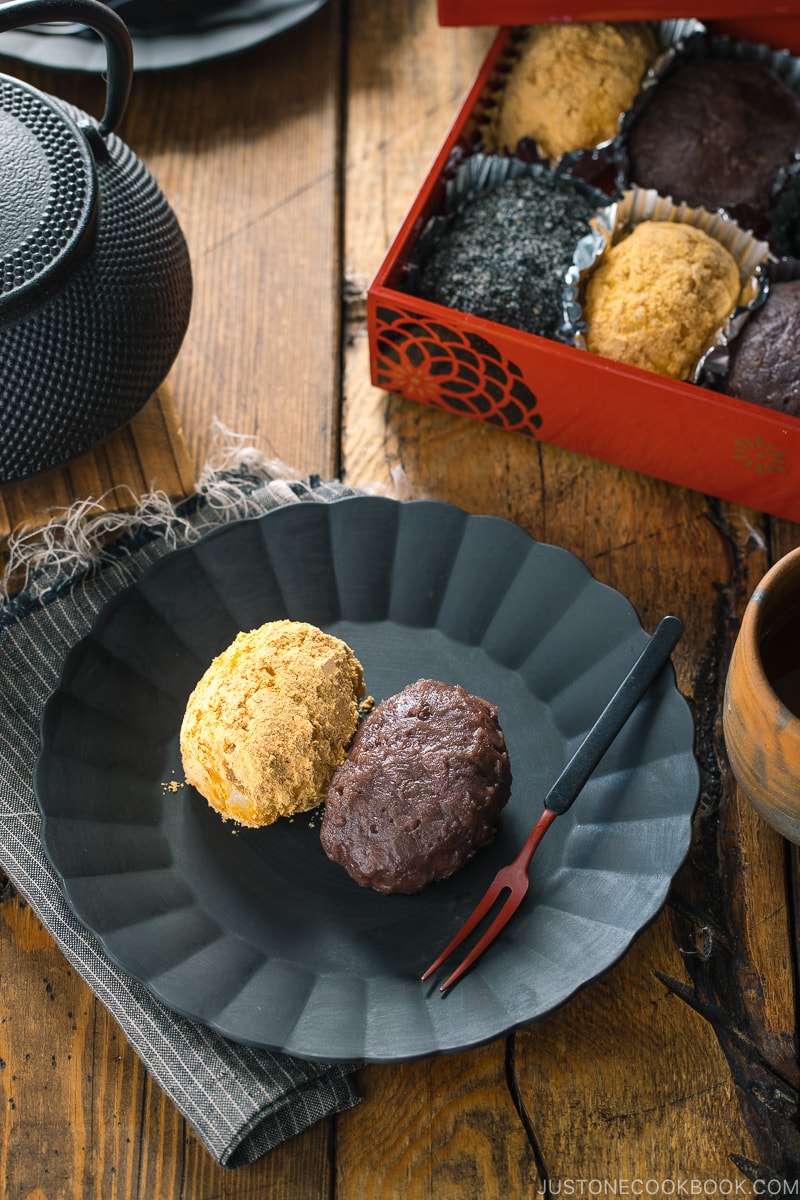
Made with glutinous rice and red bean paste, these Japanese Sweet Rice Balls are offered to one’s ancestors and eaten during the spring and autumn equinoxes in Japan. They are called Botamochi in spring and Ohagi in autumn.
Growing up in Japan, I remember we had a lot of cultural, seasonal, and sometimes religious celebrations that often come with specific foods.
Ohagi or Botamochi is one of those special foods we enjoyed during spring and autumn equinoxes every year. They are sweet rice balls filled or coated with red bean paste. Today, I’ll share little cultural tidbits of this traditional sweet along with the recipe!
What is Ohagi (Botamochi)?
These sweet rice balls are usually made with glutinous rice, sometimes rice, and red bean paste.
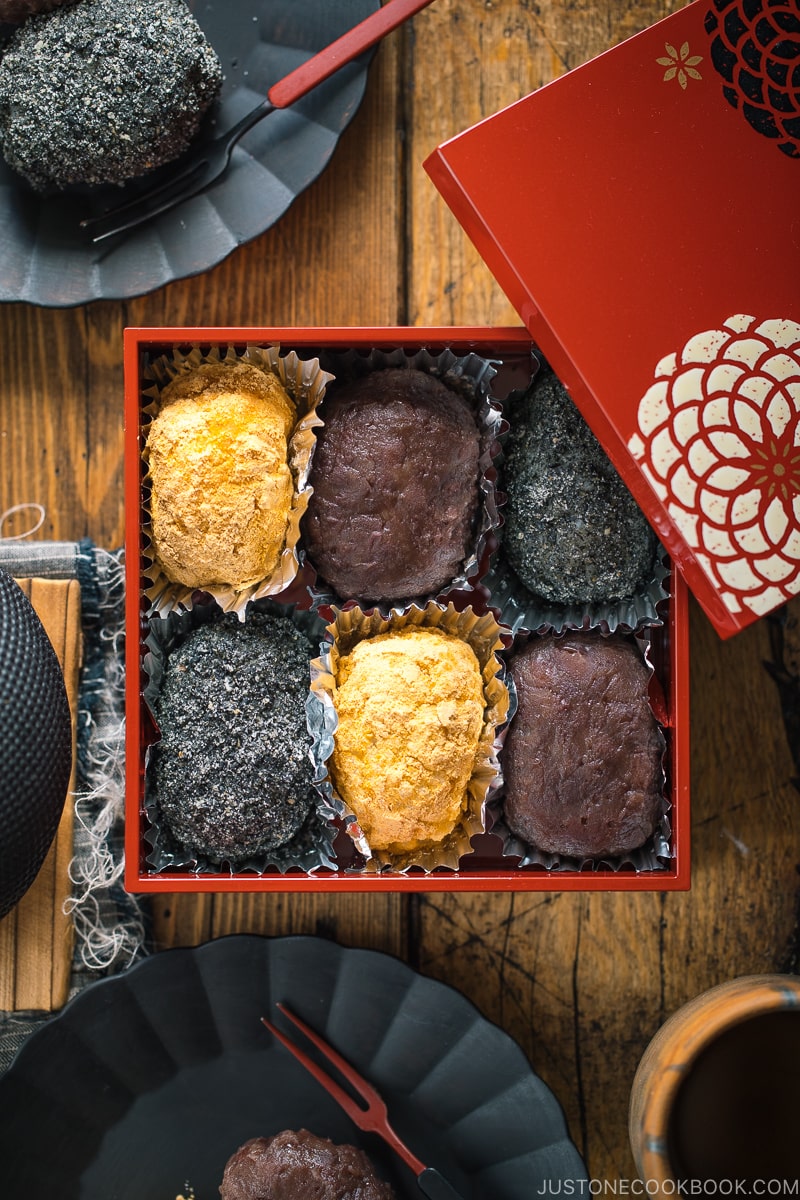
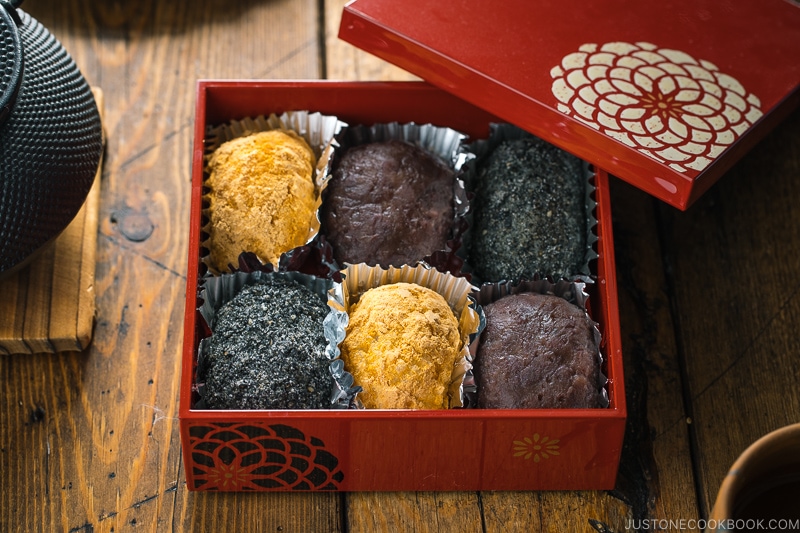
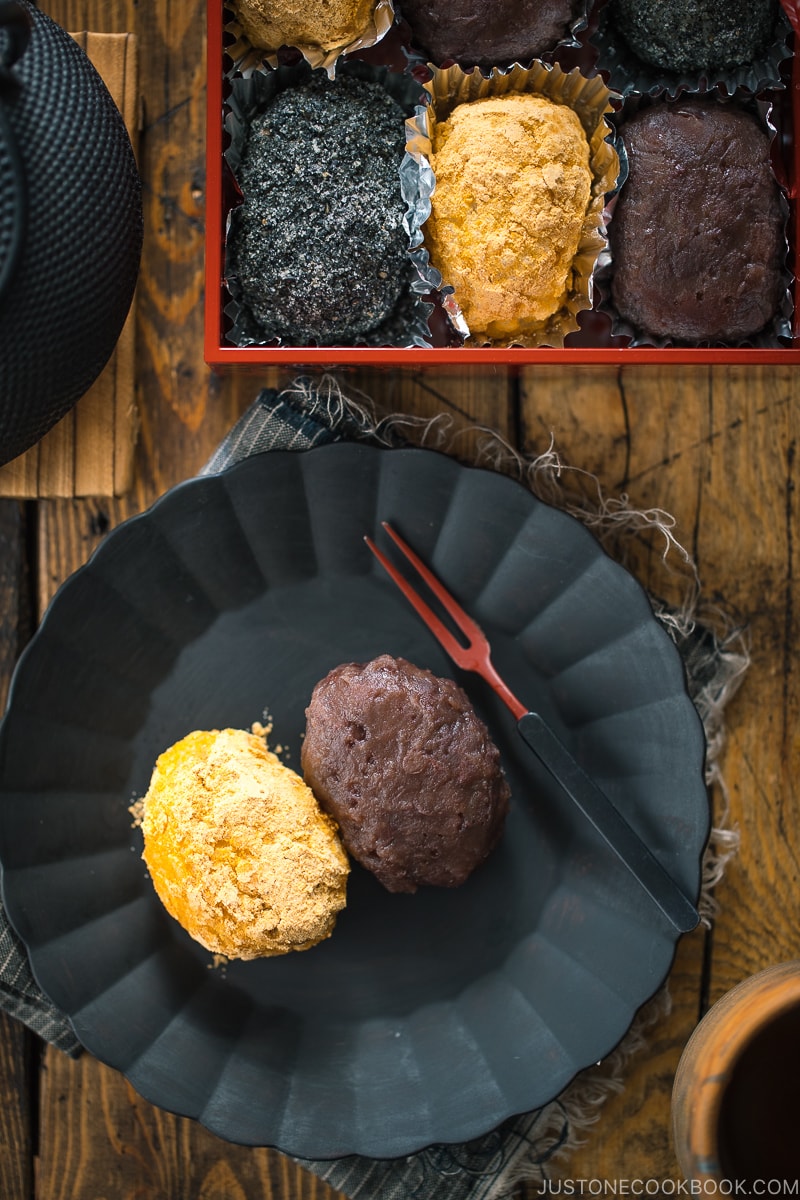
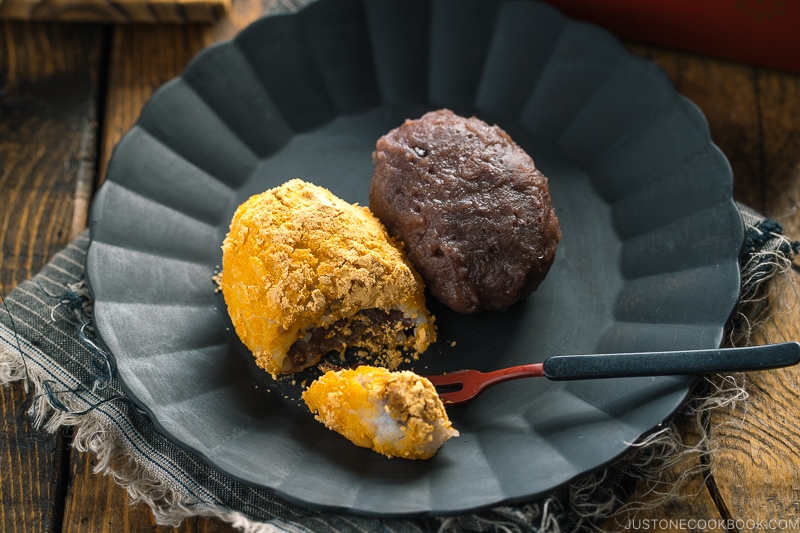
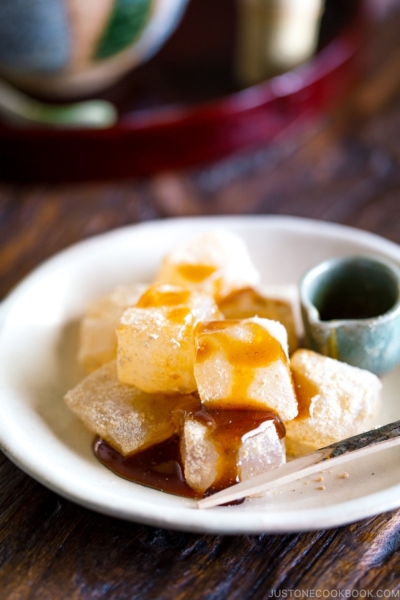
The rice balls are formed into the shape of a small cylinder and covered with red bean paste on the outside. There are also variations where the rice balls are coated with sweetened soybean flour or sweetened ground black sesame and stuffed with red bean paste on the inside.
They are commonly eaten during Ohigan (お彼岸), a Buddhist holiday during both spring and autumn equinoxes.
Botamochi vs. Ohagi
You’ve probably noticed that I keep calling these sweet rice balls with two names – Ohagi and Botamochi. That’s because we call these rice balls differently in spring and autumn.
In spring, they are called Botamochi (ぼたもち), named after the spring flower, botan (牡丹 peony).
In autumn, they are called Ohagi (おはぎ), named after the autumn flower, hagi (萩 bush clover).
Regionally, people may grow up calling it just by one name, but they are essentially the name.
How to Make Ohagi (Botamochi)
Unlike some mochi recipes on my blog that require hard-to-find rice flour, this Ohagi (Botamochi) recipe is rather simple. All you need is Japanese glutinous rice (please, use a short-grain variety), Japanese short-grain rice, and red bean paste. Here are the 3 steps to make these rice balls:
- Cook glutinous rice and rice – Cook glutinous rice and rice together in the rice cooker (or whatever you use to cook rice).
- Pound the rice – Partially pound the cooked rice.
- Shape and fill the rice balls – Shape the pounded rice into balls and coat them with red bean paste. For the other two variations, fill the rice balls with sweet red bean paste and coat them with either sweetened soybean flour (kinako) or sweetened ground black sesame seeds.
5 Tips to Make Ohagi (Botamochi)
1. Combine Glutinous Rice and Rice
Ohagi (Botacmochi) are often made with only glutinous rice (sweet rice). However, I do not recommend using just glutinous rice as these sweet rice balls get cold or less “fresh”, the texture will become hard and not so chewy.
Mixing it with regular rice helps to keep the texture softer and chewier.
2. Pre-measure Anko (Red Bean Paste)
Once the cooked rice is pounded, it’s best to shape it while the rice is still warm. If you pre-measure the paste and roll it into balls ahead of time, you can just grab the paste and stuff in the rice balls quickly.
3. Partially Pound the Rice
One of the unique features of Ohagi (Botamochi) is the noticeable rice texture when you bite into it. Unlike other similar mochi sweets where fine rice flours are used, the rice is pounded partially, not mashed or kneaded all the way. This half-pounding technique is called “Hangoroshi“, literary a half kill (半殺し).
4. Use Plastic Wrap to Thinly Spread the Red Bean Paste
Plastic wrap helps tremendously when you need to spread a thin layer of red bean paste around the rice balls. I’ve tried using my bare hand instead of plastic wrap, but I think you need a lot of practices to make it look presentable.
5. Save and Reapply Black Sesame and Soybean Flour
Within 10-15 minutes after you coat the rice balls with black sesame seeds and soybean flour, you will notice the color of those Ohagi (Botamochi) get darker and spotty.
This happens because the moisture in the rice is released to the coating. Therefore, it’s best to keep some coating and reapply it right before serving.
How to Store and Enjoy Ohagi
As they are made of both glutinous rice and rice, Ohagi is not suitable to store in the refrigerator. The temperature will only turn the rice balls hard and lose the soft, chewy texture. Therefore, it’s best to keep them in a cool place and enjoy them as soon as possible (half-day to 12 hours).
March might be cool, but September can still be warm and the food may go bad faster. In that case, I recommend storing them in the refrigerator but cover the container with a thick towel to protect from cold air. They should be kept cool, ideally.
You can also freeze Ohagi for up to 1 month. When you’re ready to eat, defrost overnight in the refrigerator.
To bring back the ideal texture, Ohagi should be reheated gently in the microwave to warm or room temperature for you to enjoy.
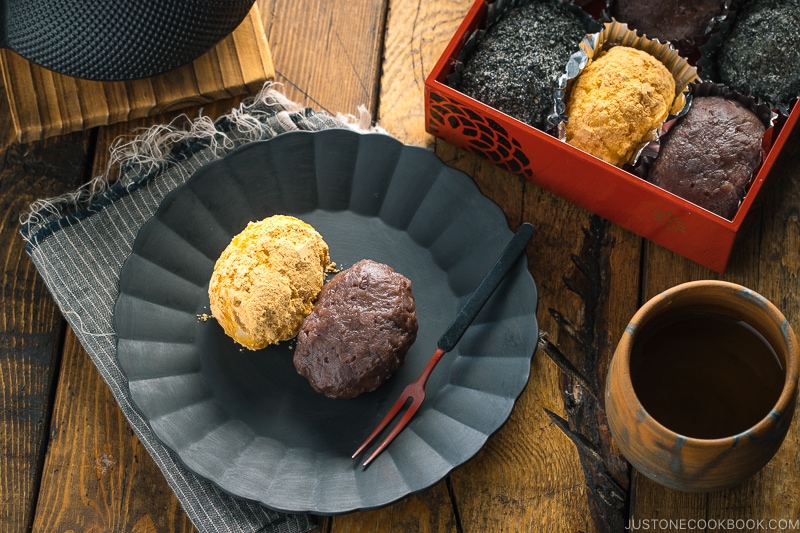
Ohagi (Botamochi) are not so sweet and they go well with green tea. Even though I don’t observe the religious ceremony, I still make these for my family twice a year around the spring and autumn equinox. In my house, food culture is pretty important and I hope my children will remember my sweet Japanese rice balls twice a year.
Other Seasonal Japanese Sweets
Wish to learn more about Japanese cooking? Sign up for our free newsletter to receive cooking tips & recipe updates! And stay in touch with me on Facebook, Pinterest, YouTube, and Instagram.
Ohagi (Botamochi)
Ingredients
For the Glutinous Rice
- 1½ cups sweet rice/glutinous rice (mochigome) (2 rice cooker cups, 360 ml)
- ¾ cup uncooked Japanese short-grain white rice (1 rice cooker cup, 180 ml)
- 2½ cups water (600 ml)
For the Saltwater
For the Black Sesame Coating
- 6 Tbsp toasted black sesame seeds
- 2 Tbsp sugar
For the Soybean Flour Coating
- 6 Tbsp kinako (roasted soybean flour)
- 2 Tbsp sugar
For the Red Bean Paste Filling and Coating
- 1.3 lb sweet red bean paste (anko) (I use my Homemade Anko recipe)
Instructions
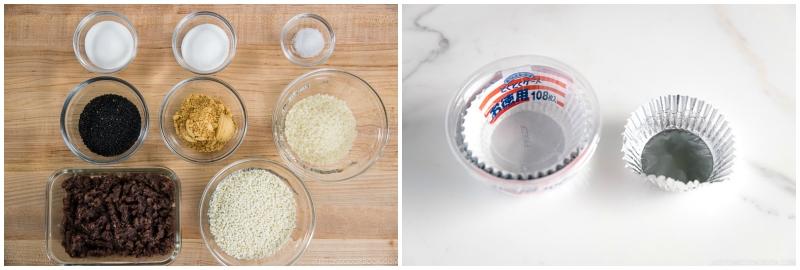
- Gather all the ingredients. For easy transfer, I use aluminum cup liners to hold the Ohagi (Botamochi). You can get them in the bento section of a Japanese grocery store.
To Prepare the Glutinous Rice
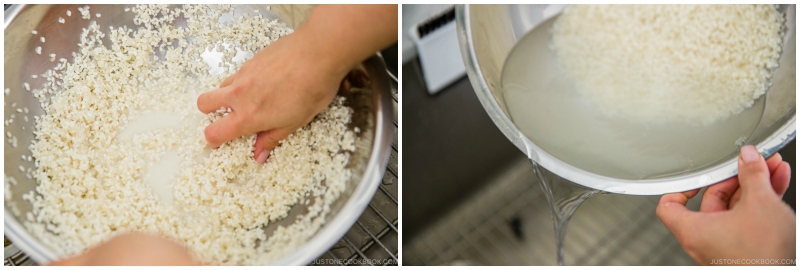
- Combine 1½ cups sweet rice/glutinous rice (mochigome) and ¾ cup uncooked Japanese short-grain white rice together in a large bowl. Add water to quickly rinse, then immediately pour off the water.

- Use your fingers to gently wash the rice in a circular motion for 10–15 seconds. Add water to rinse and discard the water. Repeat this process 1–2 times. When the water is almost clear, drain the rice well in a fine-mesh sieve.
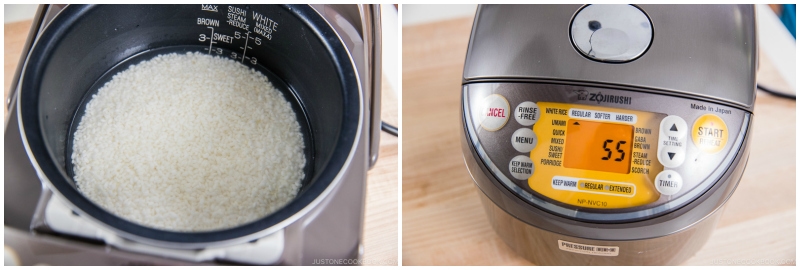
- Transfer the drained rice to a rice cooker. Add 2½ cups water.
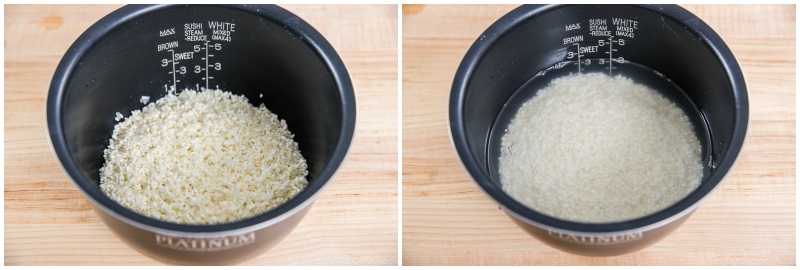
- Let the rice soak for 20 minutes. Then, press Start to cook on regular rice cooking mode.
To Prepare the Coatings and Filling
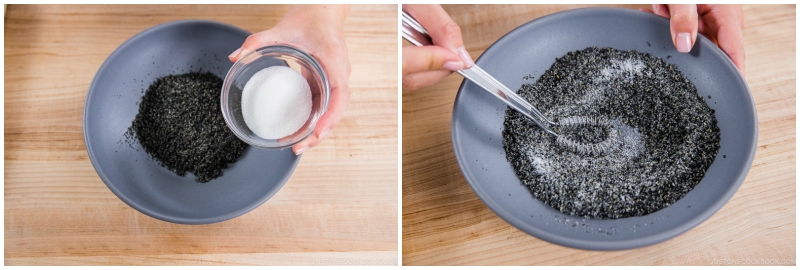
- While the rice is cooking, prepare the coatings and filling. First, add 6 Tbsp toasted black sesame seeds to a Japanese mortar and grind with a pestle.
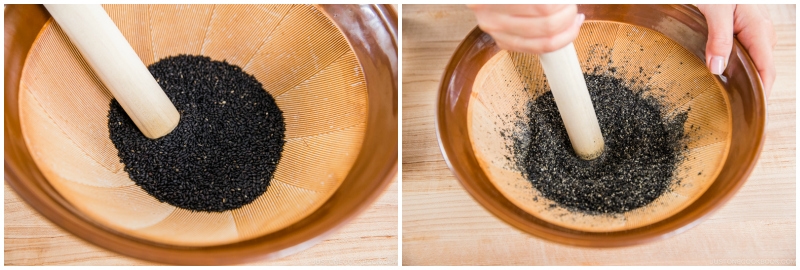
- Transfer to a medium bowl and add 2 Tbsp sugar. Mix well together.
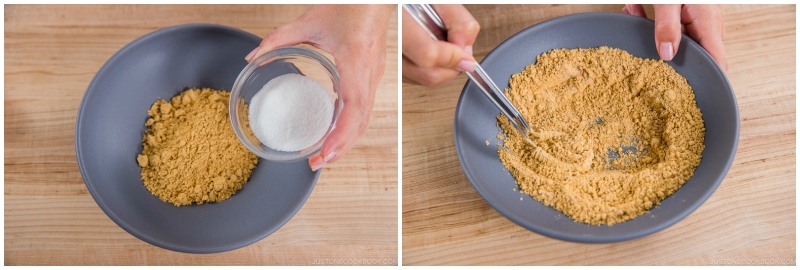
- In another medium bowl, combine 6 Tbsp kinako (roasted soybean flour) and 2 Tbsp sugar and mix well together.
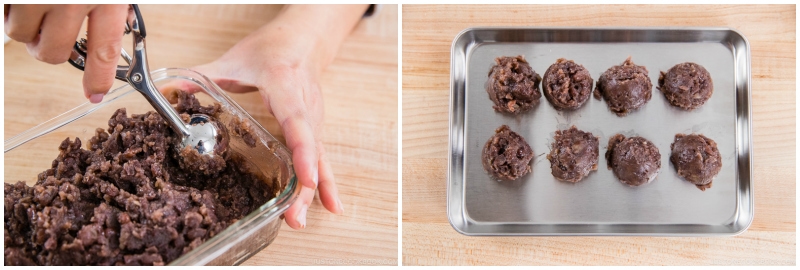
- Using a small cookie scoop, make red bean paste balls for the filling with 1.3 lb sweet red bean paste (anko). Each ball should be 2 teaspoons (0.7 oz or 20 g) of red bean paste. I made 8 balls of filling and set aside the rest to make anko-coated sweet rice balls (see the section below).
To Pound the Cooked Rice
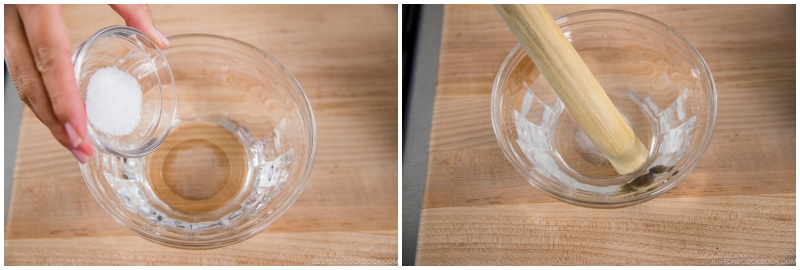
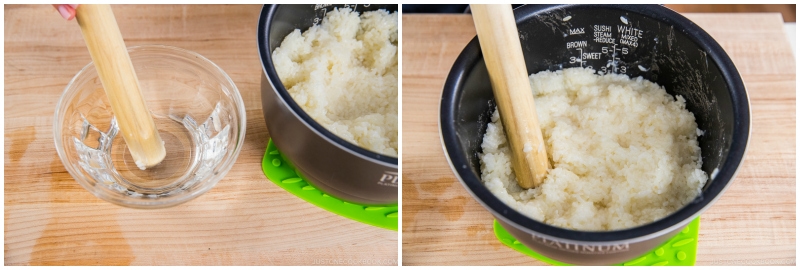
- When the rice is almost finished cooking, make saltwater by combining 1 tsp Diamond Crystal kosher salt with 1 cup water. Mix well together. This is for soaking the wooden rolling pin or pestle before pounding the glutinous rice.
- Once the rice is cooked, remove the rice cooker bowl from the cooker. While it’s hot, start pounding it with the wooden pestle or rolling pin.
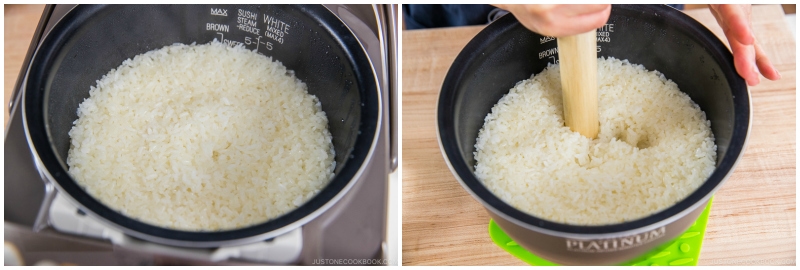
- The wooden rolling pin gets sticky from the glutinous rice. Soak it every few poundings. Stop pounding when the glutinous rice is half mashed/pounded. This is up to your liking. The rice should be mostly mashed but you can still see some rice grains.
To Make with Anko Filling
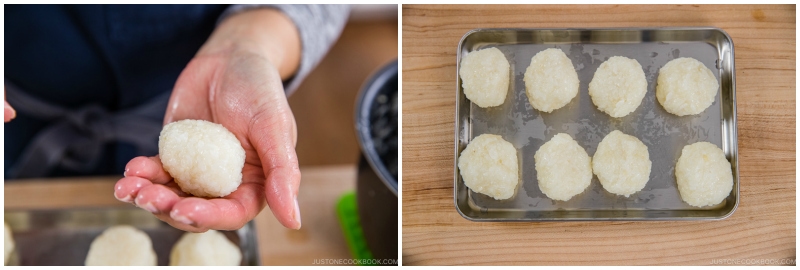
- To make anko-filled sweet rice balls, moisten your hands with the saltwater and grab a small amount of pounded glutinous rice (1.4 oz or 40 g). Form it to make a round shape.
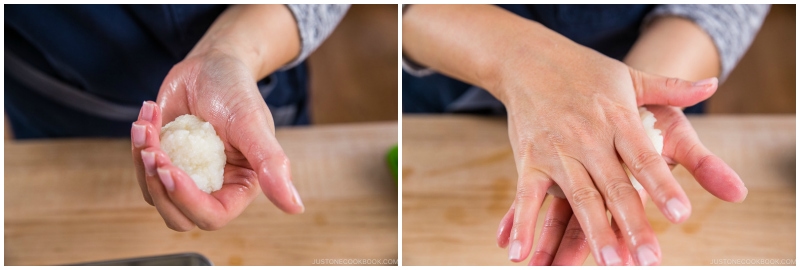
- Once it’s about 2½ inches in diameter, put one ball of anko in the middle.
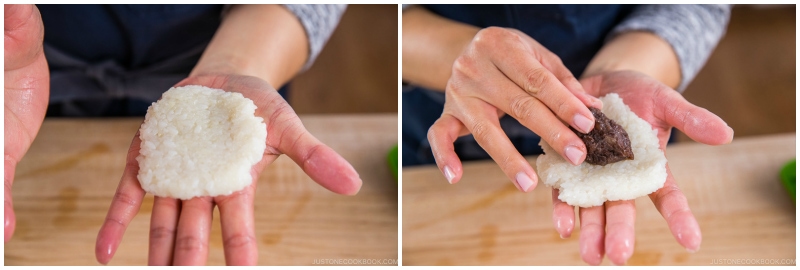
- Carefully gather up the pounded glutinous rice around the anko to enclose the filling.
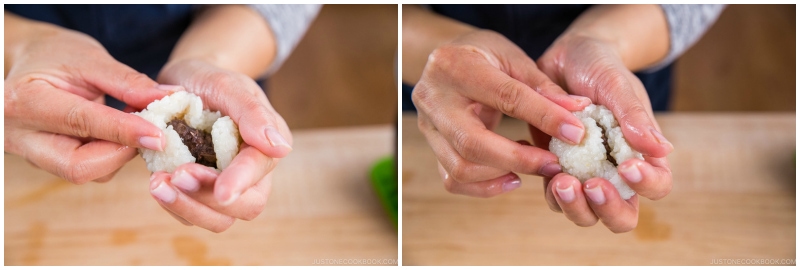
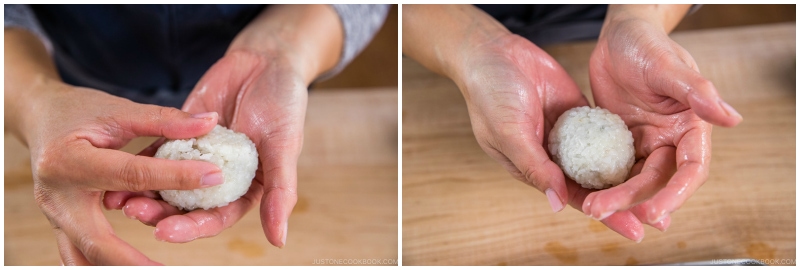
- Pinch the seam and form it into a small oval-shaped ball.
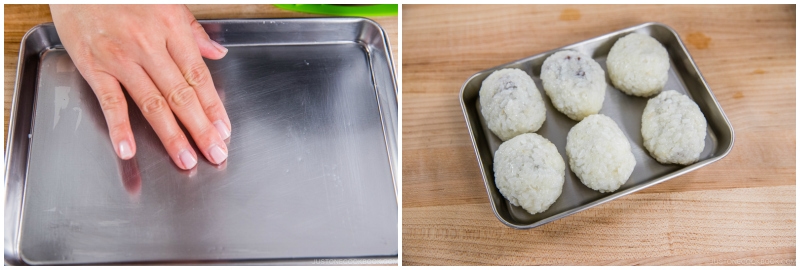
- Moisten the plate or tray with saltwater and place the oval-shaped rice balls on the tray. Repeat to make the rest of the anko-filled balls. If you will also make anko-coated sweet rice balls (see the section below), divide and set aside some of the glutinous rice.
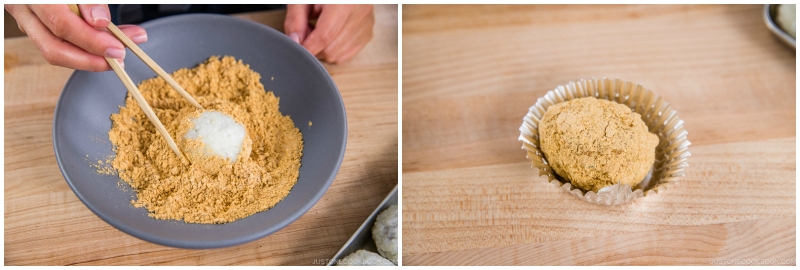
- To coat with soybean flour (kinako), put the rice ball (with anko filling) in the sweet soybean flour mix. Rotate a few times to coat well with the mixture and transfer to an aluminum foil liner.
- To coat with black sesame, put the rice ball (with anko filling) in the sweet sesame mix. Rotate a few times to coat well with the mixture and transfer to an aluminum liner.
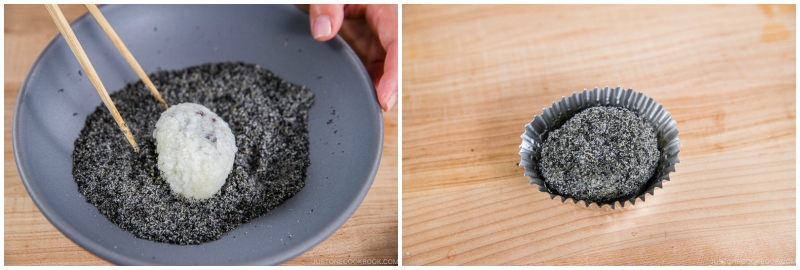
To Make with Anko Coating
- Make small, unfilled, oval-shaped balls with the pounded glutinous rice (1.4 oz or 40 g each). Here, I made 8 sweet rice balls.
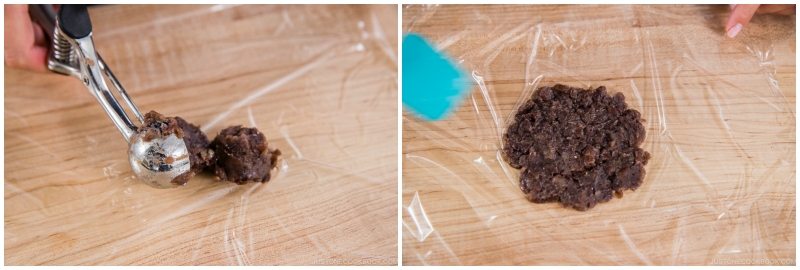
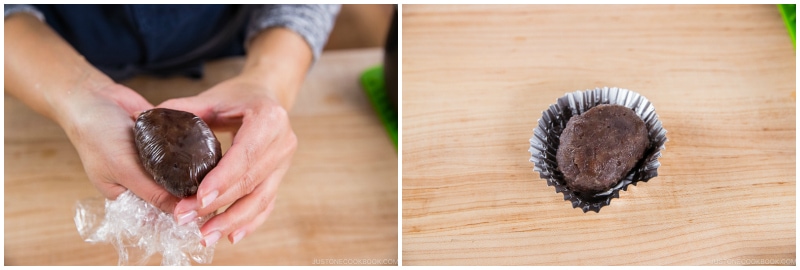
- Using a small cookie scoop, spread 2 scoops of anko (a total of 4 teaspoons, 1.4 oz, or 40 g) into a round, flat shape on a piece of plastic wrap.
- Put the rice ball on top and evenly coat the anko around the rice ball.
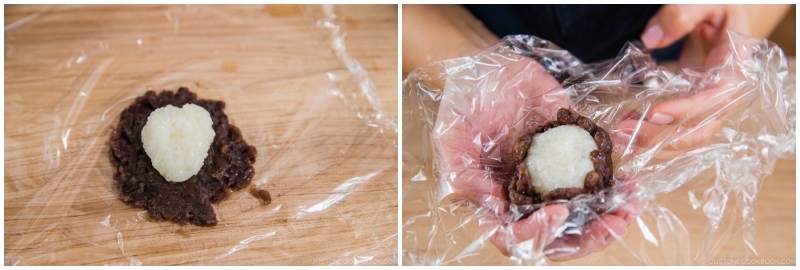
- Pull the plastic wrap and spread the anko evenly. Unwrap the Ohagi and transfer it to an aluminum liner.
To Serve
- When you’re ready to serve Ohagi (Botamochi), reapply the black sesame and soybean flour mixture. Serve them with green tea.
To Store
- It’s best to keep them in a cool place and enjoy them as soon as possible (within a half day or 12 hours). If it’s too warm to keep at room temperature, I recommend storing them in the refrigerator, but cover the container with a thick towel to protect the from cold air. Ideally, they should be kept cool. You can also freeze Ohagi for up to 1 month. When you’re ready to eat, defrost overnight in the refrigerator. To bring them back an ideal texture, Ohagi should be reheated gently in the microwave until warm or at room temperature for you to enjoy.
Nutrition
Editor’s Note: This post was originally published on March 16, 2020. It was republished on March 11, 2024.


My mom showed me how to coat the rice ball with the anko by using a square piece of cotton cloth. Wet the cloth & wring it so it’s damp. Spread the anko like you do on the plastic wrap. Works well.
Hi Helene! Thank you for reading Nami’s post and sharing the tip with us! 😊
Hi, I’m thinking of making this because I bought a packet of mochigome on a whim but now I don’t know what to do with it but it’s too many for me to finish in one go. You mentioned that these can be frozen up to a month. Do you freeze them before or after coating it with the kinako or black sesame or red bean paste?
Hi Jessica! Thank you very much for trying Nami’s recipe!
If you know you will freeze the Ohagi, we recommend freezing them without Kinako and black sesame, and add them when you defrost them.
Sweet red bean paste is ok to freeze.
We hope this is helpful! Happy Cooking!
Wow! I’m actually teaching my Mom a few things about our heritage through your site!
Thanks for sharing a different kind of mochi! I only knew about the ones that are white. Those, you bake into a giant bubble and are crispy, and chewy. There are the ones we eat without a coating, but have the red bean paste inside. I’ll have to search your site and see what other kinds there are! I’m curious 🧐 too, what you use as a topping or sauce for the baked puffy ones. I grew up eating it with soy sauce and sugar sauce. Many non Japanese eat it with maple syrup or jam.
You’ve definitely peaked my curiosity!
Hi Liv, We couldn’t be happier to hear how much joy and excitement Nami’s recipe has brought to you!
The ones you baked up to a giant bubble are called “Kirimochi” or “Mochi,” and Nami has a post where she explains how to enjoy them. https://www.justonecookbook.com/how-to-enjoy-japanese-mochi/
They are many different types of mochi-like dish. https://www.justonecookbook.com/#search/q=mochi
We hope you enjoy exploring them! Happy Cooking!
Is there a version of this that is baked or fried?
(I’m thinking, a crisp, sweet outside might make it’s “shelf life” a little longer. -Different recipe I think..)
Hi Matthew, Hum… Have you checked out the Dango recipe?
https://www.justonecookbook.com/dango-recipe/
or maybe it is the rice cracker?
https://www.justonecookbook.com/rice-cracker-recipe/
We hope this helps.
Dear Nami,
Coming to Japan at the start of the coronavirus pandemic was such a powerful experience. I am from America, and had never been overseas before. I spent two months in Japan making friends, memories, climbing peaks and witnessing the sudden silence of lockdowns. Despite the circumstances, I ate everything new I could find in Japan, from ordering curry at chain diners to stumbling into a small house-turned-restaurant for some Okonomiyaki.
My last month was when the full lockdown was in effect. There was nowhere to go. Then, I found your amazing website. I had a tiny studio with just one pot and a stove, but I spent every day recreating delicious meals that I had experienced, from curry to okonomiyaki to oden and my favorite: Ohagi! Thank you for this amazing site that allowed me to feel close to the culture of Japan while it was just out of reach.
色々ありがとうございました。
こんにちは、Austin! So happy to hear from you, and welcome to JOC and (Japan)! What a strange time you had to move to a new country! It’s hard to be alone during this the lockdown. But I’m glad you got to have the chance to learn some of the Japanese home cooking during this time. You have all the ingredients that I use. 🙂 I’m not sure how long you’ll be living there, but I hope you get to experience all the seasonal and regional foods Japan offers. I’ll be here if you need any help! Thank you for trying my Ohagi recipe! 🙂
Thanks for this recipe. I made today and it worked out really well. Actually very easy.
Hi Kate! I’m so happy to hear you enjoyed this recipe! Thanks for your kind words and feedback! 🙂
My mother used to serve them on camellia leaves. Just a thought, if you don’t have aluminum liners.
Hi Monique! Your mother’s idea is genius!!!!! I googled (in Japanese) to see if there is a leaf-wrapped ohagi or botamochi, and I could only find that there is a botamochi wrapped in Persimmon leaves in Nara (like their famous Kakinoha Sushi). Thank you for sharing your mom’s tip with us!
I love ohagi! It’s hard to get them in Singapore, and I will always look for them when I’m in Japan. Will try your recipe!
Hi Jace! Yeah, I think it’s impossible to find this outside of Japan… As the rice gets harder, the shelflife is not too long. And it’s not a well-known sweet, so not many people would buy it even a store carries it. 🙁
But we can easily make it at home. Hope you enjoy the recipe!
I love ohagi. I never knew the other name. My mom is Japanese. I was born there in Yokoskuka. We lived most of my life in the states. I try to keep my heritage alive in my children and myself. Thank you for your wonderful recipes.
Hi Shirley! When I was researching what’s best recipe title to use, The word “Ohagi” has way more keyword searches than “Botamochi”. So I decided to use it as the primary recipe name. So it’s not just you who are not familiar with the name “Botamochi” 🙂
You’re wonderful to keep the tradition in your household! I wish to do the same, especially we don’t hear about this living outside of Japan…even it’s the season to eat Botamochi. 🙂
Thank you for the ohagi and for the pickled veggies recipes. Both are what I grew up eating and I miss eating them. I looked for takuwan recipes and tried a few, but never what I am used to. I’ll try your recipe. I love the Japanese version.
Hi Florence! You’re welcome! I’m so excited to know that you’re familiar with botamochi and pickles and you grew up eating! I hope you enjoy the recipe!