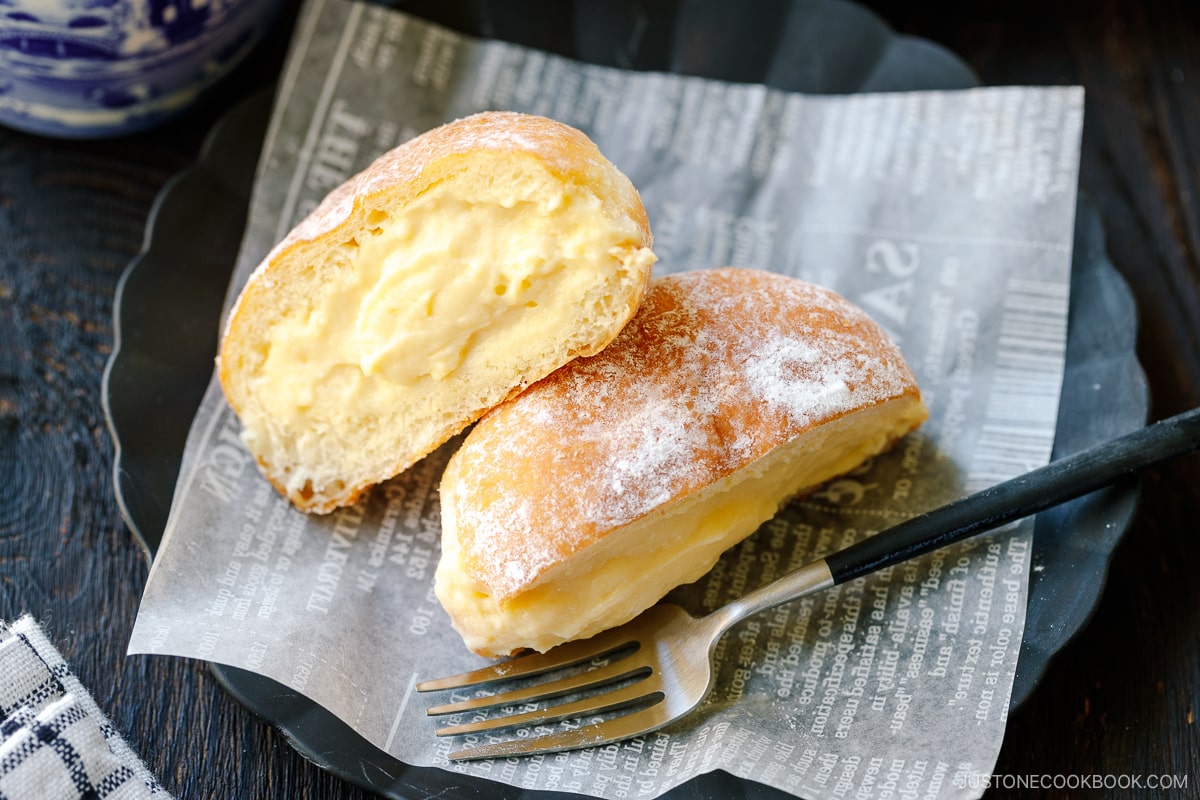
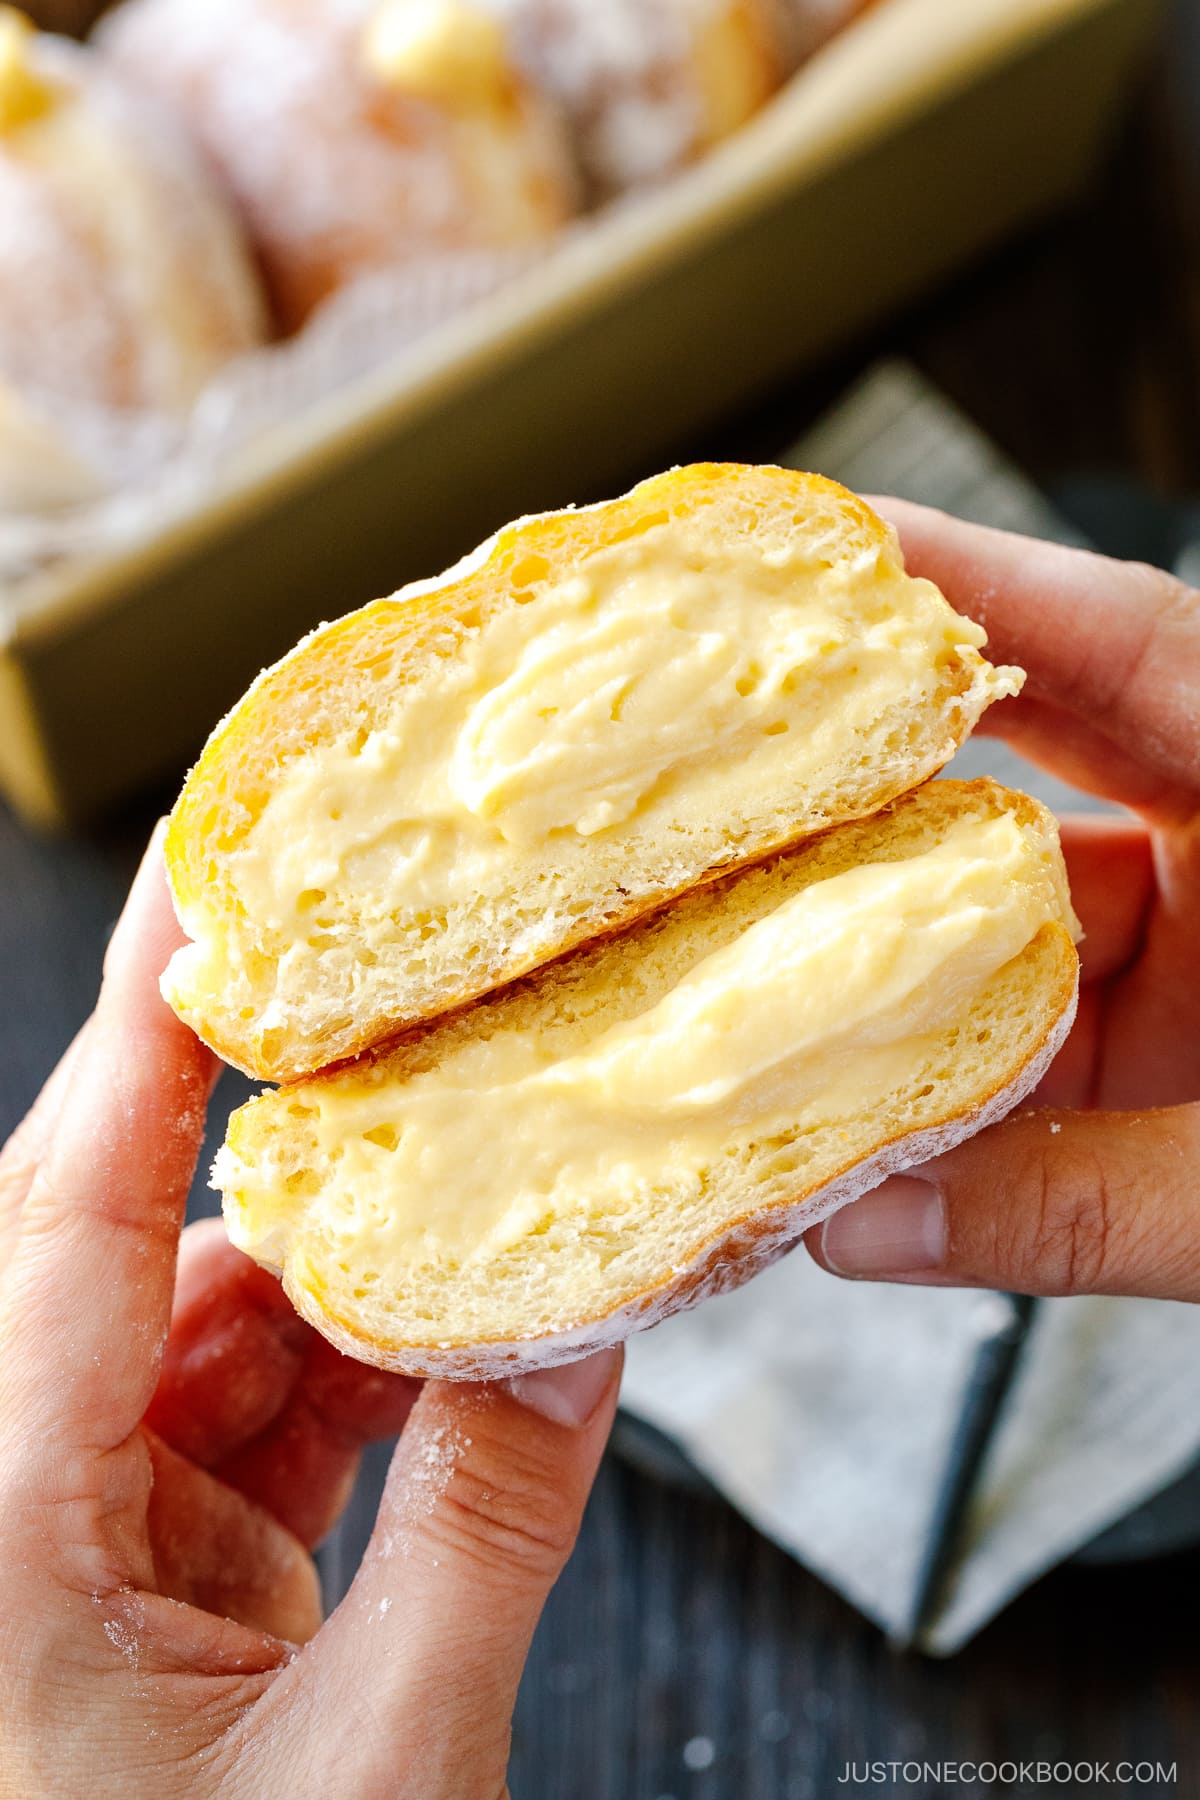
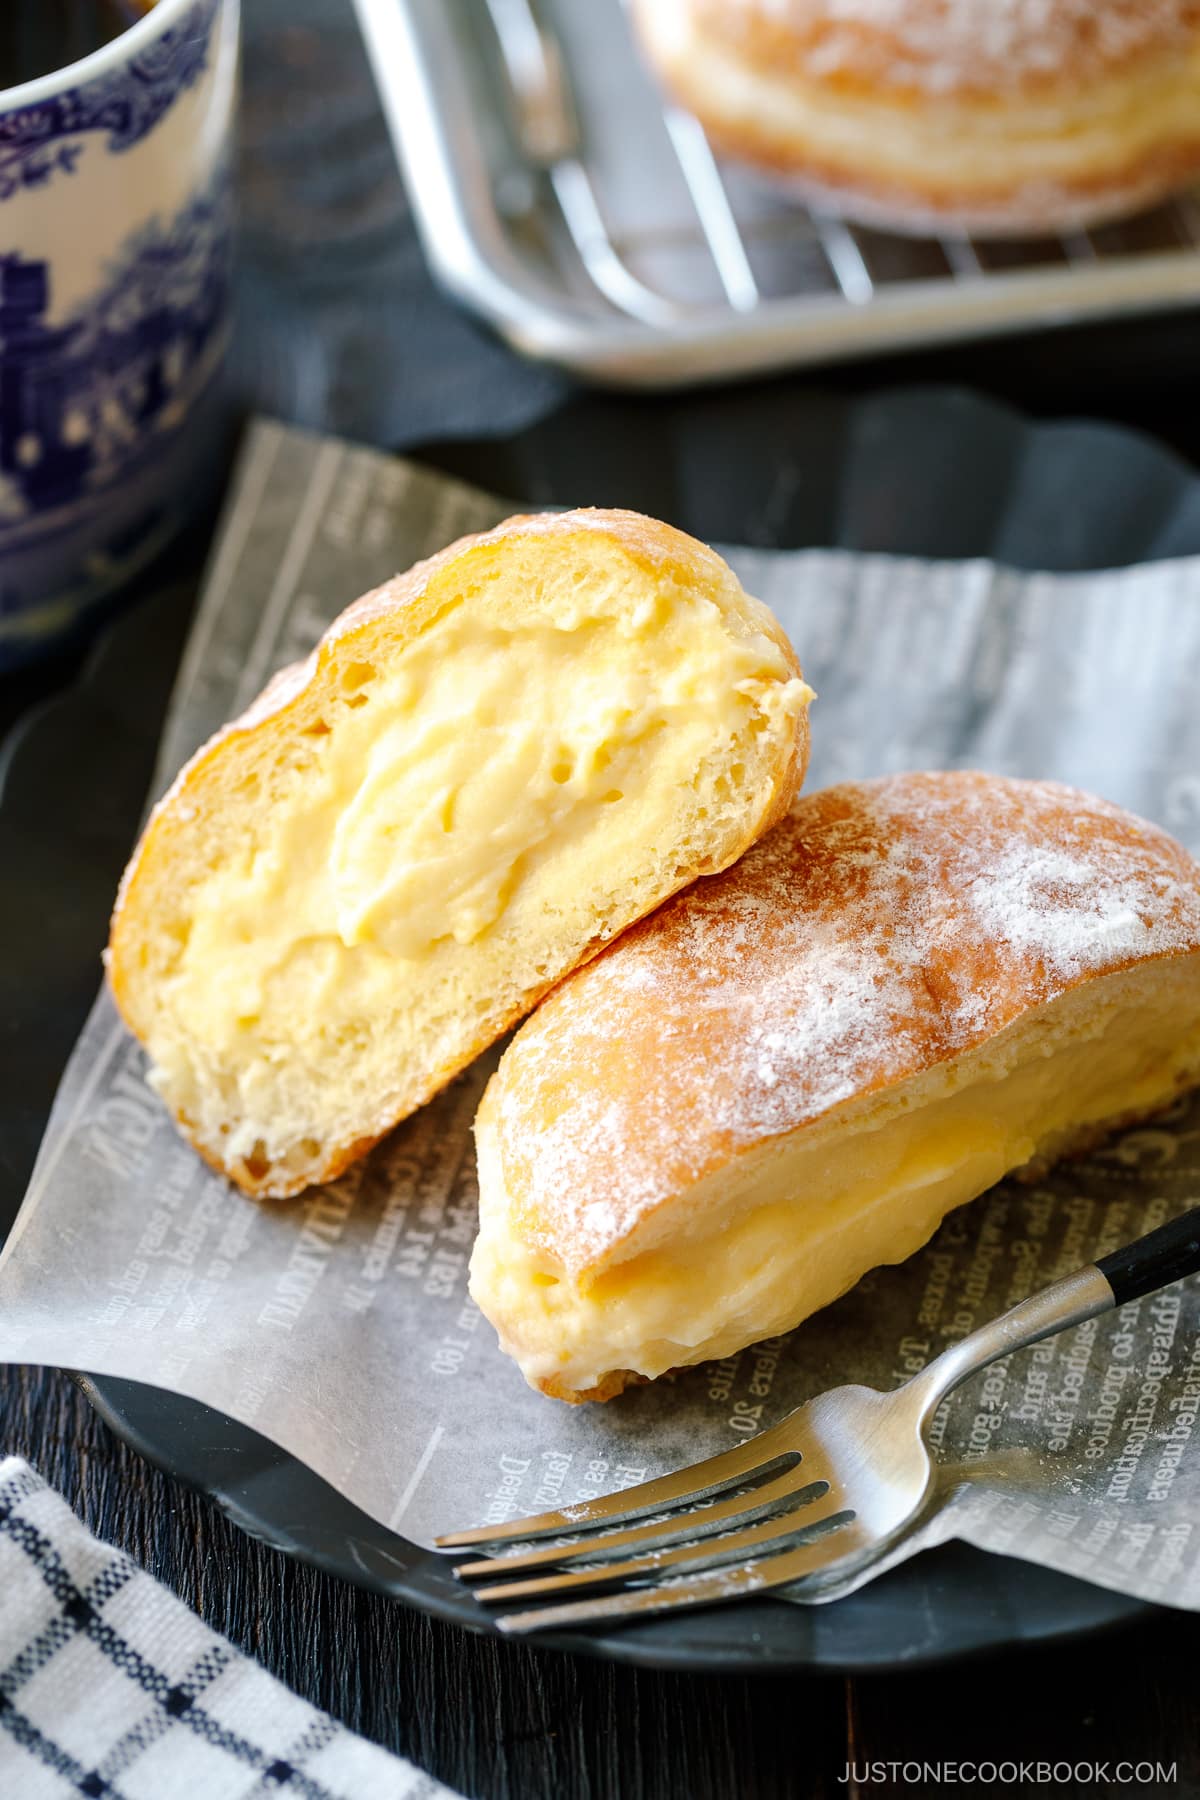
Donut lovers, rejoice! Meet the puffiest, pillowy-soft, and heavenly-tasting deep-fried treat: Nama Donuts. Filled with fresh custard cream, these yeast donuts are massively popular in Japan. Satisfy your craving today by making them at home.

Japan has always been known for its creative and delicious take on traditional confections, including donuts. One of the wildly popular Japanese-style donuts is the Pon de Ring Donuts (yes, I have a homemade recipe for that!) introduced by Mister Donuts, the beloved donut chain in the country.
The creativity doesn’t stop there. In 2022, we witnessed the emergence of another new style donuts named Nama Donuts (生ドーナツ), making headlines in the food scene.
Nama Donuts are phenomenal. They boast an unprecedented melt-in-your-mouth consistency and a pillowy-soft, cloud-like texture. My heart stops as I daydream about them.
However, I can’t satisfy my donut cravings unless I hop on a flight back to Japan. Fortunately, I had the opportunity to learn how to make these donuts from my bread instructor, Mariko. Being sweet and generous, she also agreed to let me share her Nama Donuts recipe on Just One Cookbook. So, behold, donut fans—you’re going to fall in love with these little clouds of heaven!
Table of Contents
What are Nama Donuts?
Nama Donuts (生ドーナツ) gained popularity in Japan when I’m donut ? opened its first store in Nakameguro, Tokyo, in March 2022. Run by Amam Dacotan, a popular bakery from Fukuoka, the donut shop offers nama, or fresh, donuts known for their fluffy, pillowy-soft, melt-in-the-mouth texture.
Their fried brioche-style donuts are softer than typical donuts, and infused with kabocha squash for a puffier texture and a rich, tender crumb.
You might notice that they look similar to light and fluffy Hawaiian donuts, Malasadas (actually, brought to Hawaii by Portuguese immigrants), which are rolled in granulated sugar and filled with tropical fruit-flavored custard or cream. However, I couldn’t find any information online regarding whether or not Nama Donuts are influenced by Malasadas. They certainly bear a resemblance to each other.
I’m donut ? has only five locations in the whole country: Nakameguro, Shibuya, Harajuku, Omotesando (all in Tokyo), and Fukuoka (as of December 2023). There are long queues outside each store, but if you’re visiting Japan, it might be worthwhile to try the original Nama Donuts.
But don’t worry, for those of us outside of Japan, we can still make our version of Nama Donuts at home! My bread instructor, Mariko, who taught us how to make Shokupan (Japanese Milk bread), is back! She taught me how to make her version of Nama Donuts. She’s been to I’m donut ?, and this recipe is close to their nama donuts!
Why You’ll Love This Recipe
- SO AIRY, FLUFFY, SOFT…and OUT-OF-THIS-WORLD delicious! These are compelling reasons why you’ll want to make these donuts.
- Relatively easy to make. It’s true, even for those who don’t like working with yeast or deep-frying. I hope my recipe, with 120 step-by-step images and the video tutorial, will give you confidence! Don’t get overwhelmed by the instructions; they are there to ensure your success. This is your chance. 🙂
How to Make Nama Donuts
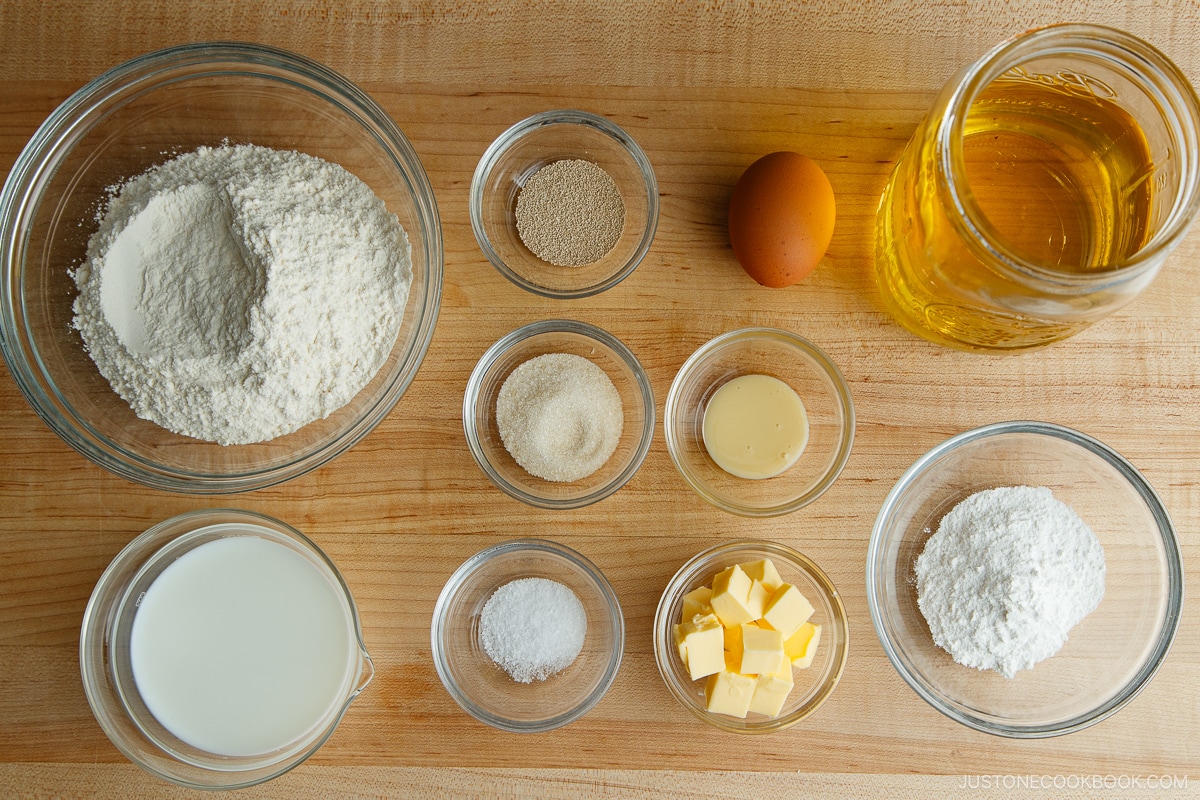
The Ingredients You’ll Need
- whole milk (104ºF, 40ºC) – In the summertime when the kitchen is warm, use room temp or cold milk.
- active dry yeast – I use this brand. DO NOT use old yeast that‘s more than 6 months old. Also, DO NOT use instant dry yeast for this recipe, unless it’s Saf instant yeast gold (remember, it’s gold packaging, not red one). This recipe has more sugar in the dough, and regular instant yeast is not as effective as active dry yeast or Saf instant yeast gold.
- egg
- sugar
- Diamond Crystal kosher salt
- sweetened condensed milk – The “original” ingredient used for I’m donut ?‘s dough is kabocha paste. Since not everyone can find kabocha overseas, my bread instructor uses sweetened condensed milk to replace kabocha.
- bread flour – I use King Arthur Bread Flour. Their bread flour has 12.7% protein — a whole point higher than other national brands.
- unsalted butter
- oil for deep frying – I use Safflower Oil. You will need at least 1 inch (2.5 cm) deep in the deep frying pot.
- confectioners’ sugar (powdered sugar) (for dusting; I’m donut ? uses powdered sugar instead of granulated sugar)
- Custard (pastry) cream: egg yolks, whole milk, sugar, pure vanilla extract (or vanilla beans), cake flour (you can make your own cake flour), unsalted butter
The Cooking Steps
- Combine the ingredients and knead well. Slam and roll the dough a few times until you get a smooth, taut skin. Then, transfer it to a bowl and cover. Let it rise in a warm environment until it’s tripled, about 1 hour. Halfway through, re-roll the dough.
- Meanwhile, make the custard (pastry) cream. See the details in the recipe card.
- Divide the dough into six pieces and roll into balls. Proof the dough balls for a second time until doubled, about 40-50 minutes. Meanwhile, preheat the oil.
- Fry the donuts at 340°F (170°F) for one minute each side.
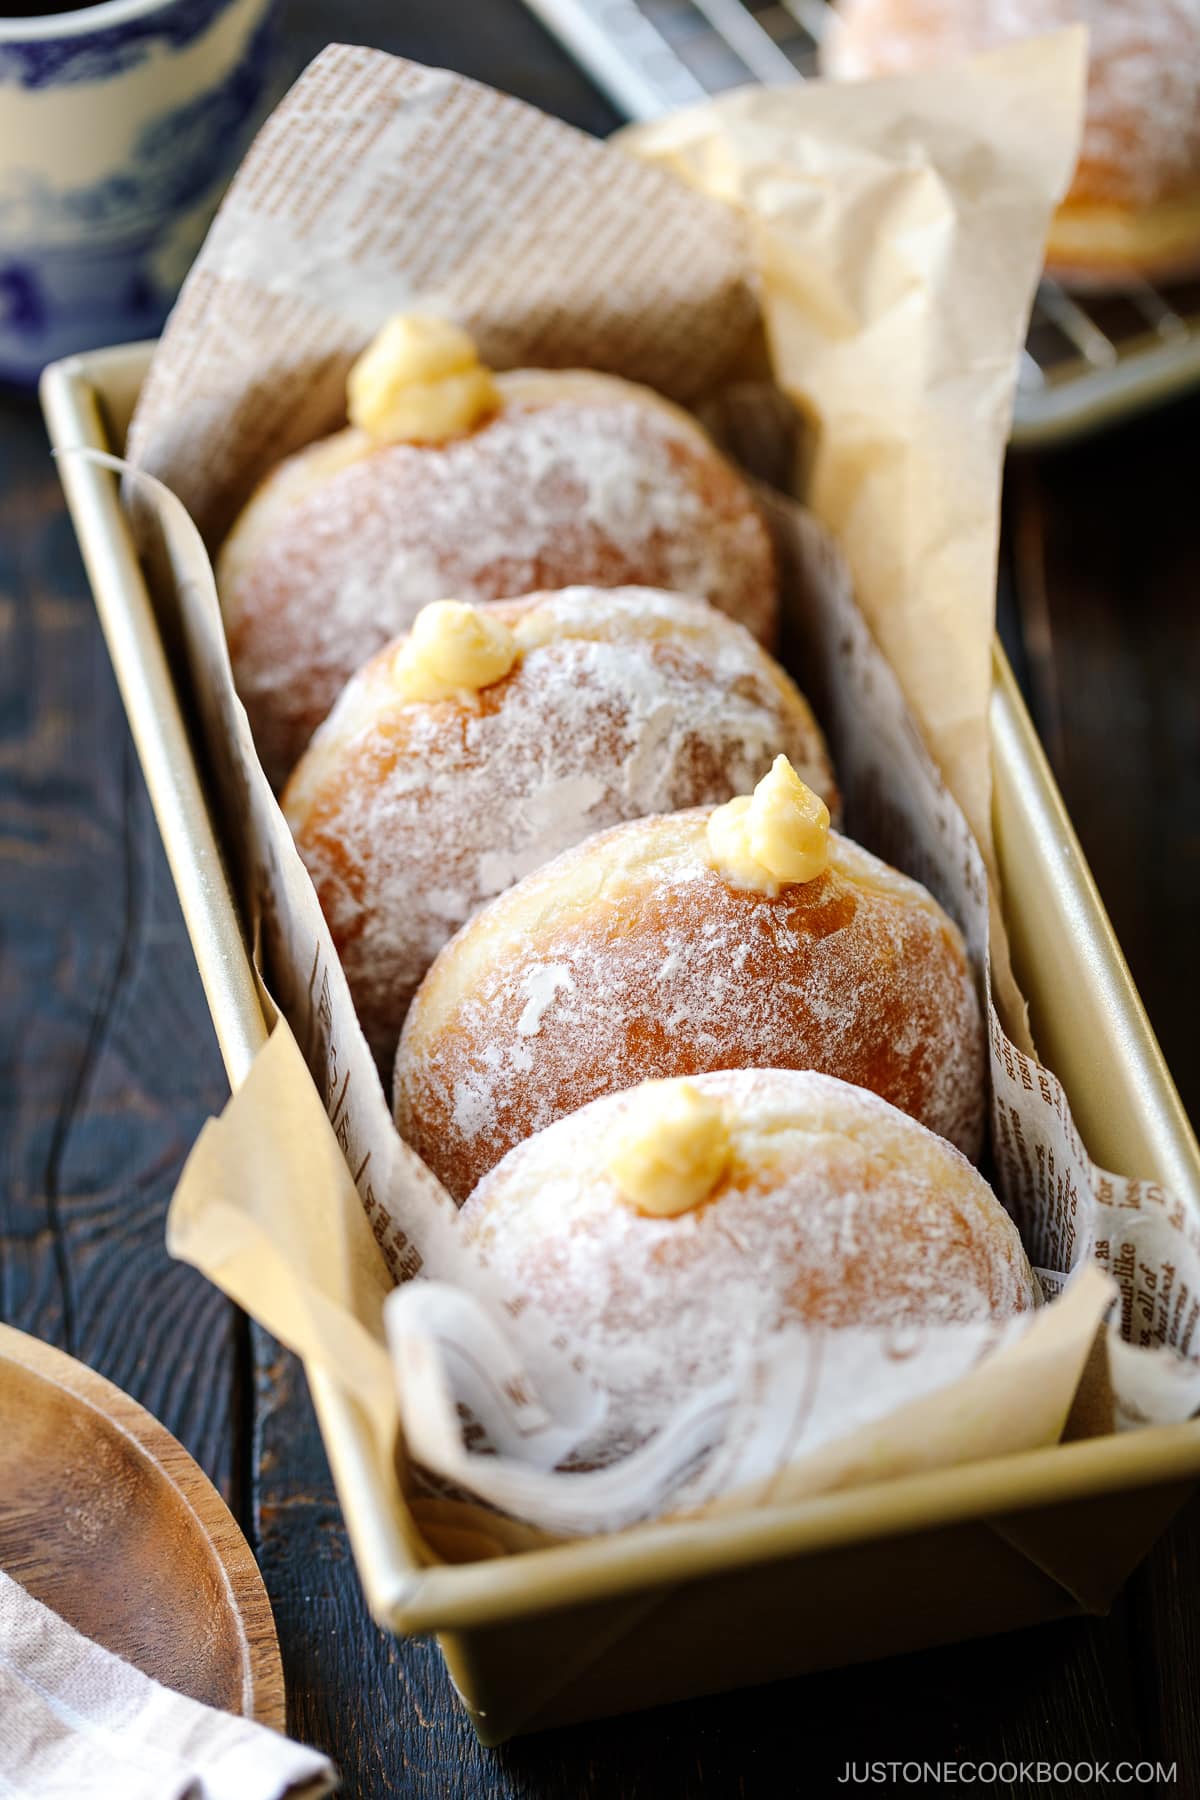
- Coat the donuts with confectioners’ sugar (powdered sugar) and fill them with the custard (pastry) cream.
Recipe Tips and Techniques
- Measure the ingredients with a kitchen scale. To set yourself up for success, I only provide metrics. It’s easier to troubleshoot when we know you measured the ingredients precisely. I highly recommend a kitchen scale in your kitchen (this is my favorite scale).
- Be sure that the ingredients are at the right temperature! Yeast is a living thing and will not activate if the environment is too cold due to the cold milk, egg, and butter. On the contrary, the yeast could die if the environment is too warm, yielding dough that doesn’t rise.
- Knead the dough on Speed 8. KitchenAid does not recommend kneading dough at settings higher than Speed 2. However, we can’t achieve a perfect texture without kneading aggressively. If you are doubling the recipe, you may want to knead on Speed 6.
- Slam and roll until your dough has a smooth, taut skin. I’ve explained how to do this step with images in the recipe card.
- The first proof requires about 1 hour, or until the dough is tripled. Halfway through, reshape the dough for a stronger texture.
- The final proof requires about 40-50 minutes, or until the dough is doubled.
- Deep fry 2-3 donuts at a time to avoid a sudden temperature drop in the oil. Maintaining the ideal oil temperature throughout deep frying is important.
- Fill the donuts with custard cream just prior to serving. Keep the custard cream in the refrigerator, but do not refrigerate the donuts as they may become hard.
Storage Tips
- To Store. Enjoy the Nama Donuts on the same day you make them. You can keep the unfilled donuts in an airtight container at room temperature for a day. Fill the donuts with custard cream just prior to serving. Store the homemade custard filling for up to 2-3 days in the refrigerator. To prevent a film from forming, place a piece of plastic wrap on top of the custard.
- To Freeze. You can keep the unfilled donuts in an airtight container or resealable freezer bag and freeze for up to 1 month. Defrost in the refrigerator overnight.
Recommended Tools to Make This Recipe
- KitchenAid Stand Mixer (Artisan Series) (with C-dough hook)
- a digital kitchen scale
- a medium bowl
- a dough scraper
- a dredge shaker
- a whisk
- two half-sheet baking sheets
- a wire rack
- a heavy-bottomed pot (I use this 2.75-quart Staub Cast Iron Round Cocotte) or a deep-fryer
- a deep-fry thermometer, such as the Thermoworks Chef’s Alarm
- a fine-mesh sieve
- a bamboo skewer
- a chopstick
- a pastry bag with a piping tip
FAQs
How long does it take for the dough to rise?
It depends. Different factors can affect the proofing time of your dough, such as:
- the temperature and humidity of your kitchen
- the freshness of your yeast
- the milk temperature.
In a warm kitchen, your dough may proof in 40-60 minutes, while it can take 2-3 hours in a cold kitchen. It’s essential to create a nice, toasty environment for your dough to rise.
How do I get the dough to rise faster?
Find a good spot where it’s nice and warm. Heat rises, so some people proof their dough on top of a running dryer machine or top of the refrigerator.
My recommendation is to use an oven. Place a baking pan/dish of boiling water on a lower rack and place the bowl with dough on an upper rack. Sometimes, it gets nice and warm, even with just the light on. You can also use a microwave and place a dish of boiling water inside the microwave.
Why is my dough not rising?
Possibly out of these reasons:
- Your yeast was old. (This has happened to me before!) Yeast is a microorganism, and it goes bad. Don’t waste the rest of your ingredients because of old yeast. Get brand-new yeast (and make sure it’s a good batch from the store!)
- Hot milk killed the yeast. Read the instructions on your yeast package. Generally, the warm water/milk temperature should be between 105ºF (40ºC) and 115ºF (46ºC) degrees.
- Too much salt/sugar/flour. Did you measure your ingredients with a kitchen scale?
- The dough was too dry. Did you cover the dough with plastic wrap? If you used a damp towel, did it dry up? The dough should be moist and elastic during proofing. Be careful not to develop a crust on the dough’s surface to prevent it from rising further.
- The dough was too cold. The yeast is most active at around 86-95°F (30-35°C) degrees. See my recommendation above to create a warm environment for the dough.
Can I knead the dough with my hands?
The dough is very wet and sticky, but you can knead it with your hands (though it requires a lot of arm work). Using a silicone mat and a pastry card, try not to introduce more flour.
Try Other Japanese Sweets
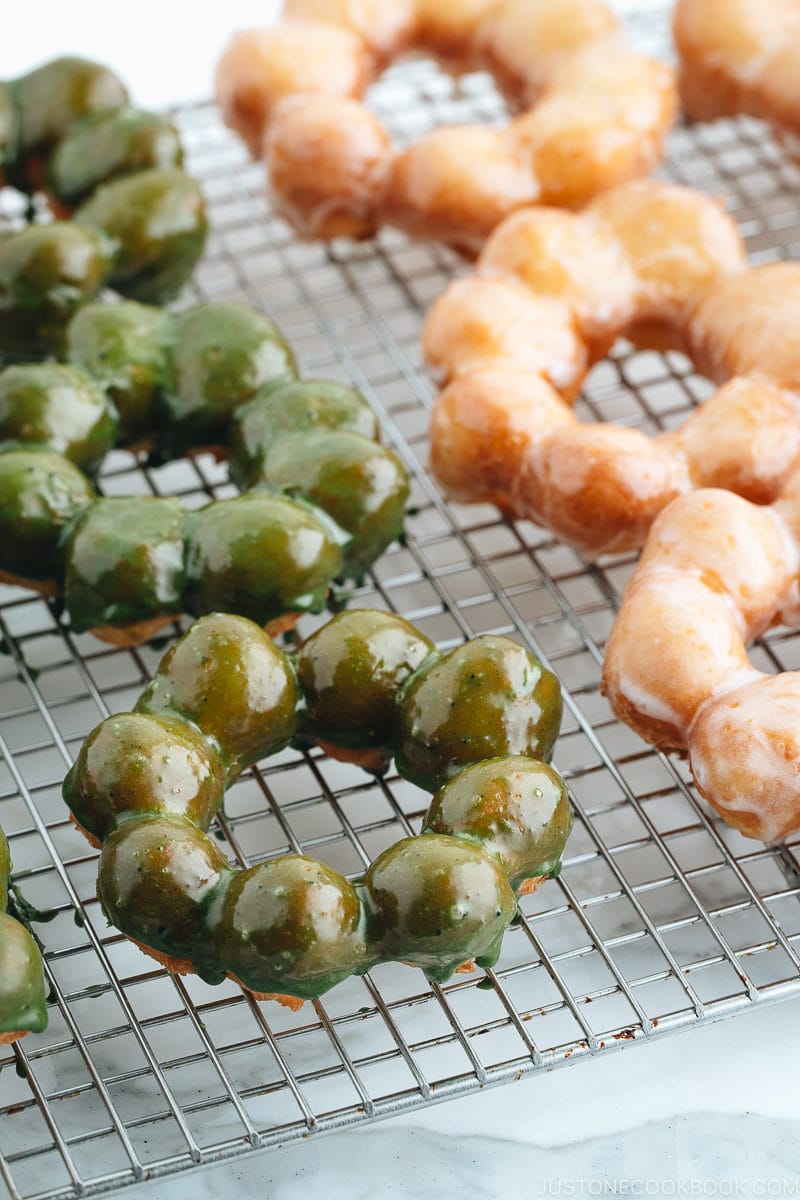
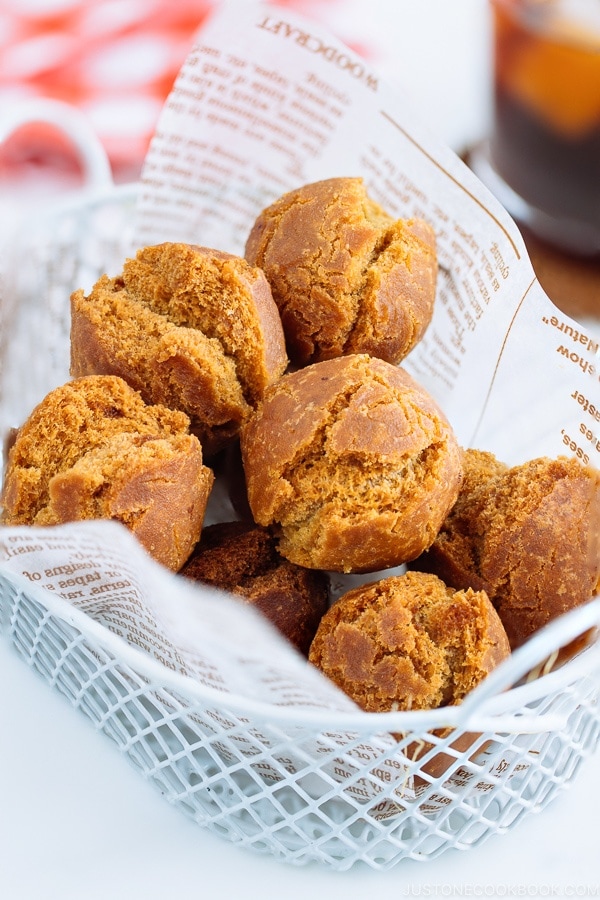
- Donuts – Pon de Ring Donuts, Matcha Donuts, Okinawan Sata Andagi Doughnuts
- Cakes – Japanese Souffle Cheesecake, Strawberry Shortcake, Chocolate Gateau
- Cookies – Miso Butter Cookies, Black Sesame Cookies, Matcha Cookies
私のパンの先生であるふじもと真理子先生、実はパンの指導以外に、ライフコーチのお仕事もしてらっしゃいます。興味がある方は、インスタグラムにてメッセージしてみて下さい。私もお世話になってます❤️
<<在米25年のライフコーチ。だから頼れる。>>
こんな方のためのコーチングです。
・アメリカ生活の不便や不安を解消し、なるべく早く生活になじみたい。
・自由な発想を持つ、自己肯定感の高い幸せな子供を育てたい。
・パートナーに頼らず、自分で自分を幸せにできるようになりたい。
・もやもやを解消し、笑顔で日々を過ごしたい。
・アメリカ生活で得られる体験を活かし、家族にとってのより良い未来を築きたい。
・日本人が知らない文化の違いを知り、スムーズな人間関係を築きたい。
・実は多くの人が知らないまま!アメリカの学校システムについて知りたい。
・自己肯定感を上げ、ぶれない自分になりたい。
・困った時に頼れる相談相手が欲しい。
・日本とアメリカの他拠点生活について知りたい。
Wish to learn more about Japanese cooking? Sign up for our free newsletter to receive cooking tips & recipe updates! And stay in touch with me on Facebook, Pinterest, YouTube, and Instagram.

Nama Donuts
Video
Ingredients
- 90 g whole milk (warmed to 104ºF, 40ºC)
- 3 g active dry yeast (DO NOT use old yeast that‘s more than 6 months old; due to high sugar content, DO NOT use instant dry yeast, unless it's Saf instant yeast GOLD)
- 30 g beaten egg (room temperature; 30 g is a little more than half a large egg)
- 15 g sugar
- 2.5 g Diamond Crystal kosher salt
- 5 g sweetened condensed milk
- 162 g bread flour (I use King Arthur brand)
- 30 g unsalted butter (cut into cubes and room temperature)
For the Custard (optional filling)
- 3 large egg yolks
- 400 g whole milk
- 75 g sugar
- 1 tsp pure vanilla extract (or vanilla beans)
- 30 g cake flour (you can make your own cake flour)
- 15 g unsalted butter
For the Donuts
- 3 cups neutral oil
- confectioners’ sugar (for dusting; I used non-melting snow sugar that you can get from King Arthur or Amazon)
Instructions
Before You Start
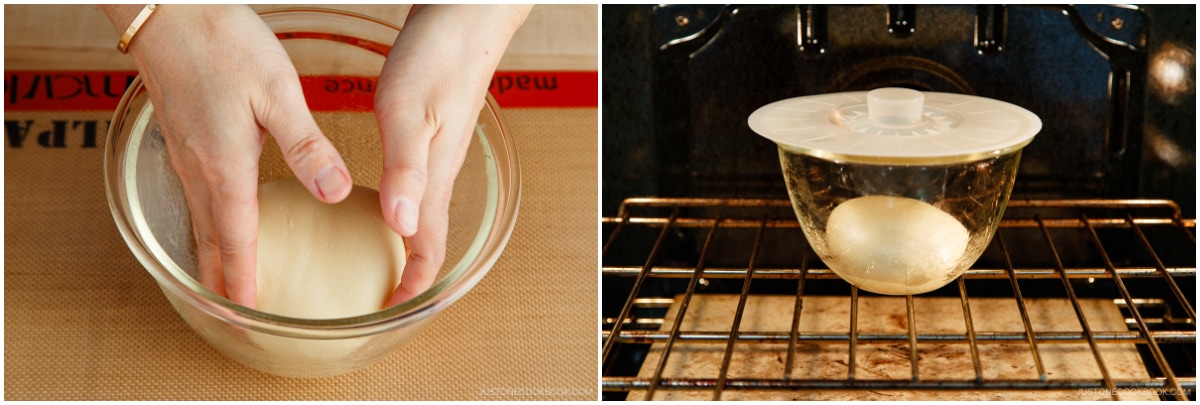
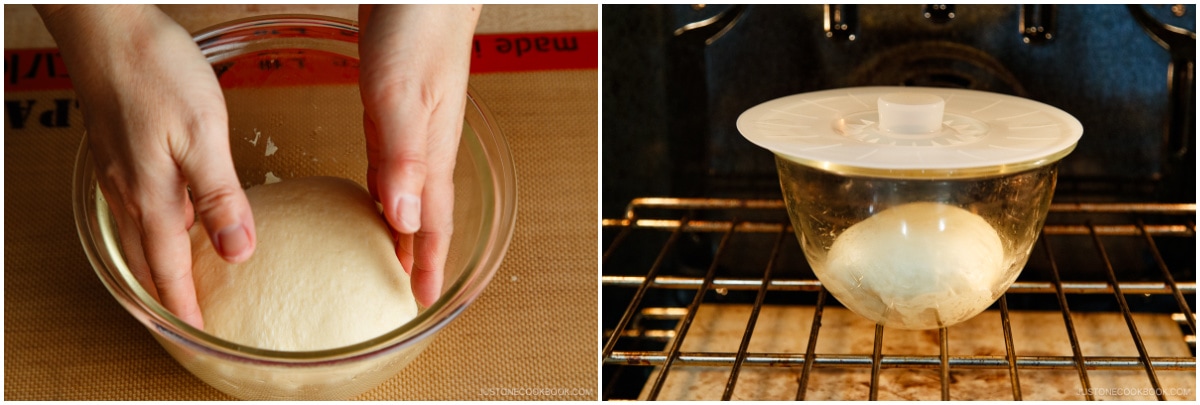
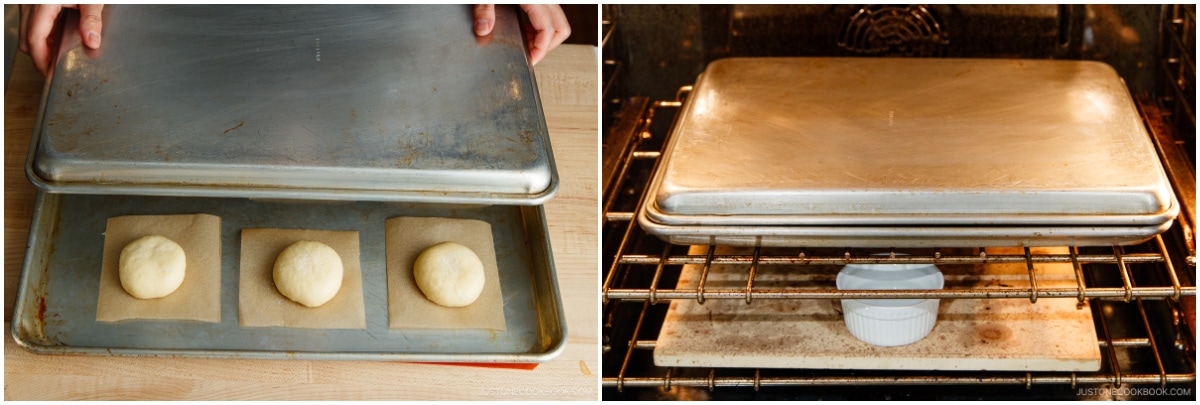
- To Create a Warm Environment for Bulk Fermentation: If your oven has a Proof setting, turn it to 100ºF (38ºC). Otherwise, place small baking dishes of boiling water on the lower-middle rack at the four corners. Then, place your dough in a bowl in the center of the rack and close the door. The steam and heat from the boiling water will create a warm environment for bulk fermentation. You can also proof bread dough with an Instant Pot using the Yogurt function on Low or the temperature setting. During the summer when humidity is high, you may not need to create a special environment.
To Make the Dough
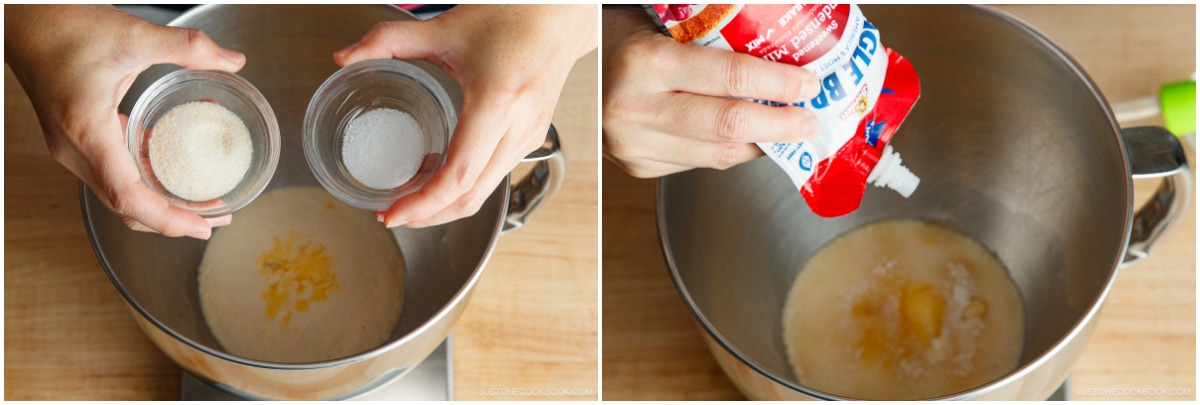
- Gather all the ingredients. Precise measurement is extremely important for this recipe; therefore, please weigh your ingredients with a digital kitchen scale. My ingredients are premeasured here, but with a kitchen scale, you can press the Tare or Zero button to add each ingredient so you don‘t need any measuring spoons or prepping bowls.
- Warm up 90 g whole milk to 104ºF (40ºC) in the microwave. It should be warm, barely above body temperature. Add the milk to a stand mixer bowl. Tip: The milk can‘t be warmer than 110ºF (43ºC) or the yeast will die.
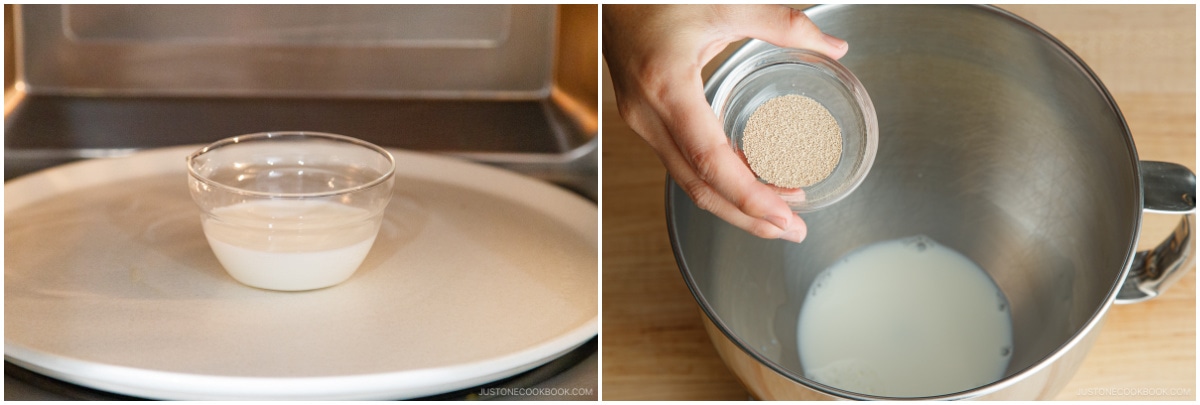
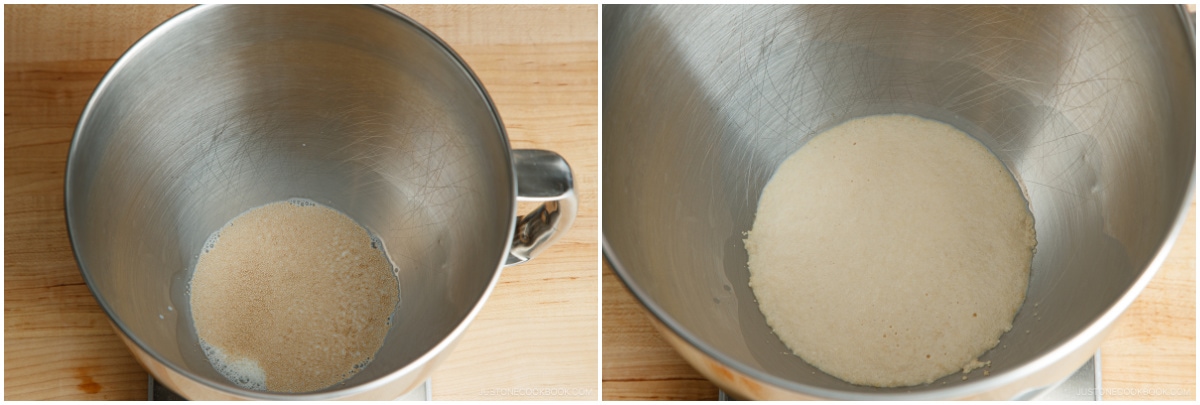
- Add 3 g active dry yeast to the milk. Give the mixture a quick stir, then allow it to sit for 10 minutes. The mixture will become foamy as proof that the yeast is alive. Tip: Proofing active dry yeast ensures that it will work in your dough. If the mixture does not get foamy, then you need new yeast. If your yeast is near its expiration date or you opened it more than a few months ago, it may no longer be alive.
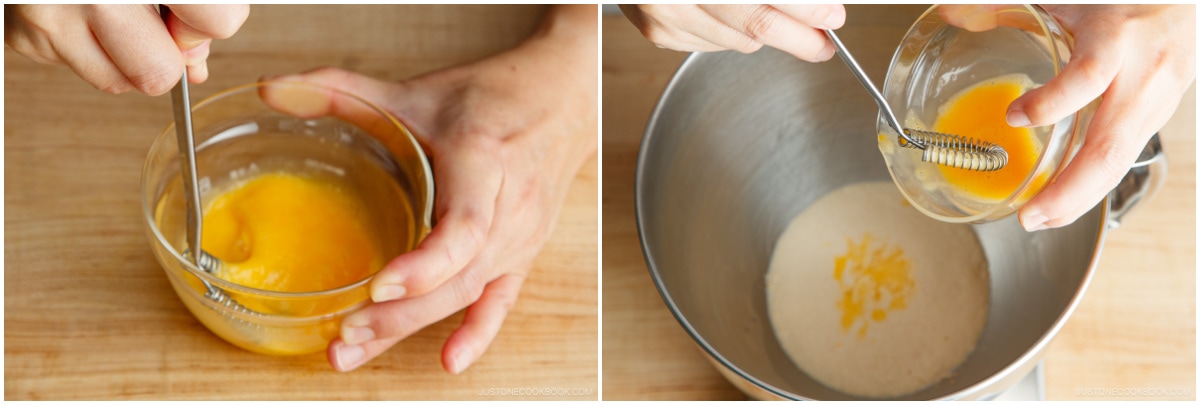
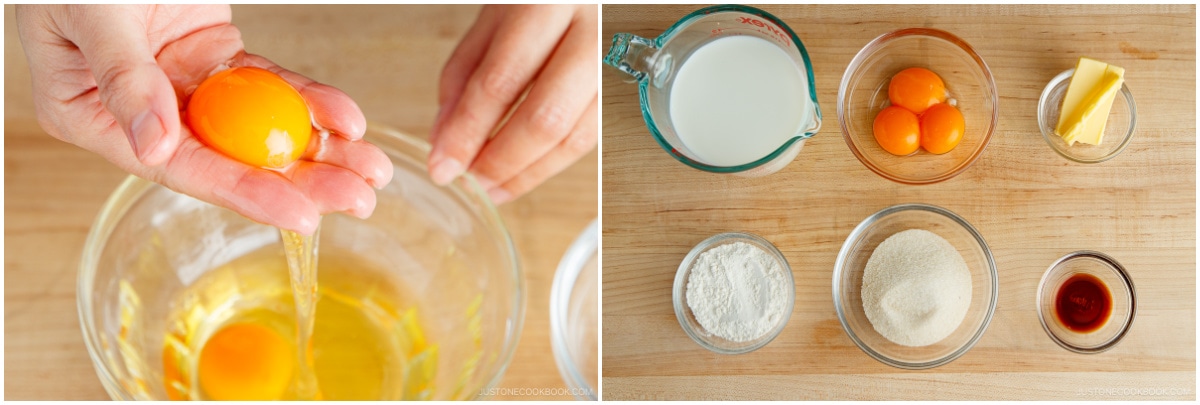
- Whisk the egg well, making sure the yolk and white are mixed well. Measure 30 g beaten egg and carefully drizzle it into the milk mixture.
- Next, add 15 g sugar, 2.5 g Diamond Crystal kosher salt, and 5 g sweetened condensed milk. Does salt kill yeast? No, don‘t worry.
- Add 162 g bread flour and 30 g unsalted butter (cubed).

To Knead the Dough in the Stand Mixer
- Attach the bowl to your stand mixer fitted with a paddle attachment. Stir until the flour is incorporated, about 15 seconds. Then, switch to Speed 4 until there are no longer any streaks of butter, about 30–45 seconds.
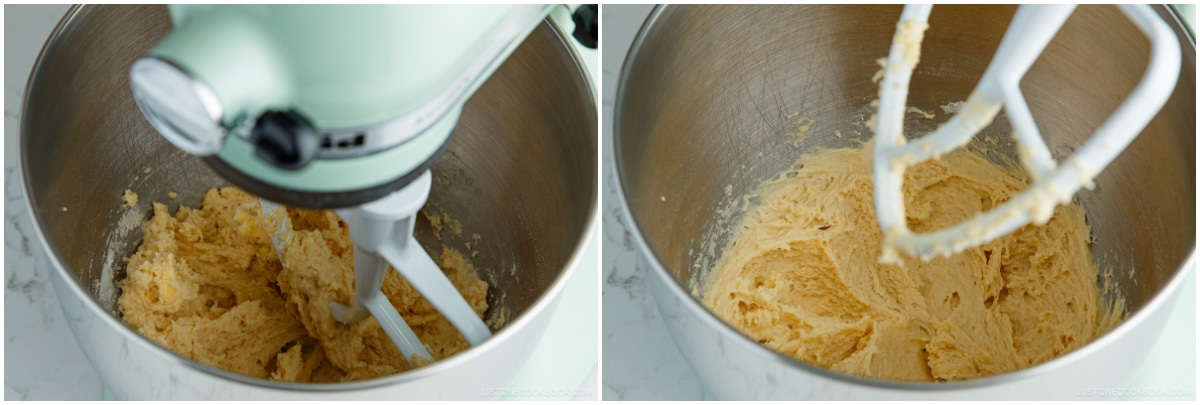
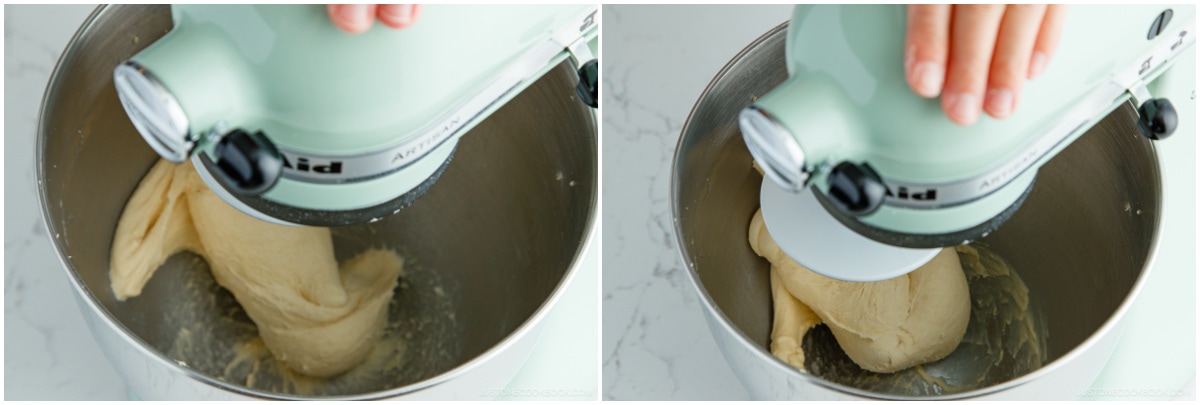
- Stop the mixer and scrape the dough from the bowl‘s sides with a dough scraper. Remove the paddle attachment and switch to a dough hook attachment. Then, start kneading on Speed 8 for 3 minutes (#1). Tip: If you‘re doubling the recipe, hold onto the stand mixer to keep it from rocking and moving.
- Stop the mixer, lift the hook, and scrape down the sides of the bowl.
- Knead on Speed 8 for another 3 minutes (#2). Tip: Knead on high speed to develop the gluten (elasticity) by lengthening and stretching the gluten strands in the dough.

- Stop the kneading, lift the hook, and scrape down the sides again.
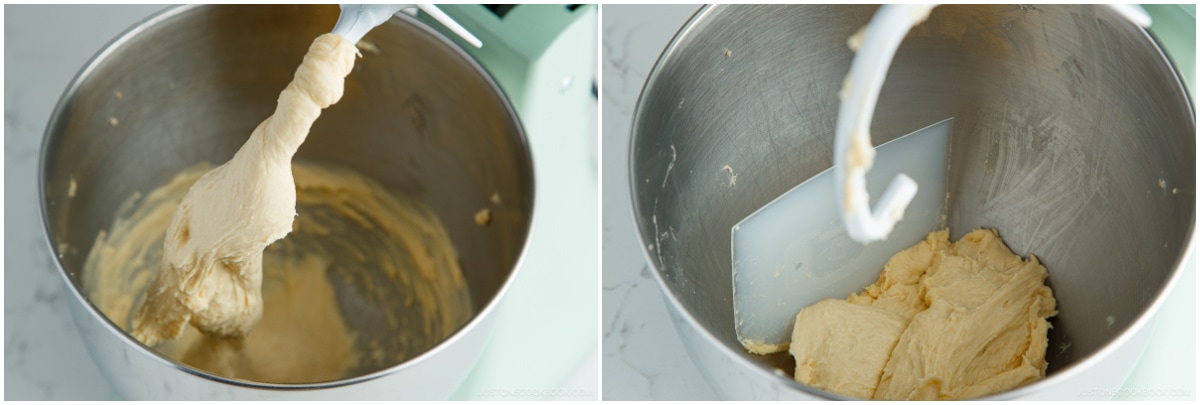
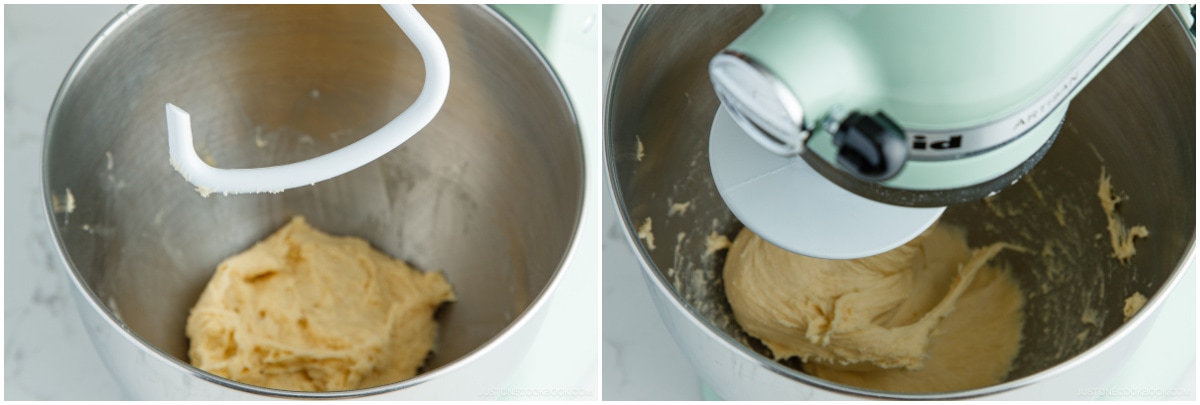
- Again, knead on Speed 8 for another 3 minutes (#3). During this time, the dough will become a solid mass and may cause the machine to rock and move, so you may want to hold down the mixer. You will see the dough start to separate from the bottom of the mixer bowl.
- Stop the mixer and lift the hook. We want to make sure the dough hook should be able to lift the entire dough mass. Not there yet, but almost there. Scrape down the sides.
- Knead on Speed 8 again, but this time, I set the timer for 1–2 minutes (#4) since it's getting close. While kneading, you will see the dough separate from the bottom of the mixer bowl.
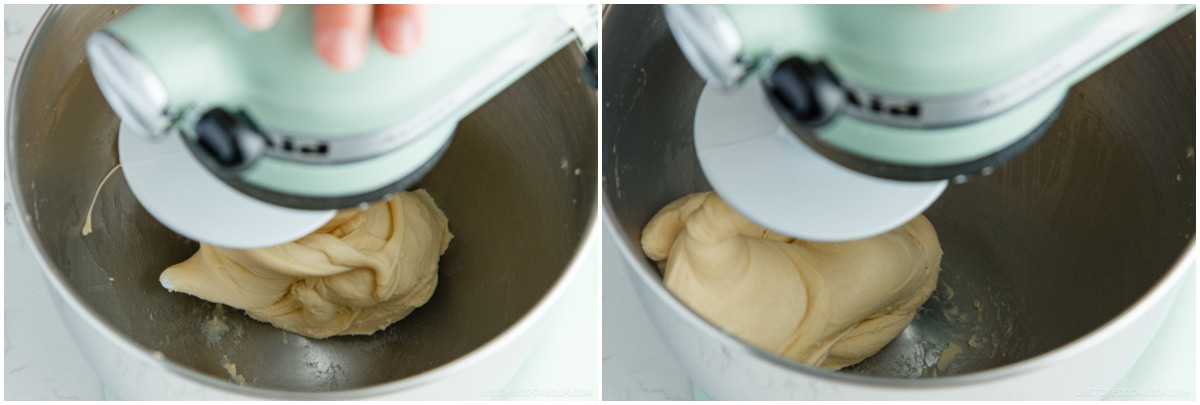
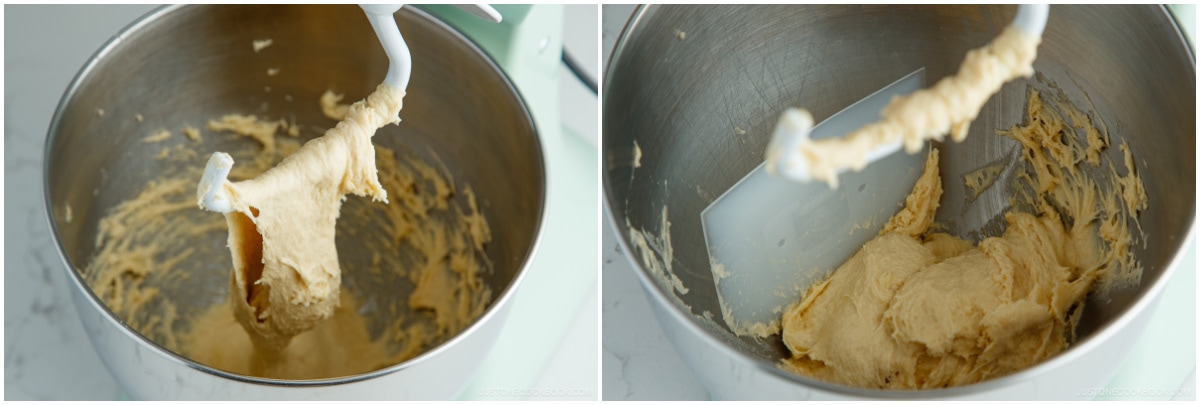
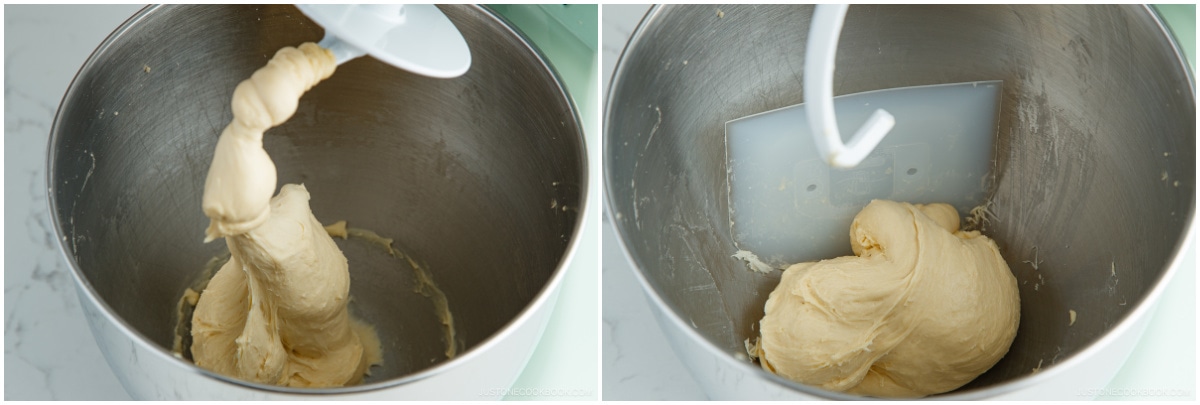
- Stop kneading and lift the hook. It should pick up all the dough in one piece. Yes! Now, knead on Speed 4 for 1 minute (#5) to loosen up and smooth out the dough.
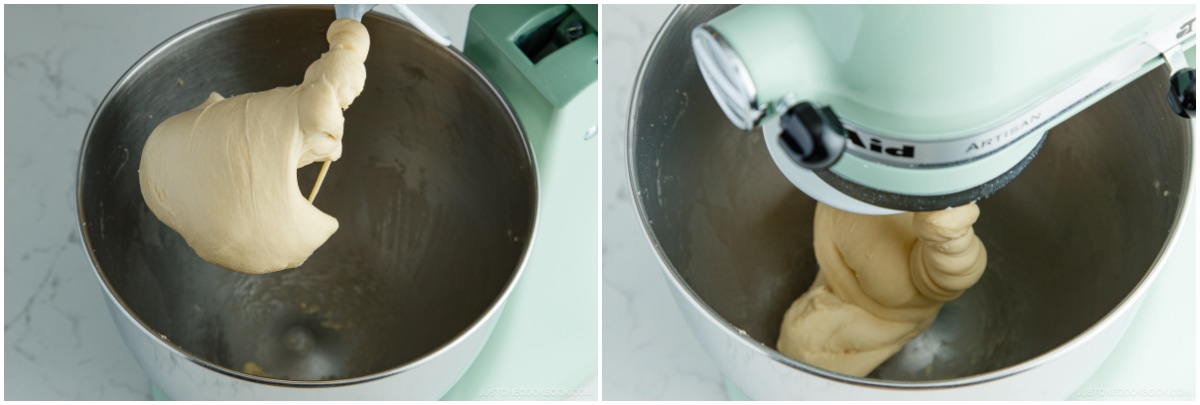
- The final dough should look shiny, silky, soft, and smooth (not sticky). Stop kneading, lift the hook, and release the dough from the hook.
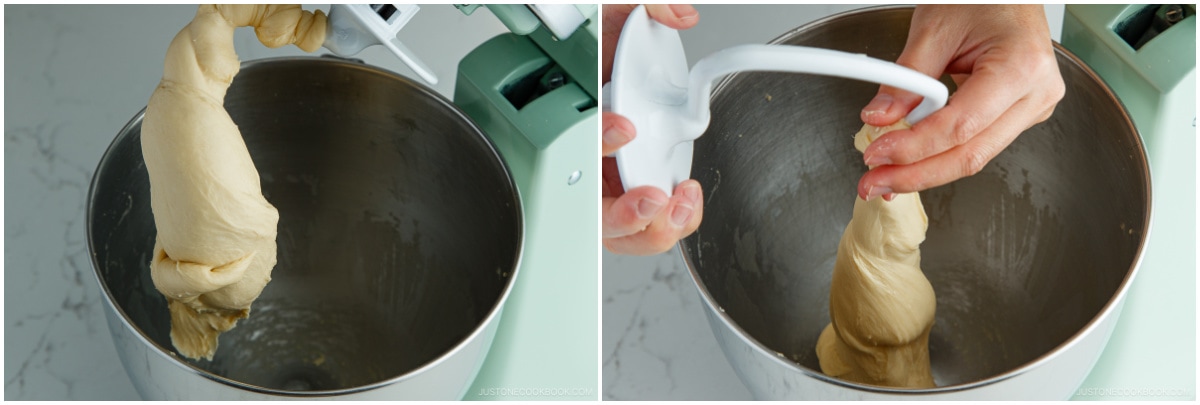
To Slam and Roll the Dough
- Line your work surface with a nonstick silicone baking mat (I use Silpat), if you have one. Otherwise, lightly dust your work surface with bread flour. Use a dough scraper to carefully remove the dough from the bowl, keeping the smooth surface intact. Remember to keep one smooth surface on your dough at all times. Place the dough, smooth side up, on the silicone mat. Now, pick it up and slam the dough‘s smooth side onto the work surface. Bang!
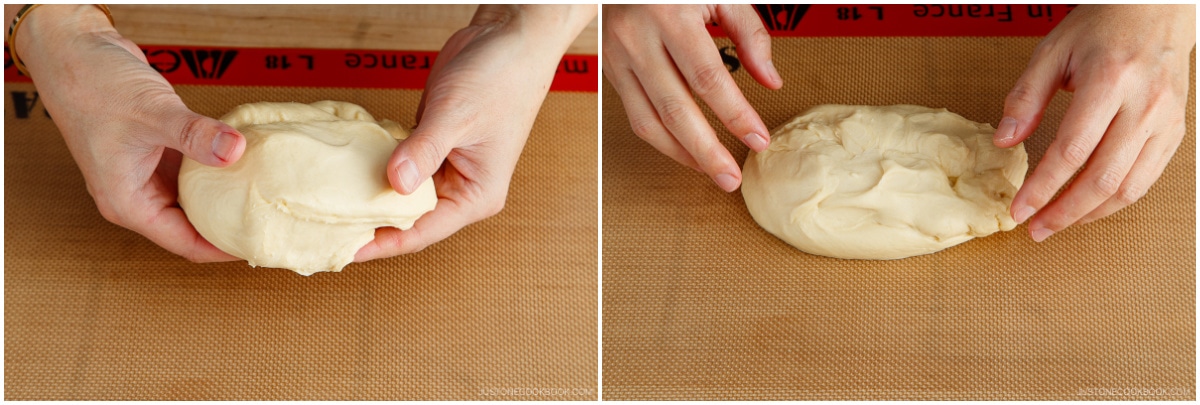
- Roll up the dough to the opposite side, revealing the smooth surface.

- Pick up the dough roll with the smooth side up (seam side down). Change the direction of the roll 90 degrees so it‘s vertically oriented. Now, slam the smooth surface of the dough onto the work surface a second time. Bang!
- Roll the dough a second time: Hold one edge of the dough and gently roll it up to the opposite side.
- Change the direction of the dough roll again. Then, slam the dough a third time.
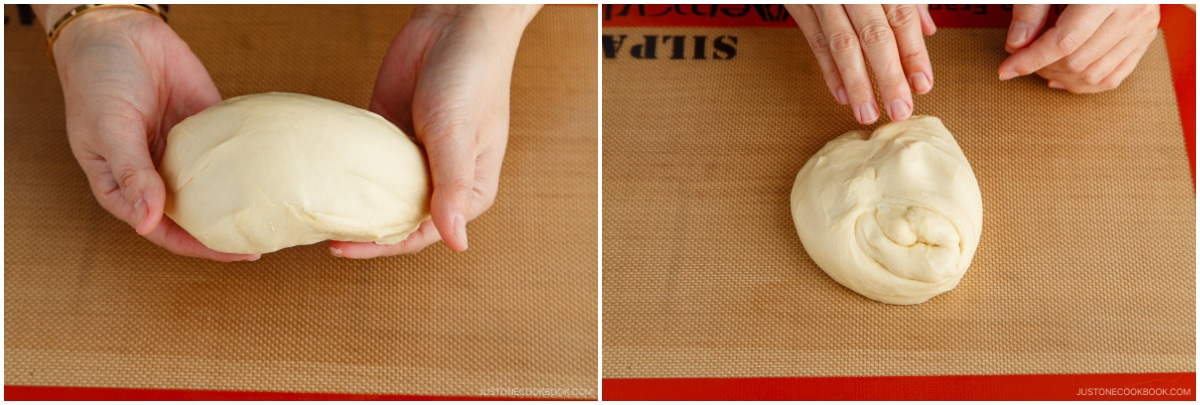
- Roll the dough a third time. Repeat this “slam, roll, and change the direction" process, until the dough ball has a smooth, taut skin. Then, pick it up and pull down the edges on all sides. Tip: If you kneaded the dough well, you may only need to repeat this 3–4 times. If you didn‘t knead enough, it might require 8–10 times.
- Once the skin is smooth and taut, tuck the edges underneath to hide them at the bottom.
The First Rise (Bulk Fermentation)
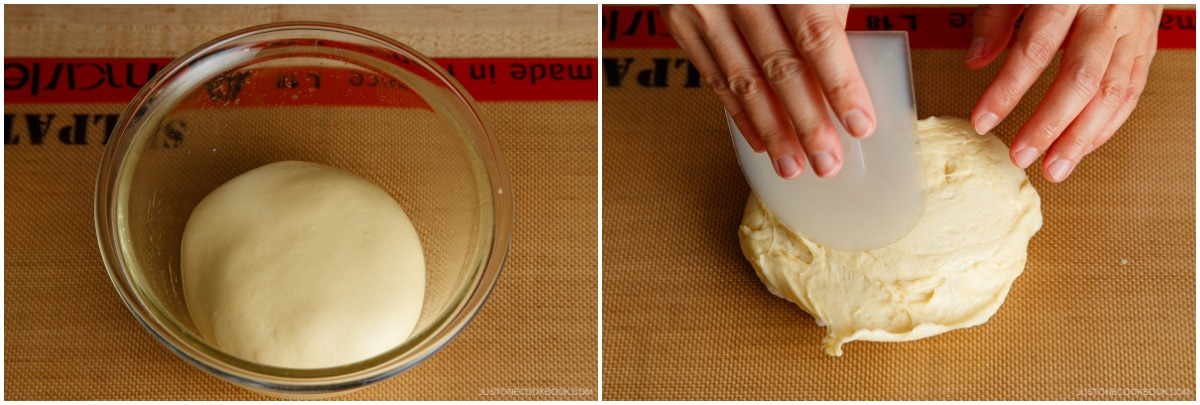
- Very thinly coat a medium bowl with neutral oil and place the dough inside. Cover the bowl with plastic. Let the dough rise until it becomes 3 times bigger in size, about 60 minutes. Halfway through at 30 minutes (you can set a timer), re-roll the dough ball; skip ahead to learn how. Tip: If you live in a cooler climate, it may take 1–1½ hours to triple in size. I use the Proof setting on my oven at 100ºF (38ºC). Please see the “Before You Start“ section for my proofing tips.
To Make the Custard
- Meanwhile, gather all the ingredients to make the custard filling.
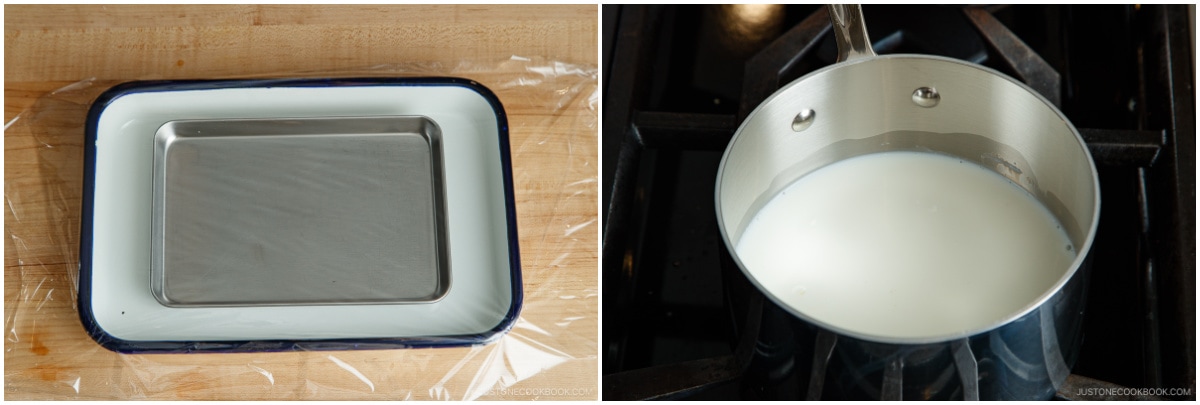
- Prepare a small rimmed tray and place a large sheet of plastic wrap on top, generously overlapping the edges. In a small saucepan, heat 400 g whole milk on low heat and slowly bring it to a bare simmer, or until bubbles start to appear around the edges. If you‘re using a vanilla bean, make a slit lengthwise on the bean pod, scrape off the vanilla seeds with a knife, and add to the milk.
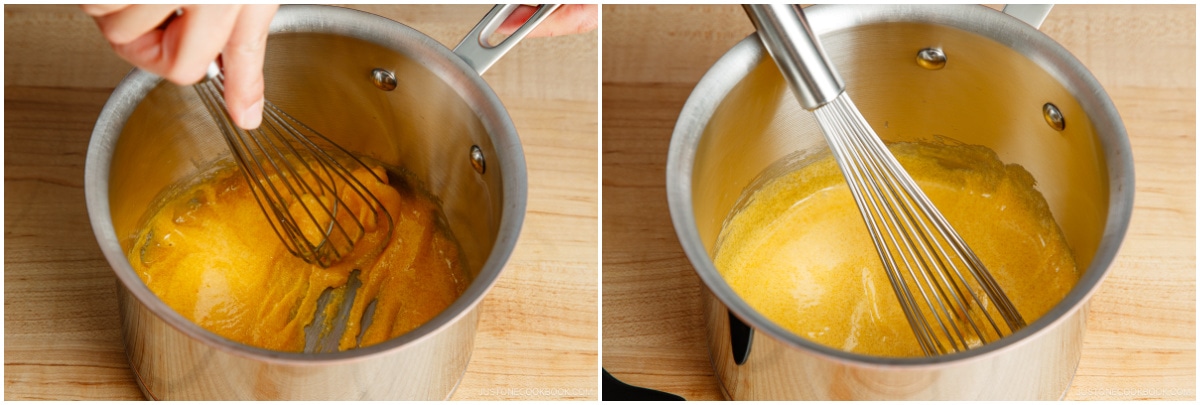
- While waiting for the milk to heat, set another small saucepan on your work surface; we‘ll start the egg mixture off the heat. Add 3 large egg yolks and 75 g sugar and whisk to combine.
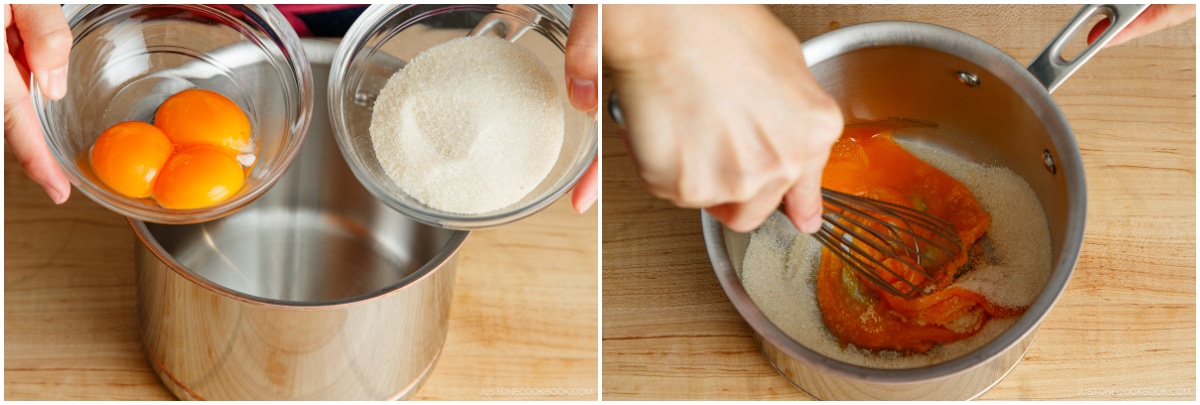
- Whisk the egg mixture until it turns pale yellow.
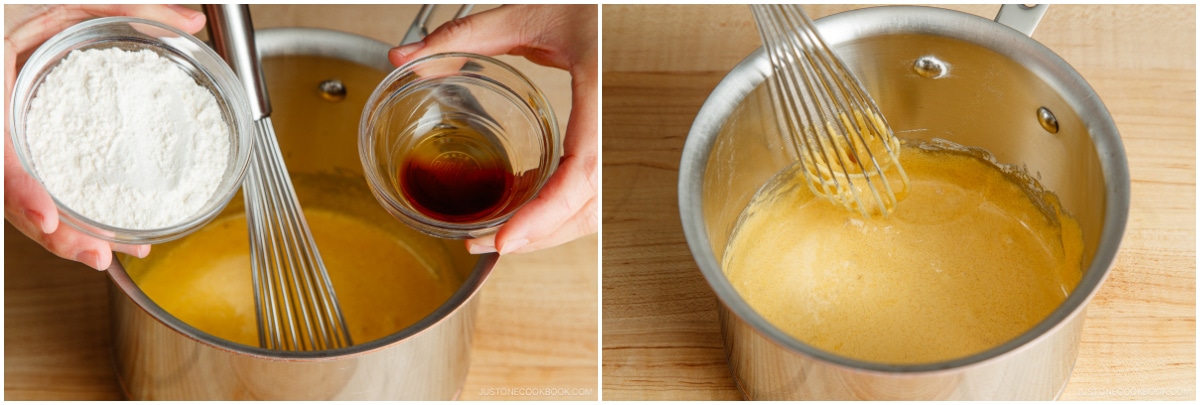
- Add 1 tsp pure vanilla extract to the egg mixture and stir well. Then, add 30 g cake flour and combine well. Keep this egg mixture to the side while you wait for the milk to come to a bare simmer; it‘s ready when bubbles start to appear around the edges.
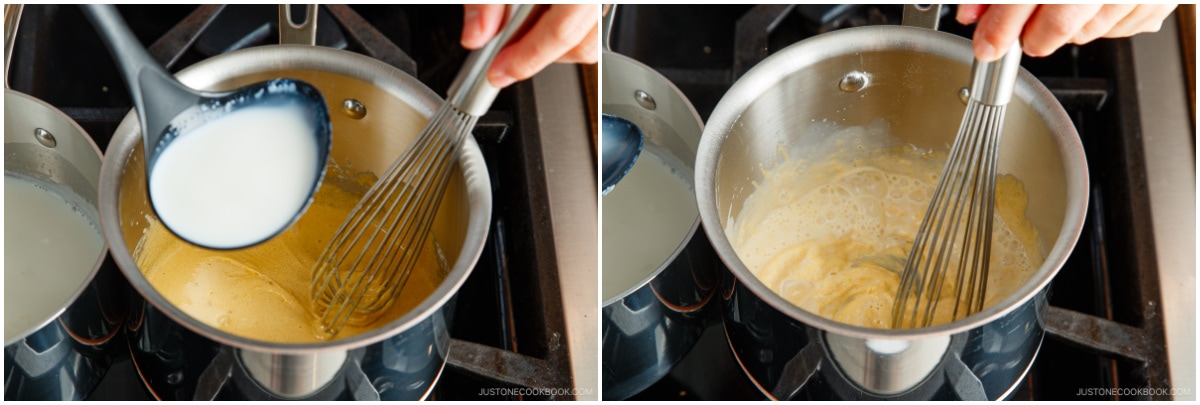
- When the milk is ready, temper the eggs: Gradually add a small portion of the hot milk to the cold egg mixture and quickly whisk to combine completely to avoid scrambling the eggs. Then, add another portion and whisk to combine completely.
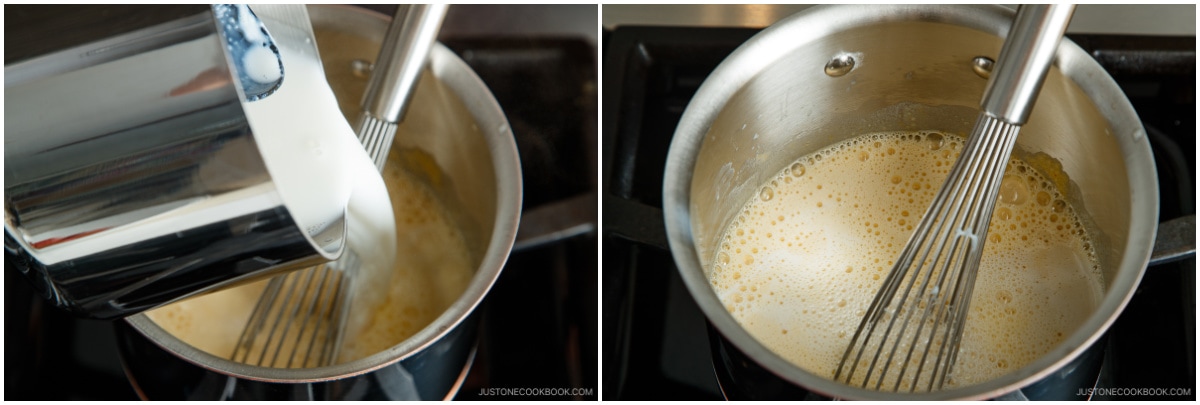
- Add the rest of the hot milk and whisk to combine.
- Now, cook the custard: Heat the saucepan over medium heat and cook, whisking continuously, until thickened. Keep whisking and do not walk away from it.
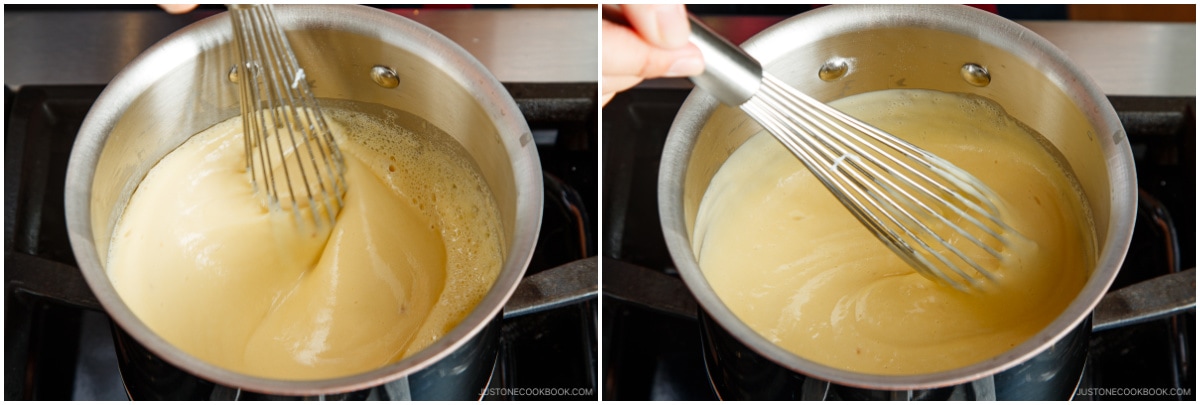
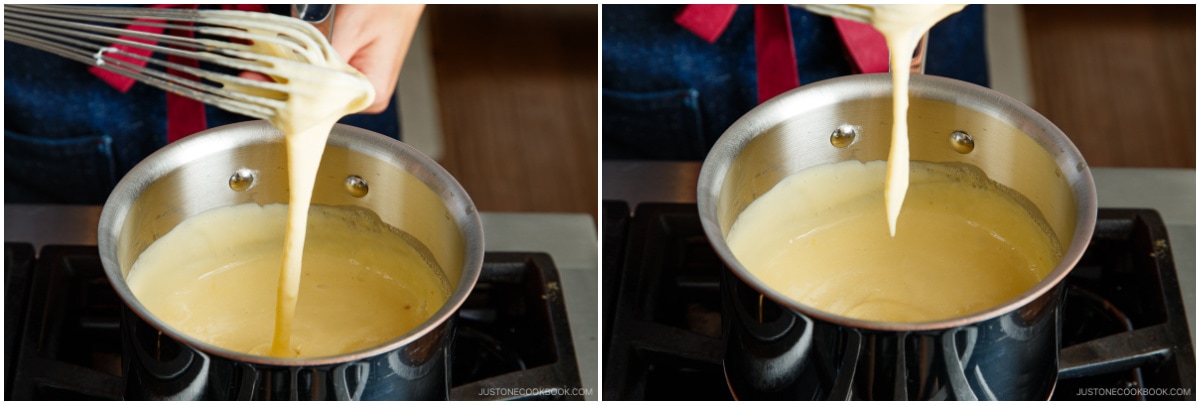
- The custard is done when you lift the whisk and the custard falls in ribbons at first, then drips. Immediately remove from the heat. Tip: The custard will continue to cook and thicken with the residual heat, so it should be runnier at this stage than your desired finished consistency.
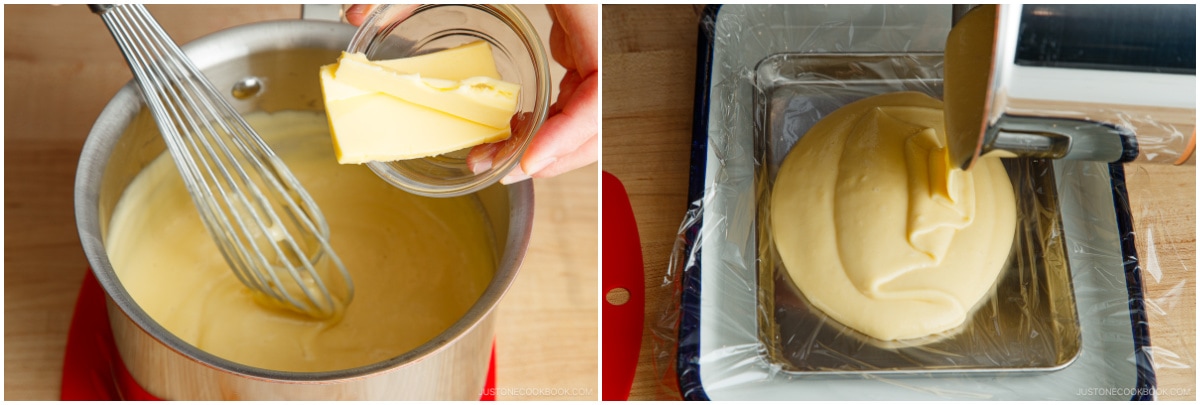
- Add 15 g unsalted butter and whisk to combine. (To make a chocolate custard, add 40 g baking chocolate chips at this stage.) Then, pour the custard directly on the plastic wrap in the prepared tray.
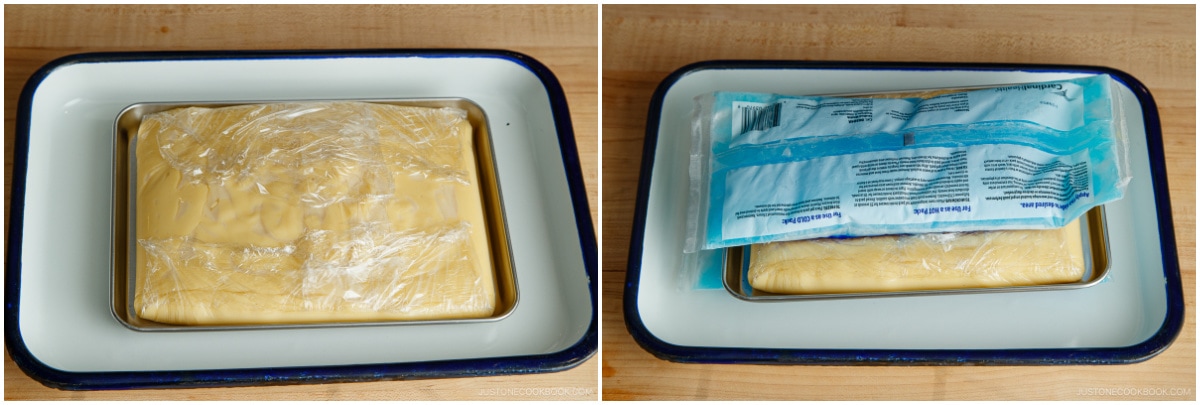
- Wrap the custard tightly with the plastic wrap, releasing the air. Cool immediately by placing ice packs or a bag of ice cubes on top. Once cooled, keep the custard in the refrigerator until ready to use. Tip: You can make this homemade custard ahead of time, since it keeps for 2–3 days in the refrigerator.
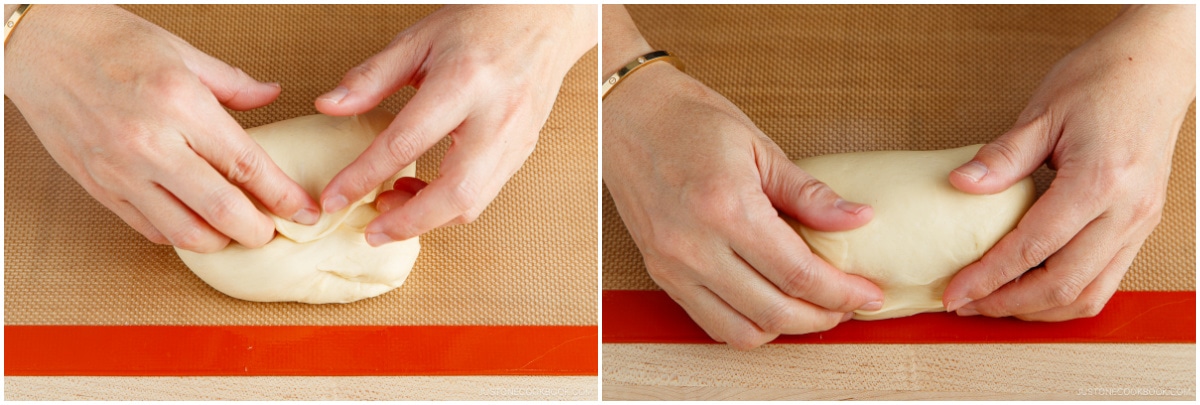
To Re-roll the Dough Ball (after 30 minutes)
- Halfway through the first rise (at the 30-minute mark), uncover the dough and invert the bowl to release the dough onto your work surface, smooth side down.
- Hold one edge of the dough with your fingers and gently roll it up to the other side, revealing the smooth surface. Remember to keep one smooth surface on your dough at all times. Gently pick up the dough.

- Pull down the edges of the dough from all sides to create a smooth, taut skin. Tuck the edges underneath to hide them at the bottom. Tip: Re-forming the dough ball at this point gives the dough strength and power to expand better and faster.
- Put the dough ball back in the bowl, smooth side up. Cover it with plastic and continue with the First Rise (30 more minutes).
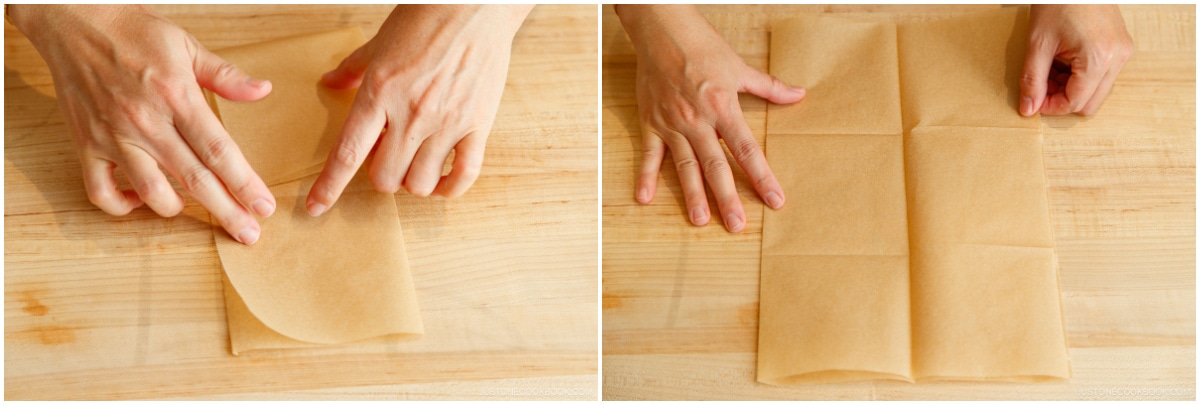
- Meanwhile, cut 6 squares of parchment paper, each 4 x 4 inches (10 x 10 cm). With a precut parchment sheet, you can make 12 squares.
To Deflate the Dough
- After 30 minutes, see if your dough has tripled in size.Tip: Do the Finger Test to check if your dough is ready. Dust some flour on top of the dough and poke your index finger in the middle. If the hole does not close up when you remove your finger, it’s ready. If the dough closes up immediately, proof the dough a little longer and test again.
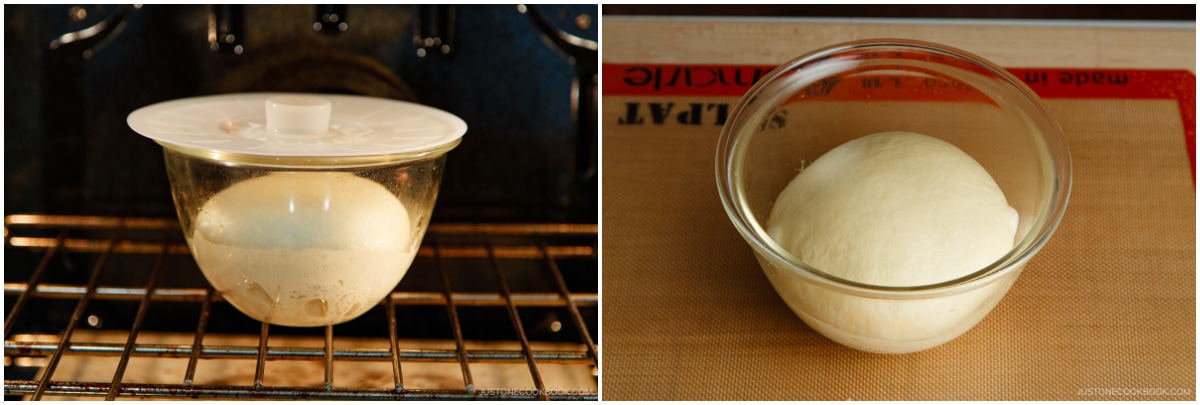
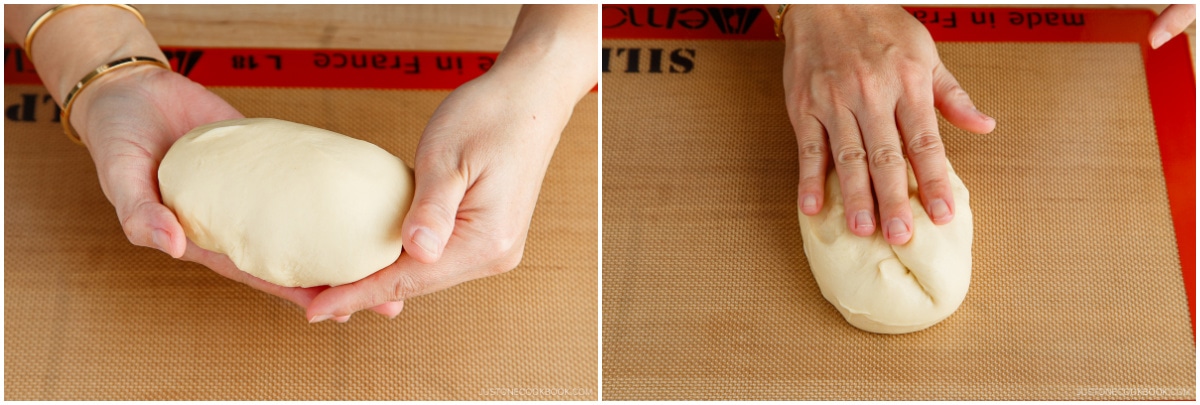
- Invert the bowl to release the dough onto your work surface. Using your fingers, gently press down and deflate the air bubbles in the dough. Remember to keep one smooth surface on your dough at all times. My smooth surface is currently on the bottom of the dough.
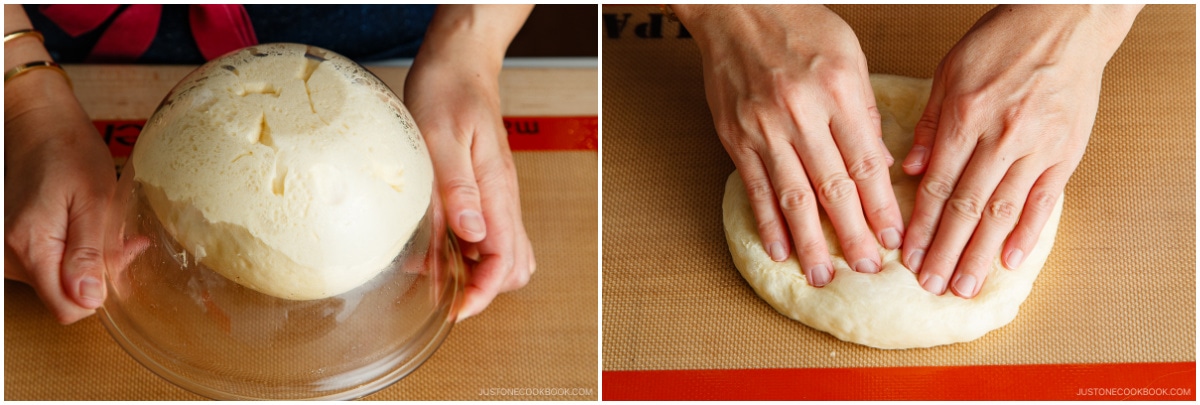
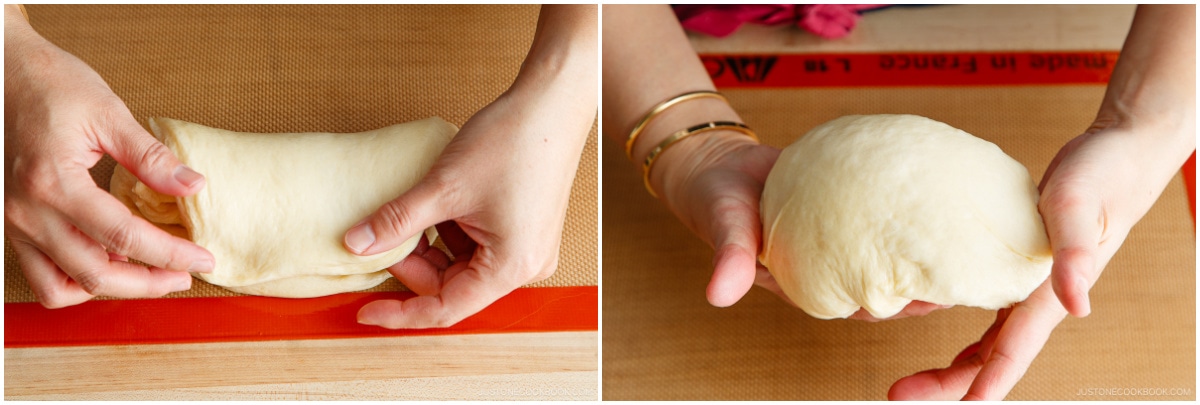
- Hold one edge of the dough and gently roll it up to the opposite side, revealing the smooth surface. Form a round shape, tucking any loose edges underneath.
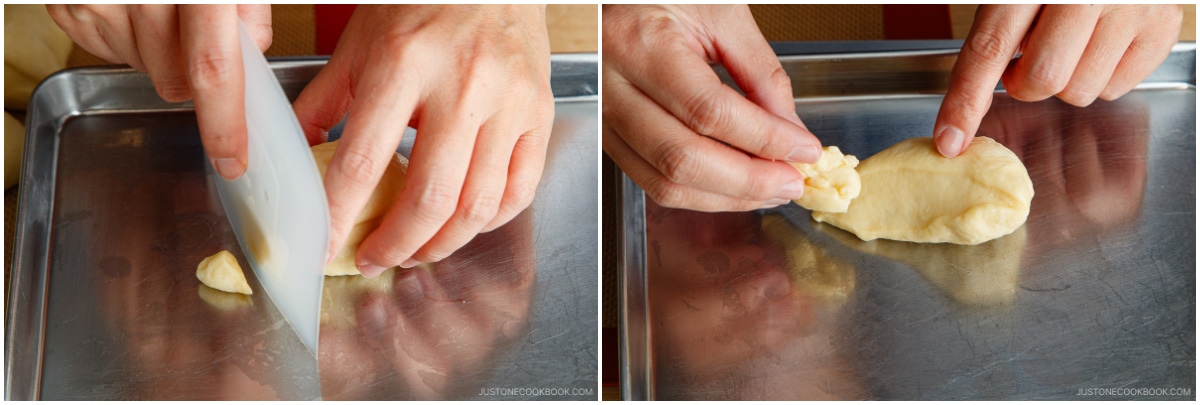
To Divide and Shape the Dough
- Using a kitchen scale, weigh the dough; mine weighed 325–327 g. Then, divide it into 6 equal pieces with the dough scraper.
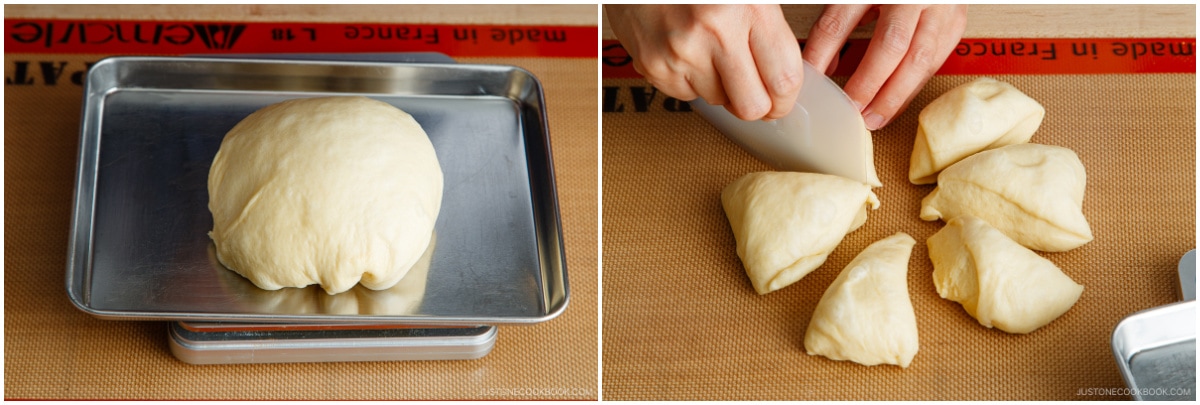
- If you have a piece that‘s bigger than the others, tear off some dough from the edge, keeping its smooth surface intact. Attach the torn dough to the edge of a piece that‘s smaller than the others.
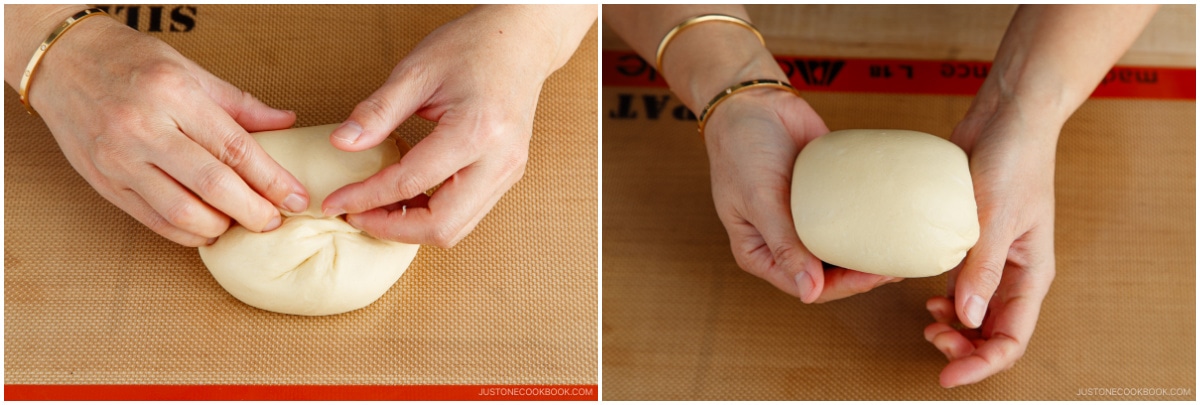
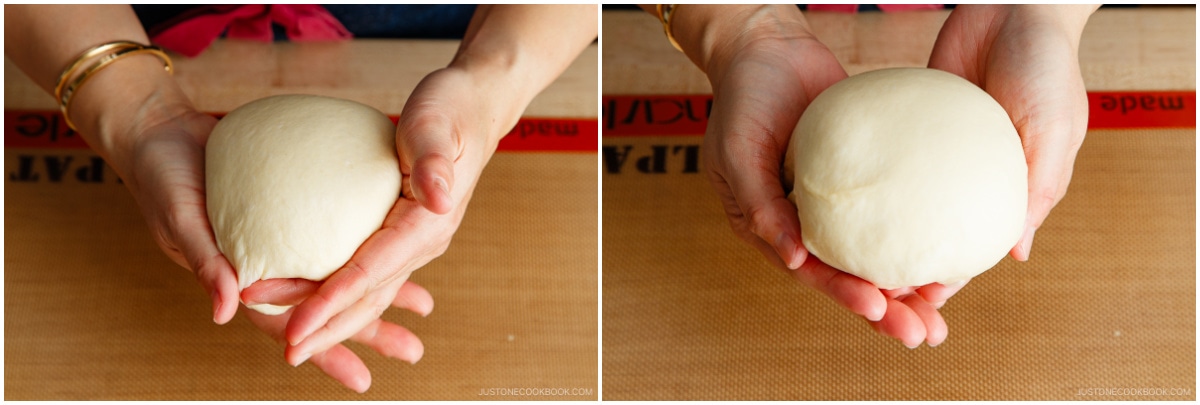
- Using your palm, press down and deflate each piece of dough. Form each piece into a ball with a smooth, taut skin: Hold the dough with the smooth surface on top. Gently pull down and tighten the dough from all sides to create tension on the outside.
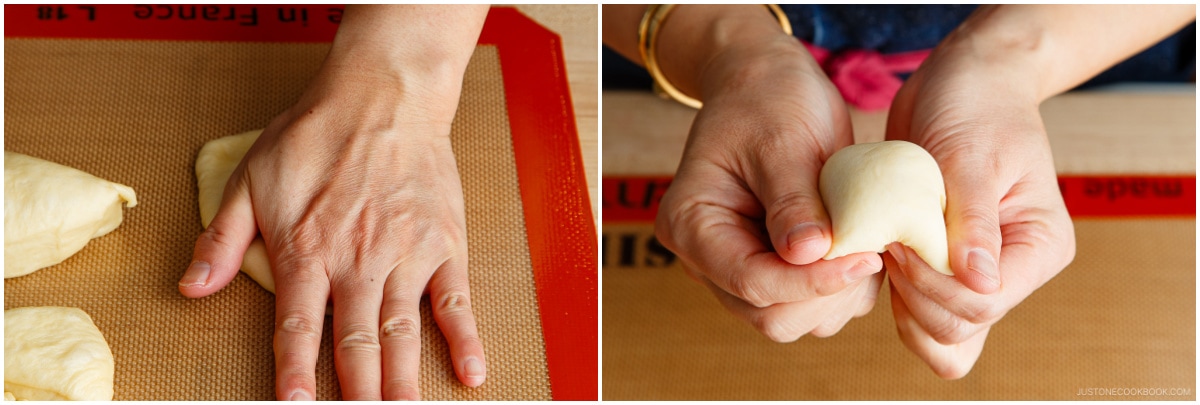
- We want all 6 dough balls to rise equally, so limit the pulling action to roughly the same for each ball, about 3–4 times total. Tuck and pinch the loose dough at the bottom. Tip: If you don't pinch it together really well, the dough expands during the final rise or deep-frying, and the back side of the dough won't look pretty.
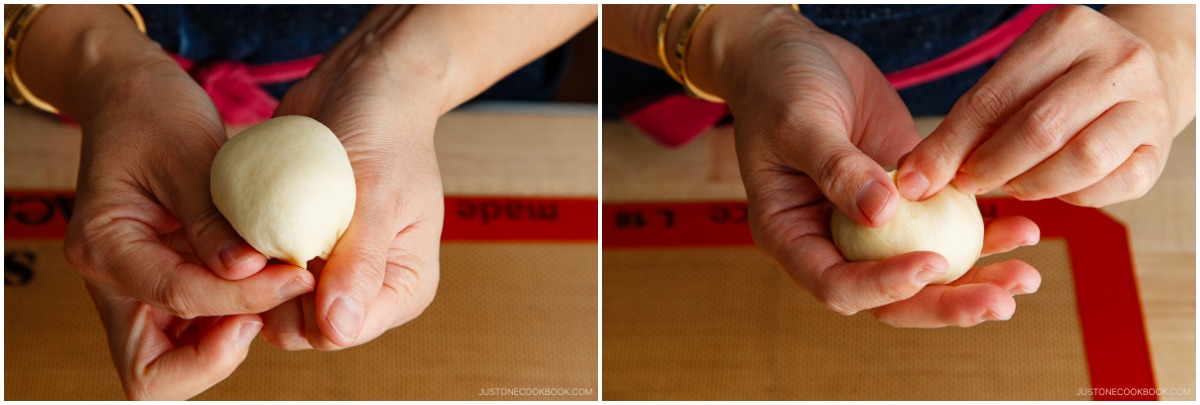
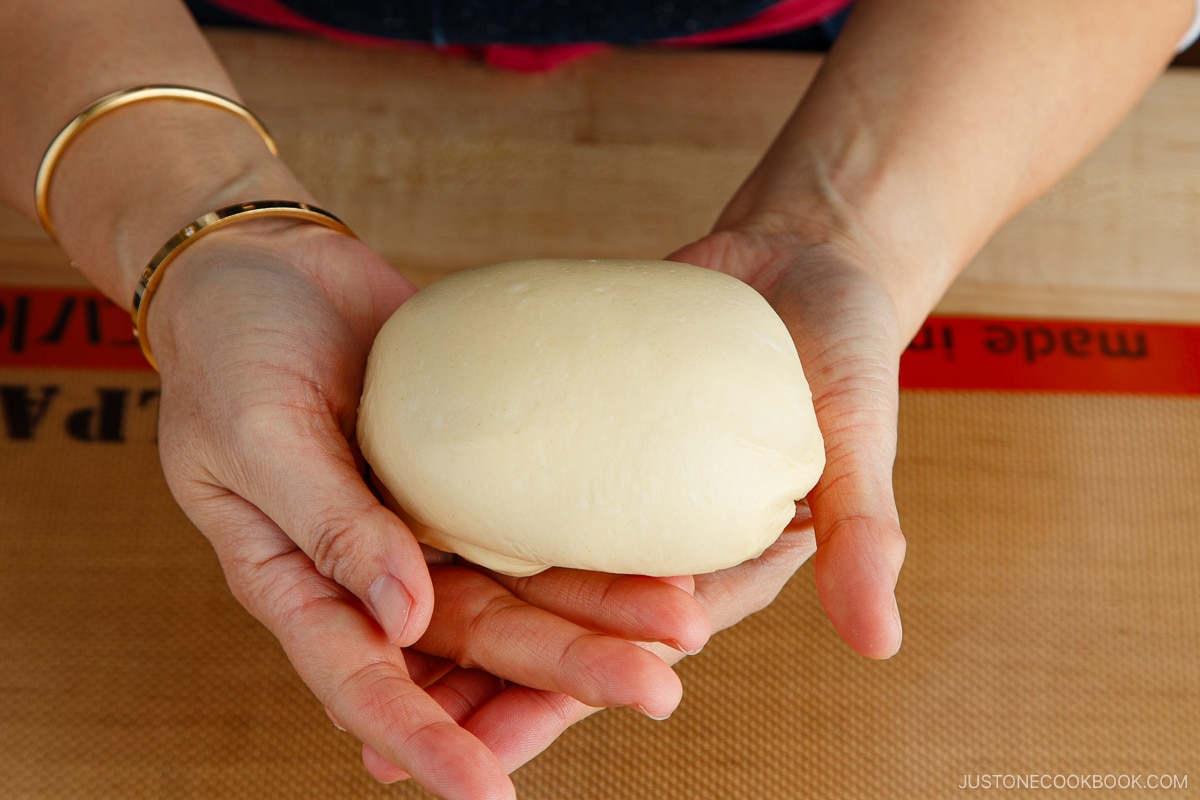
- You can roll it around in your hand on a non-dusted surface as well. The pinched dough should be smooth. Place the dough on a parchment square on a baking sheet. Repeat this process for the rest of the pieces.
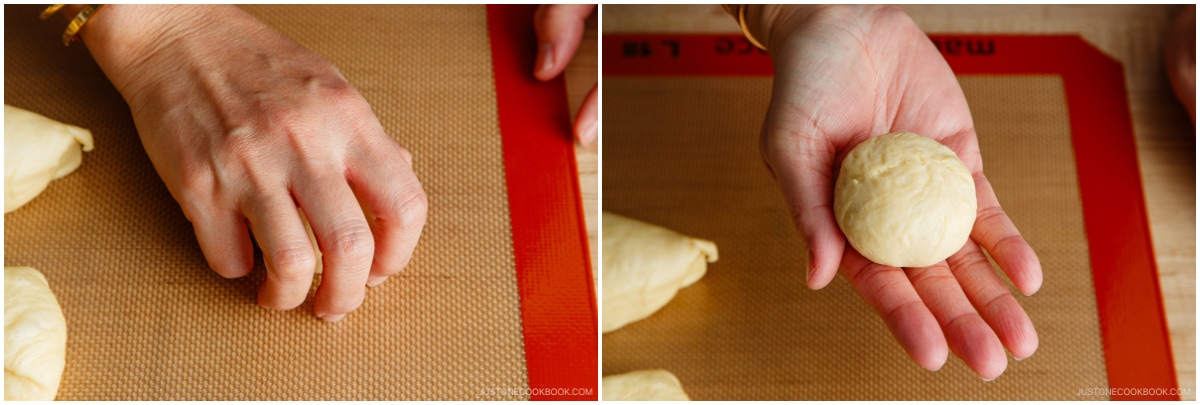
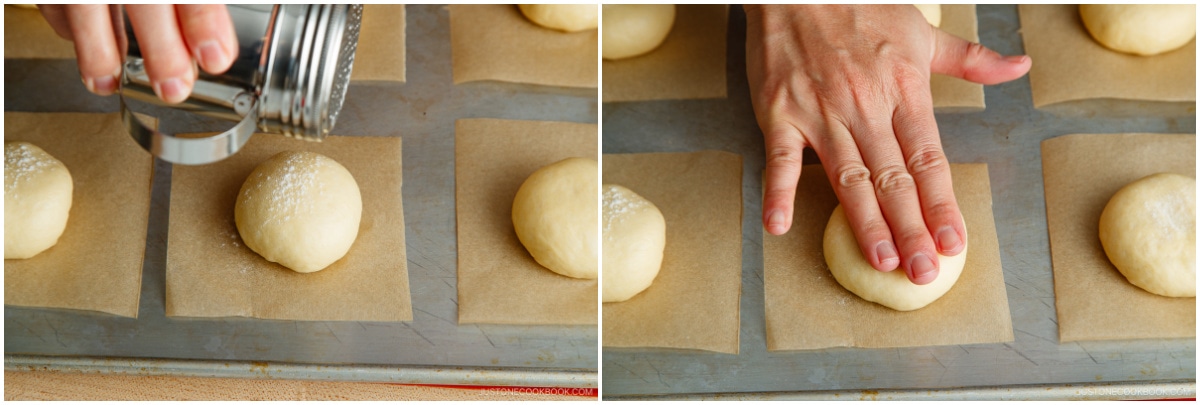
- Dust a little bit of bread flour on top and gently press down to flatten the rounded top of the dough.
The Final Rise (Proofing)
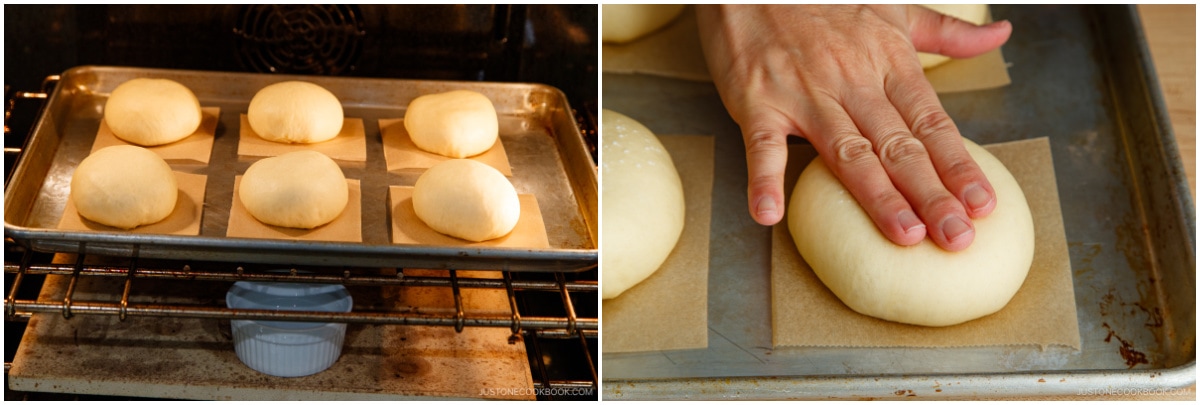
- Cover the dough with another baking sheet and place in your oven to proof. Add more boiling water to the dishes in your oven to create a humid proofing environment. Proof until the dough doubles in size, about 40–50 minutes.
To Deep-Fry the Dough
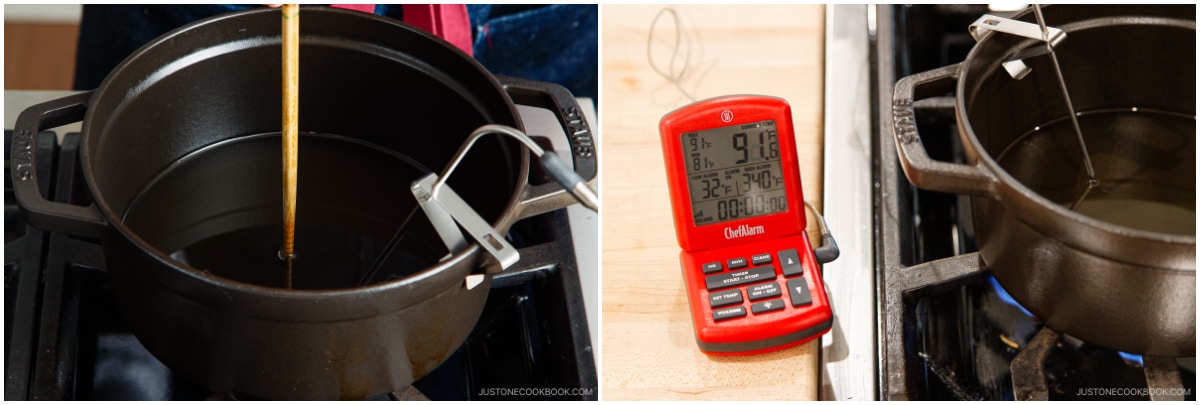
- To a Dutch oven (I love this 2.75-quart Staub Cast Iron Round Cocotte) or heavy-bottomed pot, add 3 cups neutral oil or as much needed for 1 inch (2.5 cm) of oil in the pot. Heat over medium heat and bring it to 340ºF (170ºC). Set up a thermometer, if you have one. I highly recommend the ThermoWork’s ChefAlarm. Set the alarm on your thermometer to a low of 300ºF (150ºC) and a high of 340ºF (170ºC).
- When the dough balls have doubled in size, dust some bread flour on top and gently press down to flatten the rounded top of the dough.
- Fry two donuts at a time and don‘t overcrowd the pot. Pick up the parchment square corners and carefully transfer the dough into the oil. Immediately remove the paper. Fry until they are brown on the bottom, for 55–60 seconds. If the oil temperature drops, fry a little longer, for 70–80 seconds.
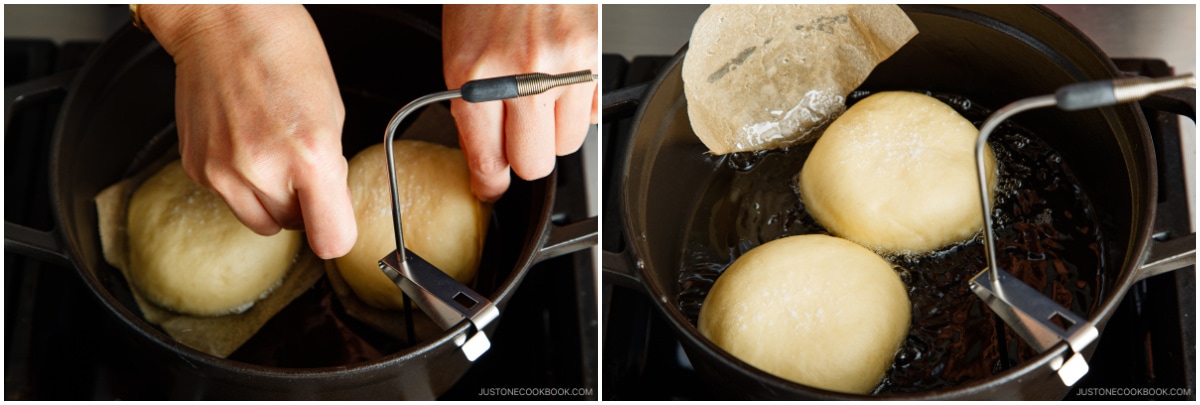
- If an air bubble forms in the dough, pop it with a skewer. Using a fine-mesh skimmer with a flat bottom, flip to cook the other side for another 55–60 seconds. Tip: Do not overcook the donuts as the remaining heat will continue to cook inside.
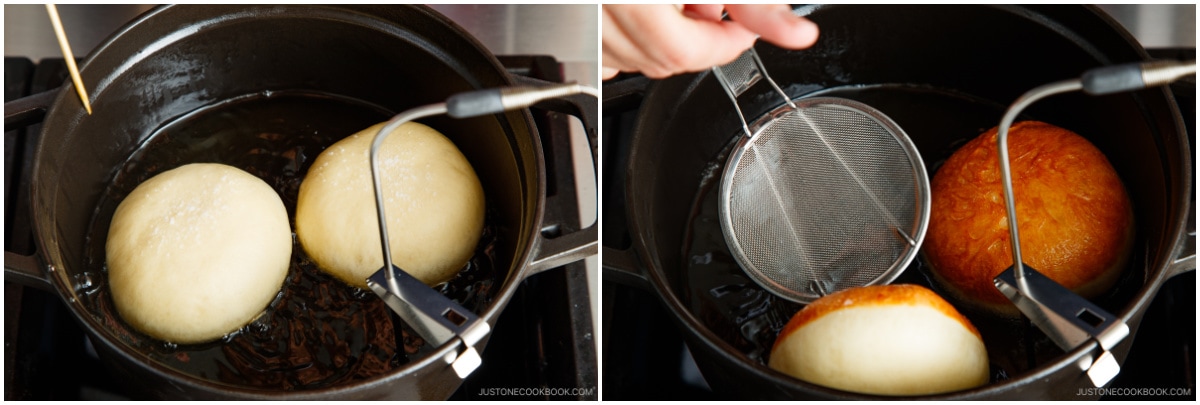
- When both sides of the donuts are nicely brown, remove with a fine-mesh skimmer, drain the oil, and transfer them to a wire rack. Continue frying the remaining dough.
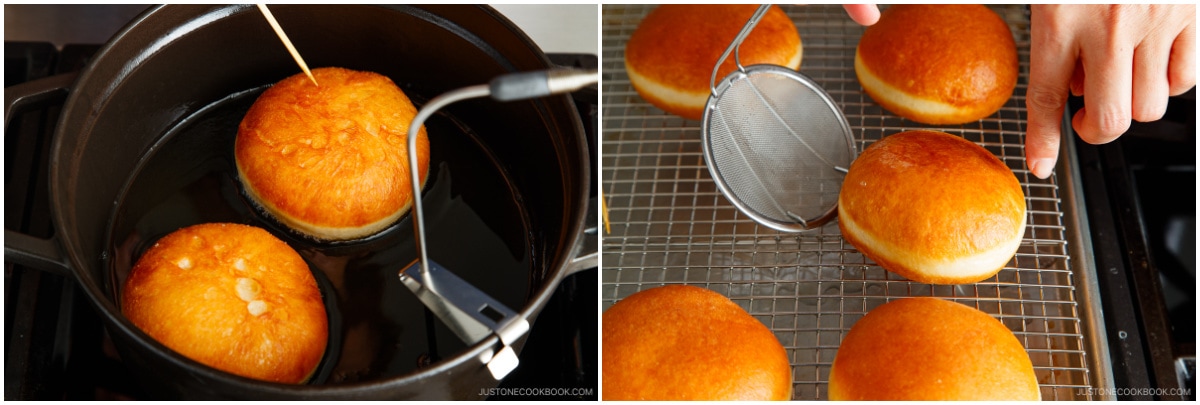
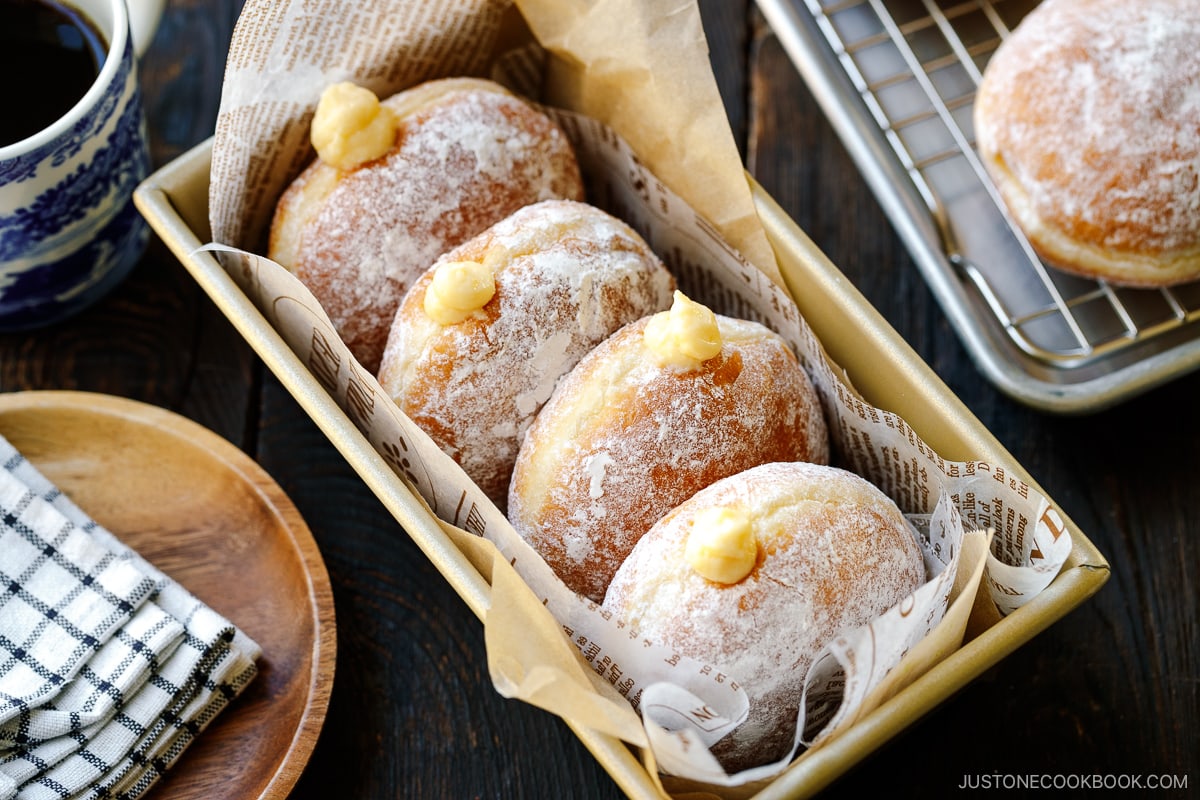
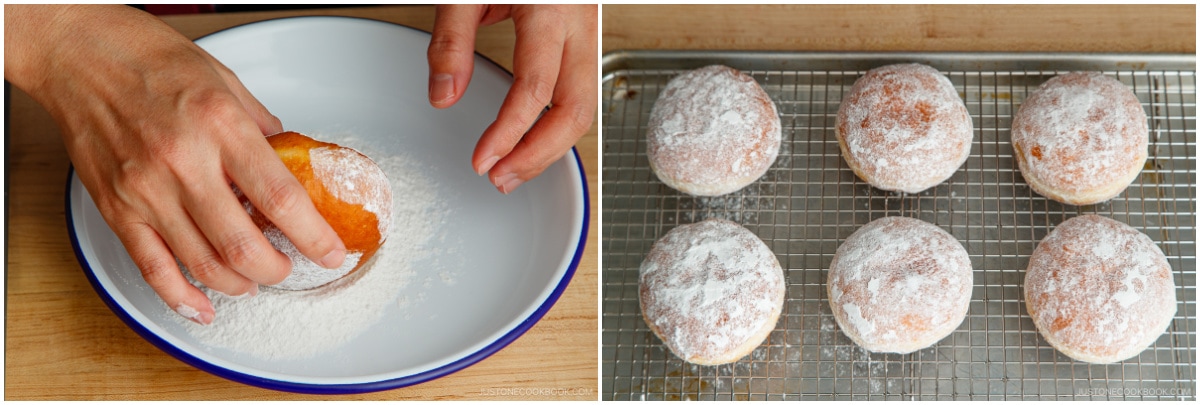
- When the donuts are slightly cool, roll them in confectioners’ sugar to dust on all sides. Serve warm or at room temperature.
To Fill with Custard
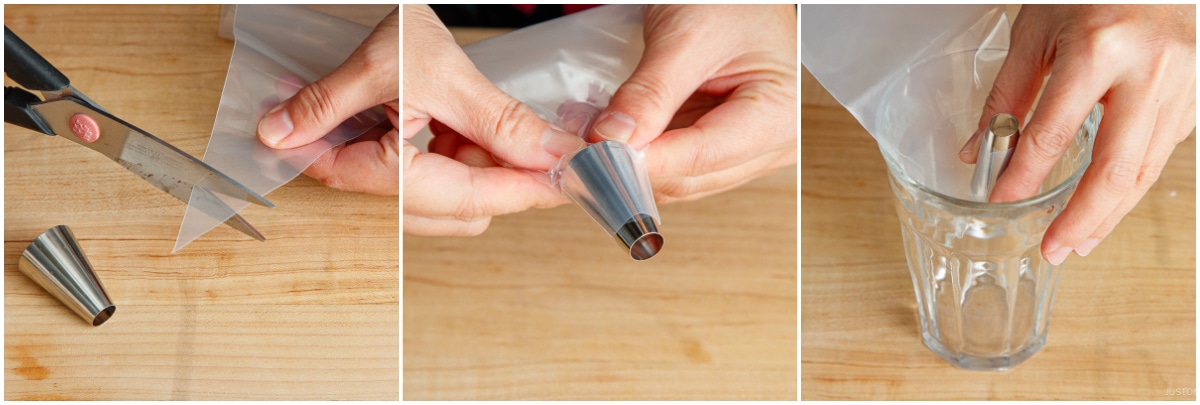
- Fill the donuts with custard cream just prior to serving. Cut the tip of a piping bag. Push a Wilton 2A decorating tip into the bag‘s tip so the metal sticks out a bit. Fold the tip end up (so the custard doesn‘t come out) and put the bag into a tall glass.
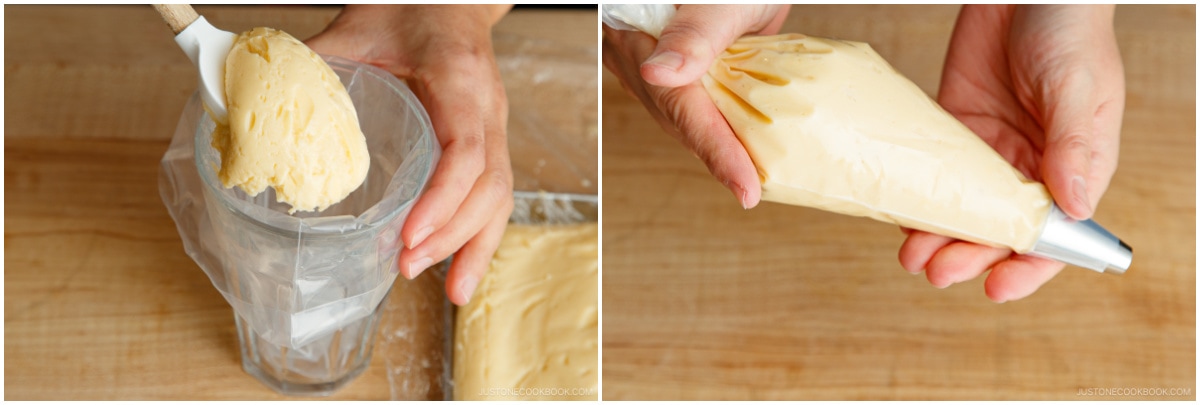
- Fold down the top half of the bag outward over the cup‘s edge. Transfer the chilled custard into the piping bag with a spatula. Once you fill the bag halfway, unfold the top half of the bag and push the custard down toward the tip. Twist the piping bag and squeeze it to test that the custard comes out smoothly. Set aside.
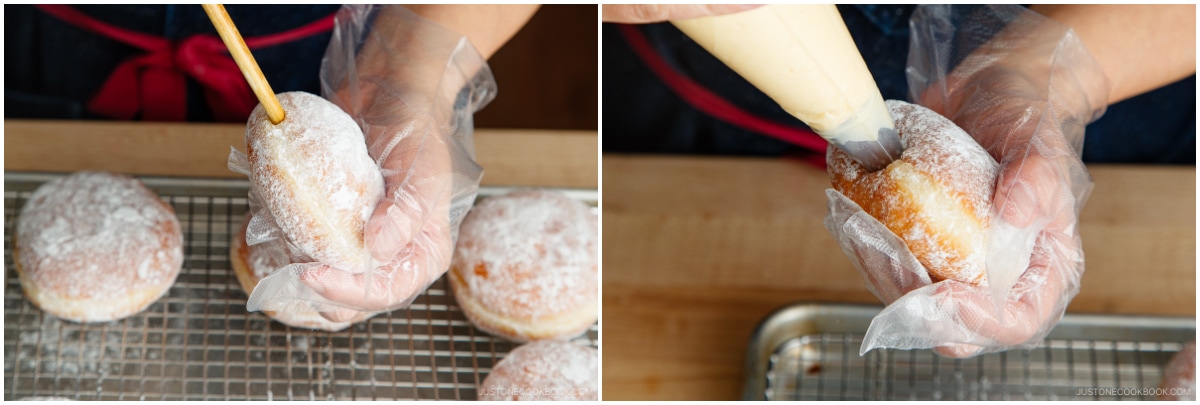
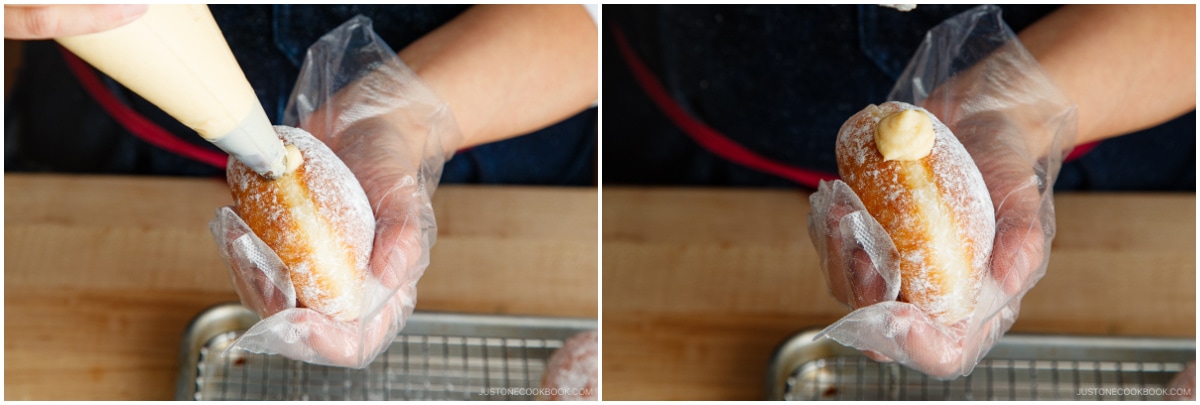
- Insert a chopstick tip into the side of a donut to make a hole. Make sure you don‘t poke through to the other side. Wiggle the chopstick inside the donut to create space for the custard. Repeat with the rest of the donuts. Then, pipe the custard into the donuts to fill until it is plump and swollen.
- Pipe an extra dollop of custard at the opening to decorate. Enjoy!
To Store
- Enjoy the Nama Donuts on the same day you make them. You can keep the unfilled donuts in an airtight container at room temperature for a day or in the freezer for up to 1 month. Fill the donuts with custard cream just prior to serving. Store the homemade custard filling for up to 2–3 days in the refrigerator. To prevent a film from forming, place a piece of plastic wrap on top of the custard.


does the dough need to pass the windowpane test? thanks
Hi, Sophie! Thank you very much for trying this recipe!
You can simply follow Nami’s instructions to skip the windowpane test.
We hope you enjoy Nama Donuts!🤗
Hi, I’ve tried this recipe and it’s AMAZING!!!!!
Thank you so much for sharing this recipe! I’ve been constantly looking for donuts that’s soft and chewy like this so THANK YOU!
Also, can I make this recipe into baked bread?
Again, thanks!
Hi Yanti! We are so happy to hear you enjoyed Nama donuts!
We have not attempted to bake this and are unsure of the outcome. Please let us know how it goes if you try it!🤗
This recipe looks amazing🔥Do you know the amount of kabocha paste if I wanted to try the original version. Is kabocha paste handmade or is it something it’s bought in store in Japan? Thanks!
Hi Raffaella! I’m not sure, and probably it’s their secret. I assume it’s homemade kabocha paste (I recommend passing the paste through a fine-mesh sieve to remove the fibers).
This looks similar to Italian donuts called Bomboloni. I don’t like to deep fry so maybe I’ll spray some oil on the surface of the dough and try air frying it.
Hi Jessica! Yeah, I just saw the picture! I don’t own an air fryer so I won’t be able to see if that will work, but please keep us posted. This deep frying doesn’t involve any water/moisture so there will be very quiet deep frying (no splatter) and the oil will stay clean for other oil uses. Also, one minute (or less) each side, so it’s fast. I’m just trying to encourage. haha. 🙂
You can definitely use instant yeast for this, but you’ll want SAF gold yeast. It’s made specifically for sweet doughs.
Hi Lissa! Thank you so much for reminding me to write that in the post/recipe card. My bread isntructor uses it, and her sub suggestion was active dry yeast. It looks like Amazon restock it. I couldn’t find Saf gold in my neighborhood or Amazon when I was testing this recipe.
This looks delicious and I would love to make it! Can I still make this without a stand mixer?
Hi Claire! I haven’t kneaded this very wet dough with hands. I can imagine you will be tempted to introduce more dough, but please don’t, if you want to keep it fluffy and airy texture. It will end up with a dense texture with more flour added (hence, I highly recommend measuring flour precisely with a scale). Also, please note that it will involve a lot of arm work. As you see in the steps, we knead the dough in high speed for a long time (unlike other donut recipes that use low speed). If you can replicate this similar kneading motion, I think you can. You need good pastry cards and a silicone mat for a wet dough as you don’t want to introduce more flour. Hope you enjoy the recipe!
These look delicious – but can’t convert all the measurements from metric. SAD!
Hi Vi! Thank you so much for your feedback.
Both Shokupan (Japanese milk bread) and Nama Donut recipes are provided by my bread instructor Mariko, so I want to keep the recipes as they are originally written. We believe that measuring the ingredients precisely is crucial for the light and airy texture of these donuts.
Unfortunately, with a cup measure, it always adds more flour than needed, even practicing the fluff and scoop method (https://www.justonecookbook.com/how-to-measure-flour/). For the baking recipes that are more forgiving, I always and will continue to provide cup measurements.
I want everyone to succeed in making this donut recipe, with the right texture. And I’ll always be the advocate on using a kitchen scale for baking recipes to minimize my readers’ errors and disappointments.