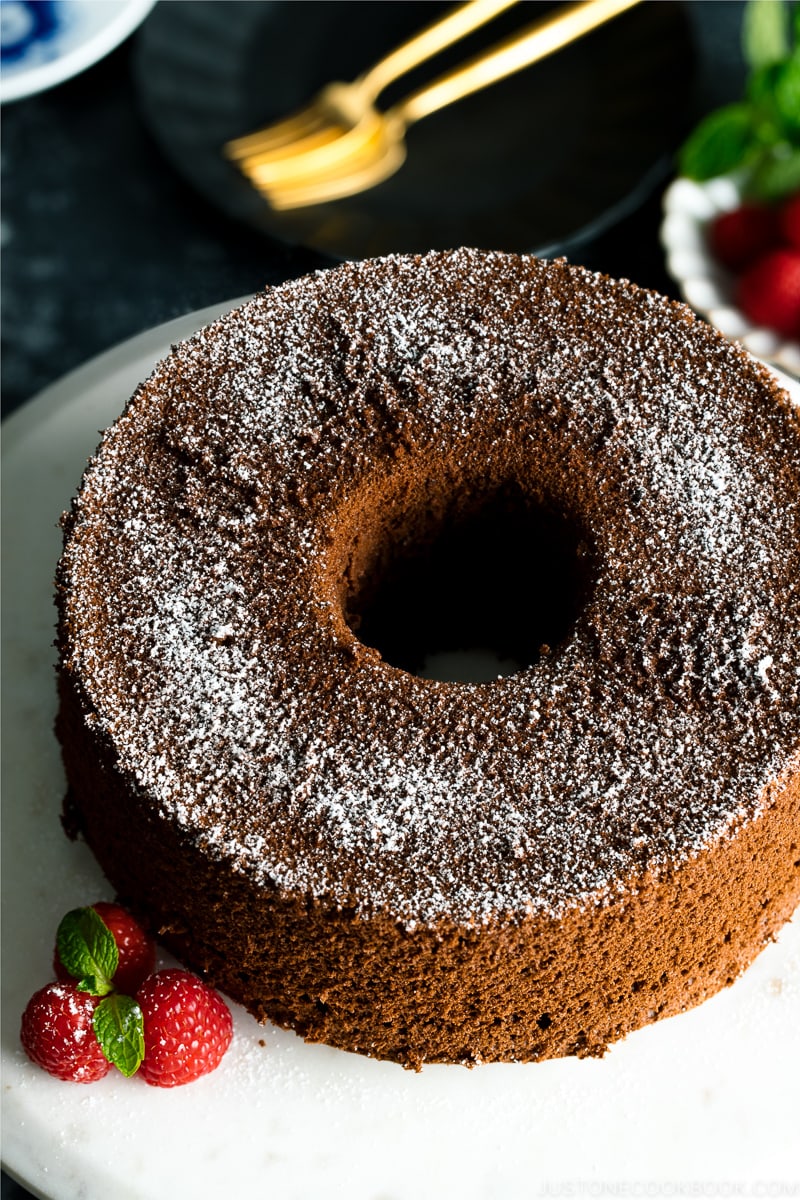
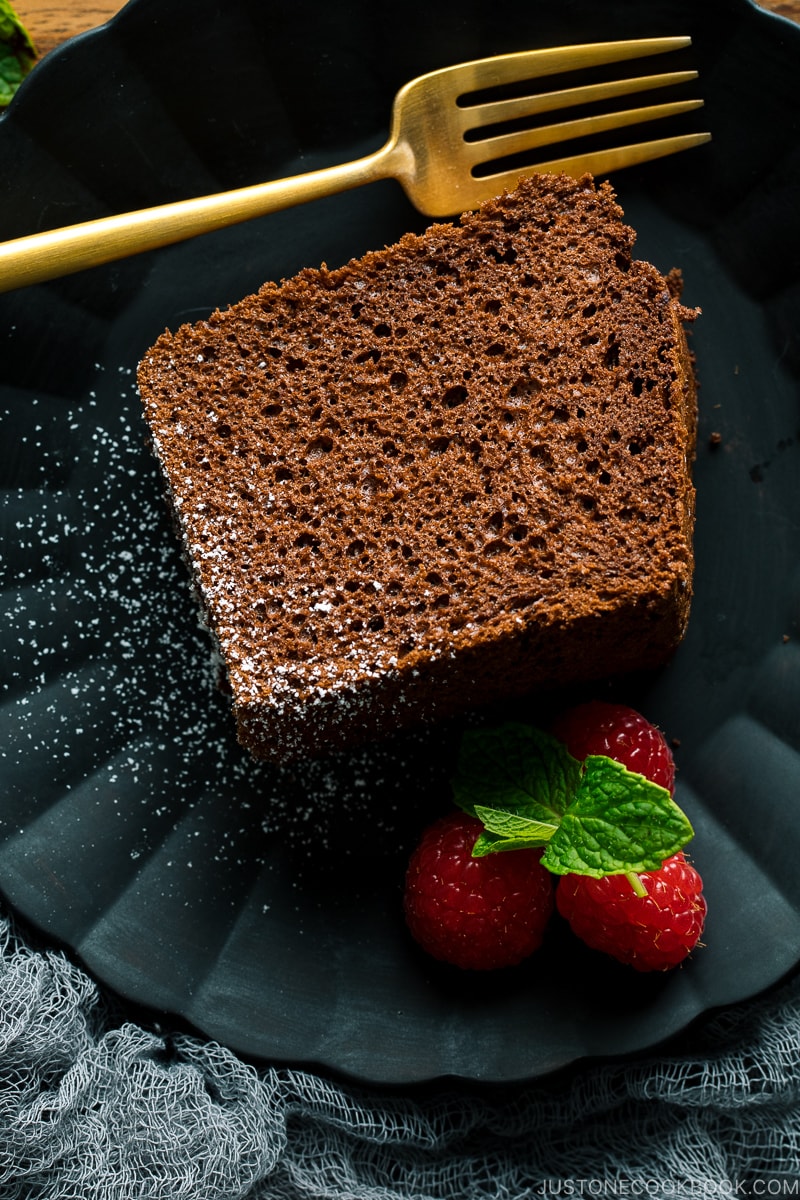
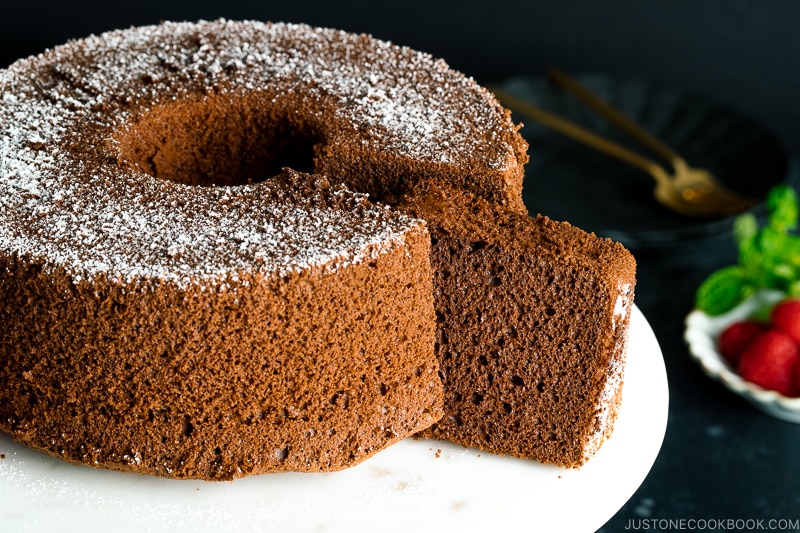
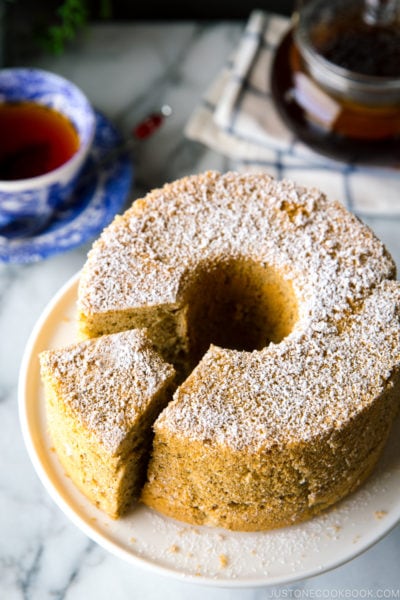
This classic Chocolate Chiffon Cake is airy, light, and spongy with a rich chocolate flavor and mild sweetness. Extremely popular in Japan, chiffon cakes are found in cafes and pastry shops across the country. This showstopper recipe will soon be your favorite dessert, too.
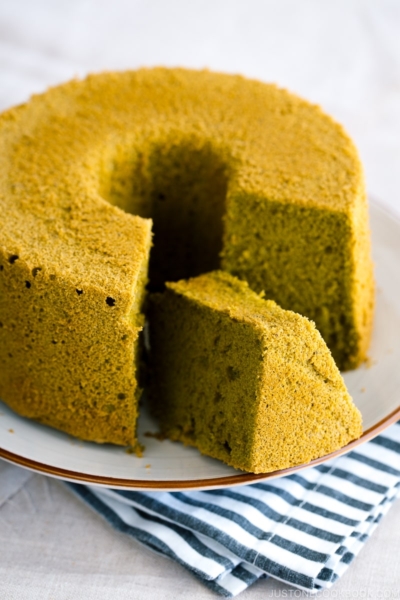
Chiffon cakes are extremely popular in Japan, probably more so than in the U.S. You can find all kinds of chiffon cake flavors in coffee shops, pastry shops, and sweets stores. From Green Tea Chiffon Cake to Black Sesame Chiffon Cake, unique Japanese flavors are all the rage and they are the ones you want to try when you’re in Japan.
Today we’re going classic. Because we can never have enough chocolate in our life, here is the much anticipated Chocolate Chiffon Cake!
Table of Contents
Why You Should Make This Chocolate Chiffon Cake
- Easy (compared to Japanese Souffle Cheesecake or Japanese Strawberry Shortcake)
- Just 8 ingredients
- No butter, just 4 tablespoons of oil
- Extra moist
- Light and soft with a velvety crumb
- Rich and deeply flavorful
This is, without a doubt, the best chocolate chiffon cake my family loves!
How to Make Chocolate Chiffon Cake
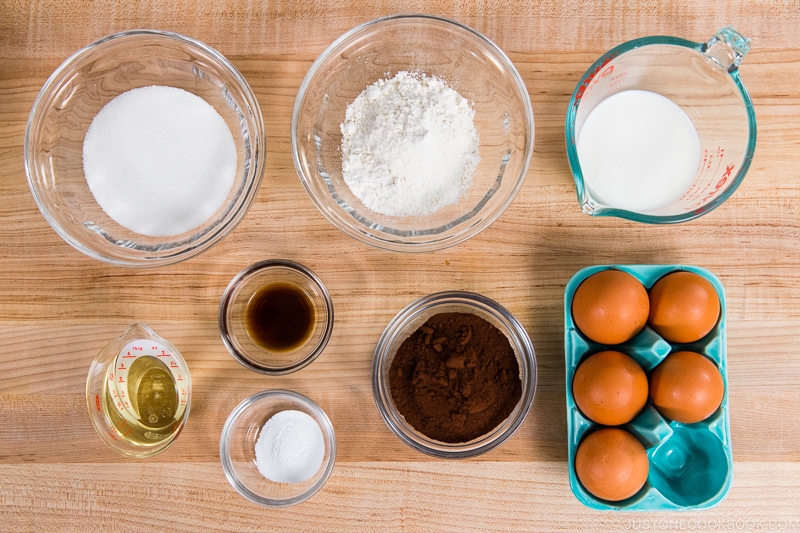
Ingredients You’ll Need
Each ingredient serves an important role in this cake. For the best results, I do not recommend making substitutions unless stated otherwise.
- Eggs: I use American large eggs and one large egg is about 50 grams without a shell (56.7 g with a shell).
- Granulated sugar: I use granulated white sugar for baking.
- Neutral flavored oil: I use untoasted sesame oil (no flavor) for this recipe. You can use canola or vegetable oil.
- Whole milk: I used cow’s milk but you can use other types of milk or water.
- Vanilla extract: Use good quality vanilla to add flavor.
- Cake flour: Do not substitute! For chiffon cake, you need cake flour (薄力粉 Hakurikiko if you’re in Japan). Can’t find it? You can make it yourself with all-purpose flour and cornstarch (See Notes in my recipe).
- Baking powder: Some people do not use BP for a chiffon cake, but I use it for lifting.
- Dutch-processed cocoa powder: We’ve been using the Droste brand of cocoa powder (mostly used by my daughter who bakes) and we love it. I found this article online that explains a bit more about which cocoa powder you should buy (in short, they recommend Droste brand). You can purchase it on Amazon (but comes with a pack of 3)
Overview: Cooking Steps
You can make this chocolate chiffon cake with a simple whisk and bowl, but I highly recommend using an electric mixer or a stand mixer for beating egg whites to save your arm from falling off.
- Mix wet ingredients in one bowl and add dry ingredients.
- Beat the egg whites in another bowl with the electric mixer or stand mixer, and then combine with the batter.
- Pour the batter into the 20-cm (8-inch) chiffon cake pan and bake for 40 minutes!
2 Tips to Make Perfect Meringue (Egg Whites)
Tip #1: Chill egg whites
I know, it’s the total opposite of what you learned from American recipes. I’ve seen most of the American recipes use room-temperature egg whites to make the meringue. However, almost all (99%) Japanese chiffon cake recipes require cold, well-refrigerated, or sometimes half-frozen egg whites, to make meringue without cream of tartar. Chilled egg whites will make very fine and smooth meringue with small and strong air bubbles inside. They remain strong even in the oven and help the batter rise higher and fluffier. If you are not from the US, which method do you use?
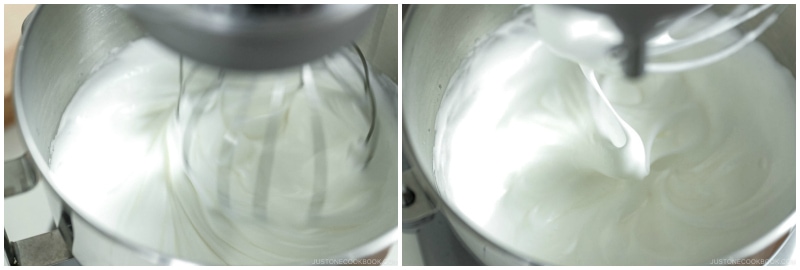
Tip #2: Whisk until stiff peak with a tip that folds over
There is always discussion on how much you should beat the egg whites. From my experience, it’s best to stop the mixer when you’re close to finishing to check the condition of the peaks. When you lift the whisk, the egg whites in the bowl or on the whisk should be firm enough to go straight up and hold a stiff peak, but just the very tip may fold over a little, like taking a bow. The meringue should have a slightly glossy texture, too.
Then, switch from the hand-held electric mixer (or stand mixer) to a balloon whisk, and thoroughly mix the sides and center of egg whites a few times to get to the same consistency throughout.
How to Make Perfect Chiffon Cake
Chiffon cakes are one of the easiest cakes you can make at home. However, it took me some trial and error until I could make a really good one. Mostly because I had a hard time beating the egg whites and folding the batter correctly.
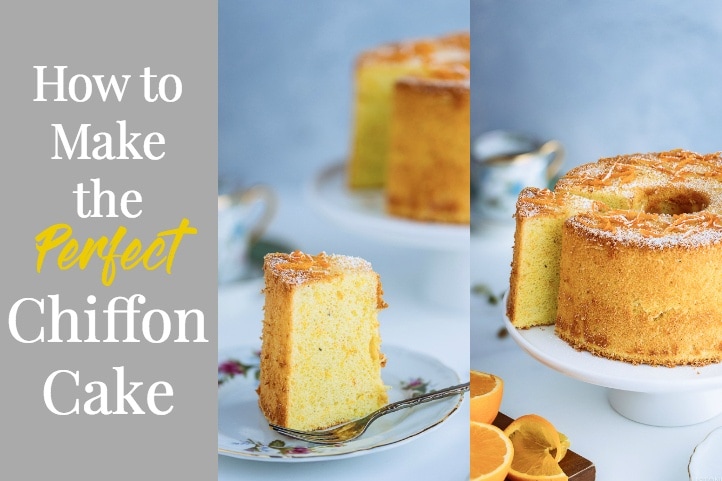
So I put together my tips in this post, including ingredient measurements for all the different chiffon cake pan sizes.
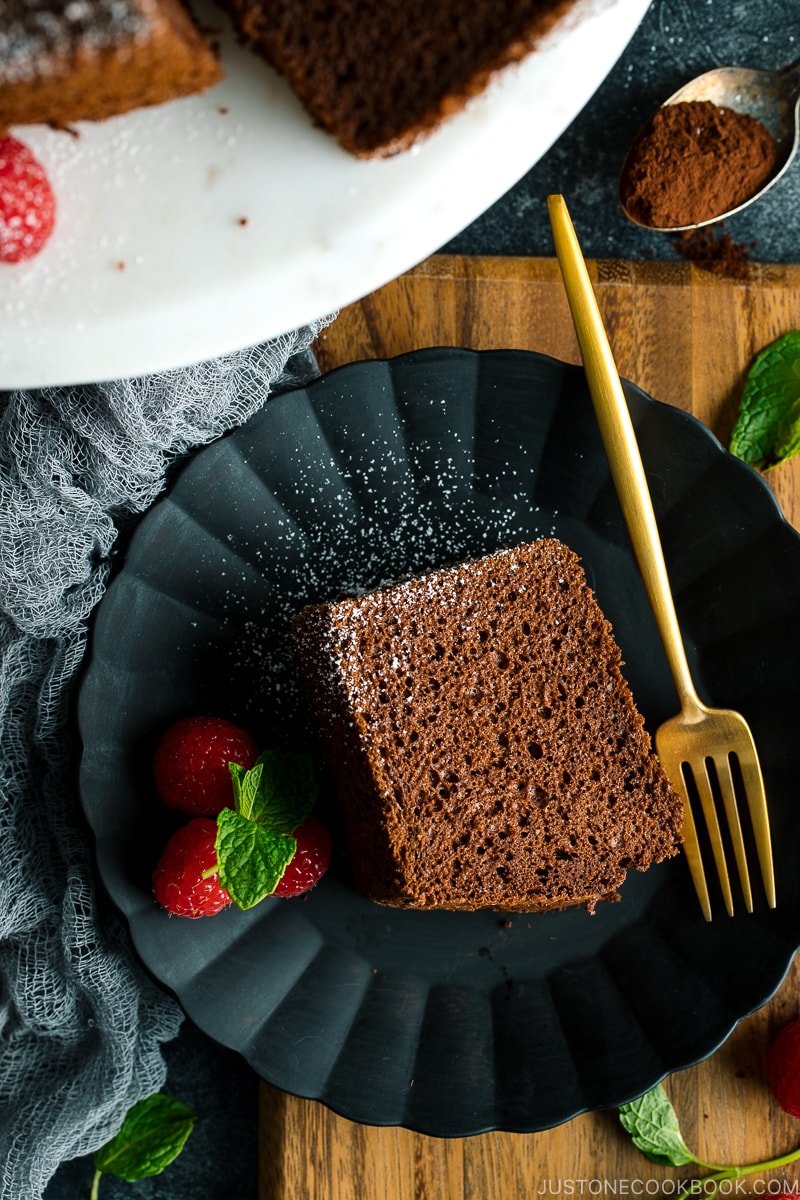
Enjoy this light, fluffy, yet rich chocolate chiffon cake with a cup of earl grey tea or coffee! It is a keeper, especially if you like chocolate and light spongy cakes.
FAQs
How can I convert this recipe to a different chiffon cake pan size?
You can figure out ingredients (eggs, sugar, etc) for your pan that is 7 inches (17 cm), 8.5 inches (22 cm), 9 inches (23 cm), or 10 inches (25 cm) in this post.
Important! You have to take away some cake flour to replace it with cocoa powder for the chocolate chiffon cake, here’s the measurement.
- 7 inches (17 cm): 25 g cocoa powder + 50 g cake flour
- 8 inches (20 cm): 40 g cocoa powder + 80 g cake flour
- 8.5 inches (22 cm): 50 g cocoa powder + 100 g cake flour
- 9 inches (23 cm): 60 g cocoa powder + 110 g cake flour
- 10 inches (25 cm): 70 g cocoa powder + 140 g cake flour
How about Double Chocolate Chiffon Cake?
I knew you would ask this question, so I did try making a Double Chocolate Chiffon Cake recipe several times. What do I mean by “double”? Chocolate is used two times: cocoa powder and melted chocolate.
I tried adjusting the ratio of the cocoa powder and melted chocolate to make the cake as light as possible, but the richer the chocolate cake is, the denser it gets. It loses the bouncy, airy, light “chiffon cake” texture. The cake resembles more like a pound cake, instead of a chiffon cake.
Another issue I had with double chocolate was that the cake does not rise as tall as the chiffon cake with only cocoa powder. For example, I would have to use a 7″ (17 cm) chiffon cake pan for the ingredients for 8″ (20 cm) chiffon cake to get a decent “chiffon cake” height.
In the end, I was not quite satisfied with the result (and can’t call that “chiffon cake”), so I increased the cocoa powder in the batter to get more chocolate flavor. My chocolate to cake flour ratio is 1 to 2 (40 g cocoa powder: 80 g cake flour). If you decrease the cocoa powder to 20 g (1 to 6 ratio), the cake will become taller, but have less “chocolate-ty” taste.
Other Delicious Chiffon Cake Recipes
Wish to learn more about Japanese cooking? Sign up for our free newsletter to receive cooking tips & recipe updates! And stay in touch with me on Facebook, Pinterest, YouTube, and Instagram.
Chocolate Chiffon Cake
Video
Ingredients
- ⅔ cup cake flour (weigh your flour or use the “fluff and sprinkle“ method and level it off; you can make Homemade Cake Flour)
- 1¼ tsp baking powder
- ½ cup Dutch-process cocoa powder
- 5 large eggs (50 g each w/o shell) (separated into whites and yolks)
- ⅔ cup granulated sugar (divided in half)
- ¼ cup neutral oil (4 Tbsp)
- 95 ml whole milk or water (⅓ cup + 1½ Tbsp)
- 1 tsp vanilla extract
For Serving
- 1 Tbsp confectioners’ sugar (for dusting; optional)
Instructions
Before You Start…
- Gather all the ingredients. I highly encourage you to weigh your ingredients using a kitchen scale for this recipe. Click on the “Metric“ button at the top of the recipe to convert the ingredient measurements to metric. If you‘re using a cup measurement, please follow the “fluff and sprinkle“ method: Fluff your flour with a spoon, sprinkle the flour into your measuring cup, and level it off. Otherwise, you may scoop more flour than you need.
- Preheat the oven to 340ºF (170ºC). For a convection oven, reduce the baking temperature by 25ºF (15ºC). You will also need a 20-cm (8-inch) chiffon cake pan. If you have a different size pan, read my chiffon cake post to adjust the ingredients as well as the blog post of this recipe for the cocoa amount. Please see my Notes at the end of this recipe for additional details on ingredients and techniques.
To Mix the Batter
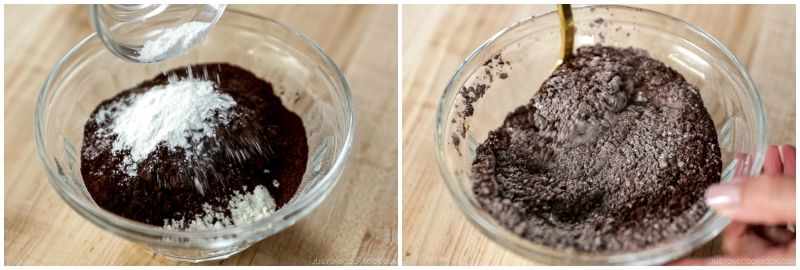
- In a bowl, combine ⅔ cup cake flour, 1¼ tsp baking powder, and ½ cup Dutch-process cocoa powder and mix well with a fork or whisk. Set aside these dry ingredients.
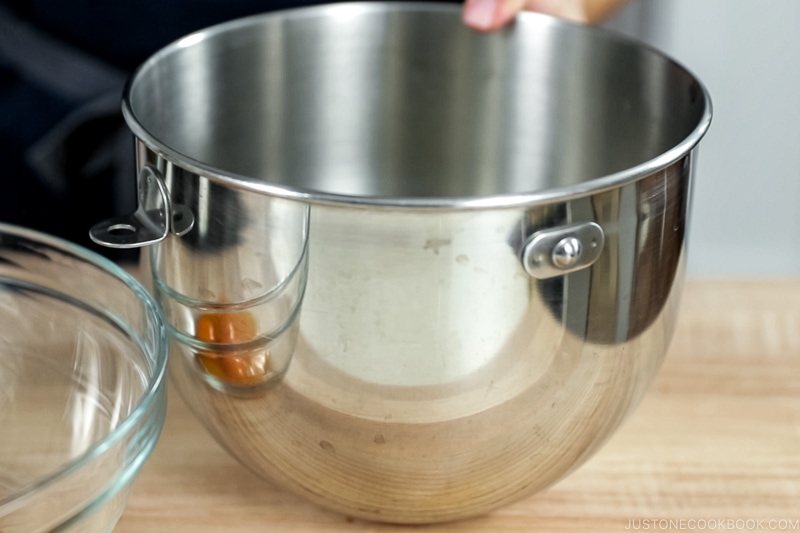
- Separate 5 large eggs (50 g each w/o shell) into yolks and whites. Keep the egg whites in a stand mixer bowl and the egg yolks in a large mixing bowl.
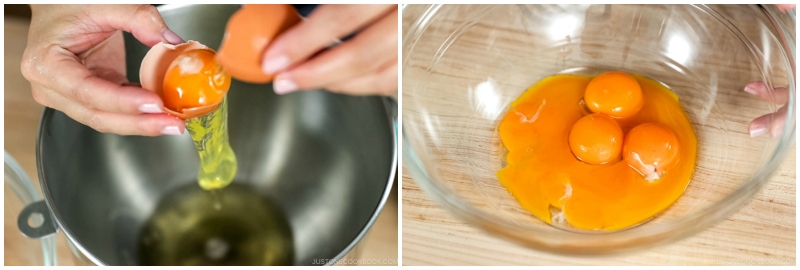
- Refrigerate or freeze the bowl with the egg whites for 15 minutes so both the bowl and egg whites are cold. (It’s okay if the egg whites are partially frozen). Tip: In Japan, we chill the egg whites to make smooth, fine-textured meringue and do not use cream of tartar.
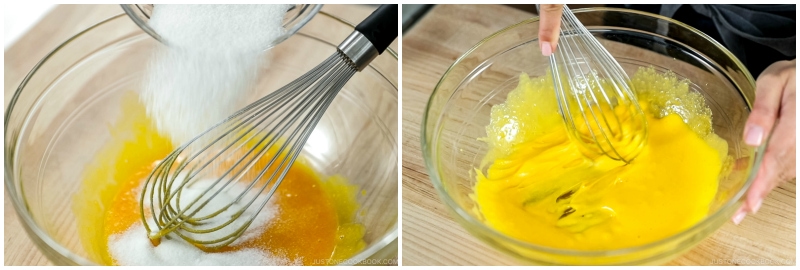
- Now, start mixing the batter. First, beat the egg yolks with a hand whisk (or stand mixer).
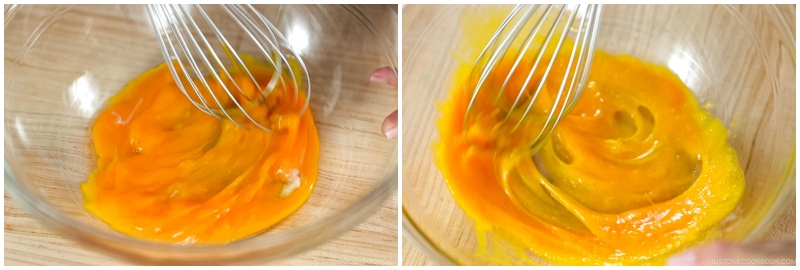
- Add half of the ⅔ cup granulated sugar. Whisk vigorously until it’s a creamy pale yellow color.
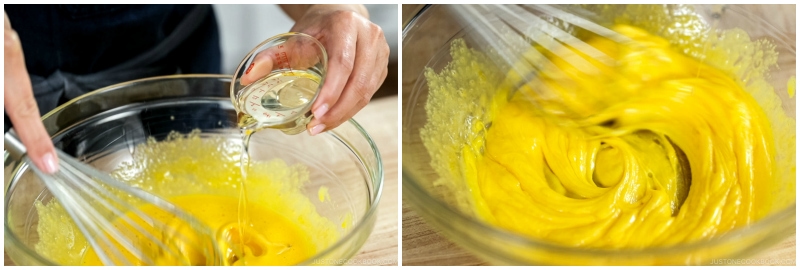
- Add ¼ cup neutral oil and beat with a whisk to combine.
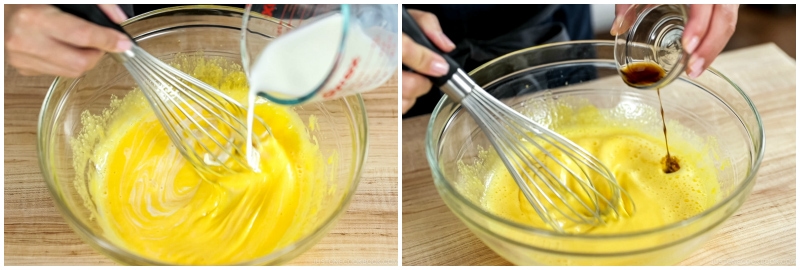
- Add 95 ml whole milk or water (⅓ cup + 1½ Tbsp) and 1 tsp vanilla extract and combine well.
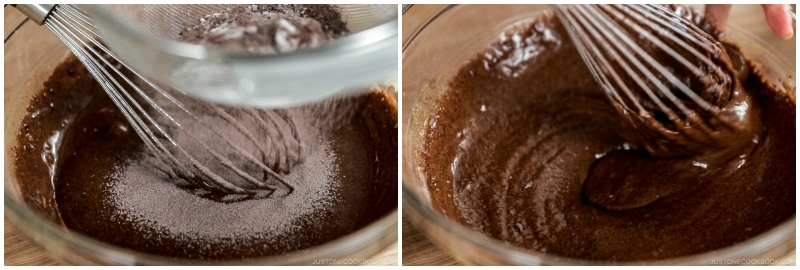
- Using a fine-mesh sieve, sift half of the dry ingredients into the bowl with the egg mixture. Using a hand whisk, mix well to combine.
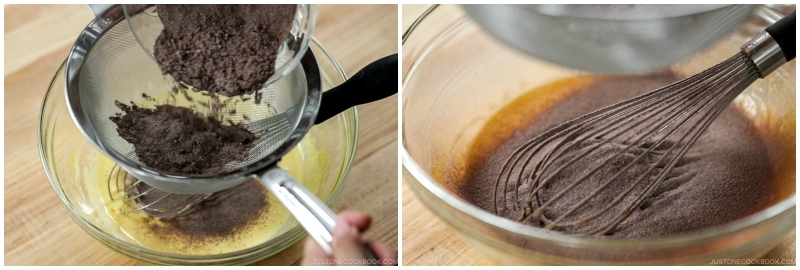
- Sift the rest of the dry ingredients into the bowl and whisk by hand until just combined; do not overmix. Make sure there are no lumps in the batter. Set aside while you beat the meringue.
To Make the Meringue
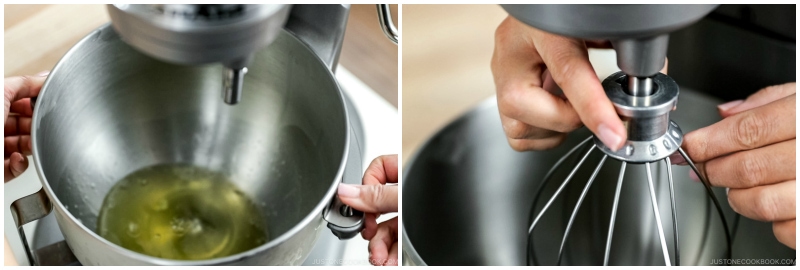
- Take out the bowl of egg whites from the refrigerator or freezer. Set the bowl on the stand mixer with a whisk attachment (I used the KitchenAid Professional Series).
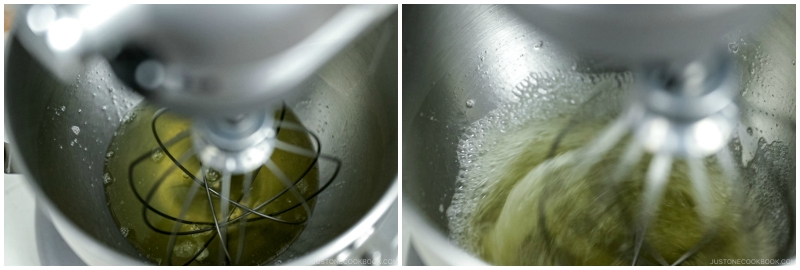
- Start whipping the egg whites on medium speed (Speed 5) until the egg whites are bubbly, opaque, and foamy.
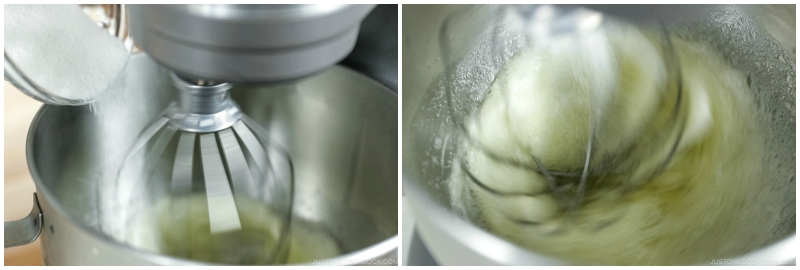
- Gradually add the remaining half of the granulated sugar in small increments while whisking. Once you add all the sugar, increase to a higher speed (Speed 8) and beat vigorously until stiff peaks form (see the next step for how to check). Tip: I usually pause beating when the egg whites are almost done. Take off the whisk attachment from the mixer and use it to hand-mix the looser egg whites near the bowl‘s edge into the stiffer whites near the center until it‘s all homogenous in texture. Then, put the whisk back on and continue beating.
- To check for stiff peaks, pull up your whisk. The egg whites in the bowl or on the whisk should be firm enough to hold a peak, pointing straight up (or maybe a little bit folding over just at the very tips). By this time, the meringue should have a glossy texture, too. If you overbeat the meringue, it will become very stiff and grainy and won‘t incorporate into the batter at all.
To Fold In the Meringue
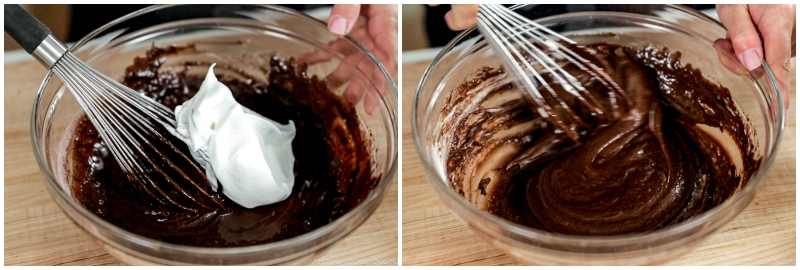
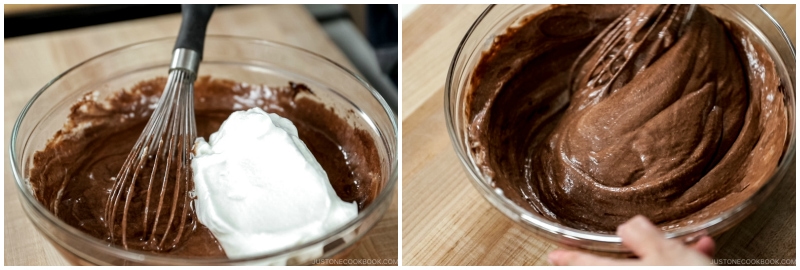
- Using a hand whisk, take one-quarter of the meringue from the bowl and add it to the batter. Whisk well by hand to combine until homogenous.
- Take one-third of the meringue left in the bowl and this time, gently fold it into the batter without deflating the air bubbles in the meringue and batter.
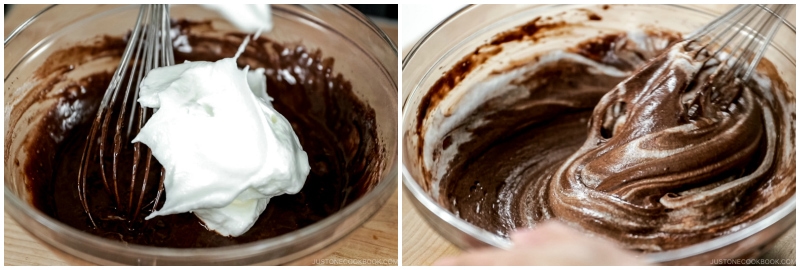
- Take another third and repeat the gentle folding process.
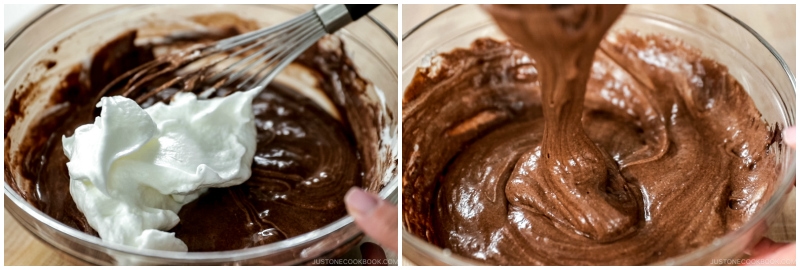
- Take the final third and gently fold it in. Make sure to thoroughly mix without deflating the air bubbles.
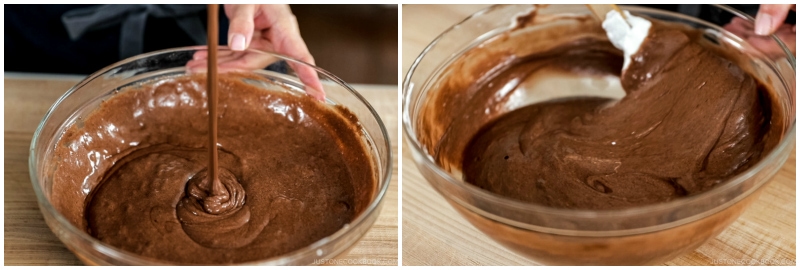
- The final batter should fall in ribbons when you lift the whisk. The image to the left below shows you what the ribbon stage looks like. Lastly, switch to a spatula and fold the batter one last time, scraping the sides and bottom of the bowl to make sure there is no chocolate accumulation.
To Bake
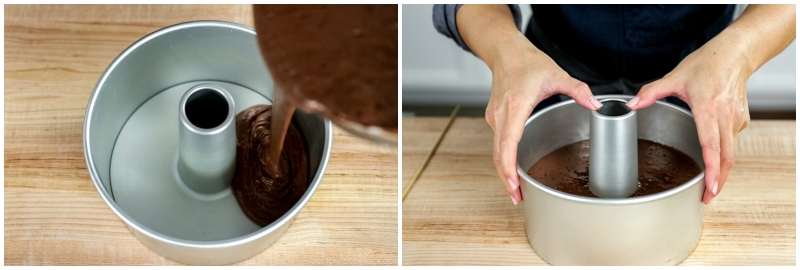
- Prepare an ungreased 20-cm (8-inch) chiffon cake pan. From 6–8 inch high, pour the batter into the pan at just one spot to prevent air bubbles from forming. While holding the removable base in place, gently tap the cake pan on the work surface to release any air pockets in the batter.
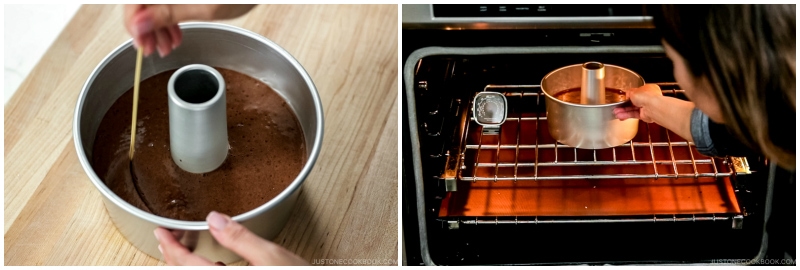
- Run a wooden skewer through the batter to release any remaining air pockets. Put the cake pan on the middle rack of the oven and bake at 340ºF (170ºC) for 35–40 minutes (40 minutes for my oven).
- To check that it‘s done baking, insert a wooden skewer into the middle of the cake. If the skewer comes out clean and the top of the cake springs back when gently pressed, it‘s done. Tip: If the top of the cake gets dark too quickly, cover the top loosely with aluminum foil to prevent burning. (The cake may be too close to the heat source.)
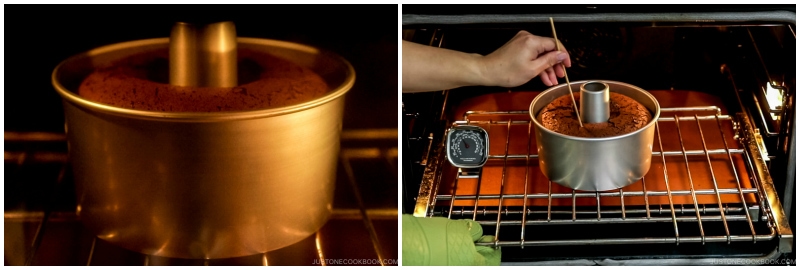
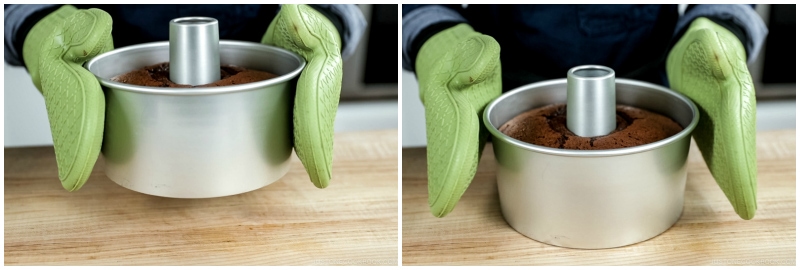
- Remove the cake pan from the oven and gently drop the pan onto the work surface to shock the cake. This stops the cake from shrinking.
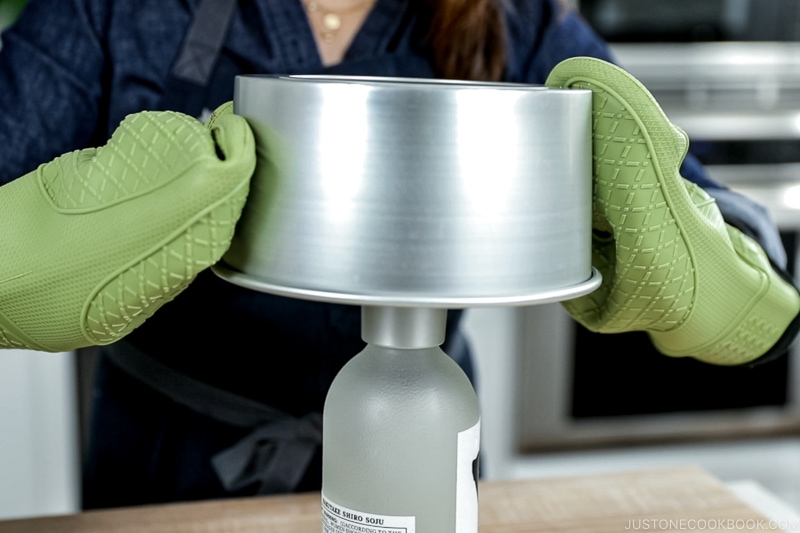
- Prepare a bottle with a long neck, such as a glass wine bottle. Invert the center tube of the cake pan onto the bottle‘s neck and let the cake cool completely in its pan. Cooling the cake upside down helps it stretch downward and maintain its loft.
- Once the cake is completely cool, run a long offset spatula around the outer edge of the pan and a small offset spatula around the inner tube. Tip: I used to use a knife, but the tip of the knife tends to poke the cake while moving around, so I switched to offset spatulas.
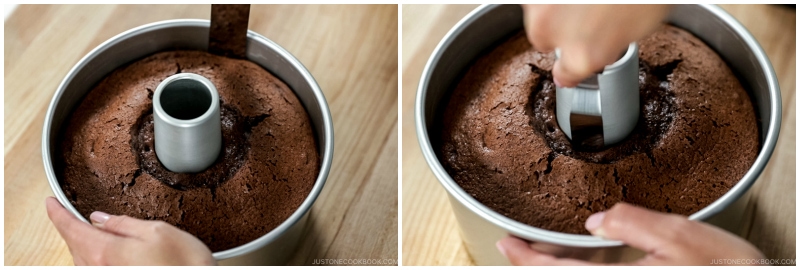
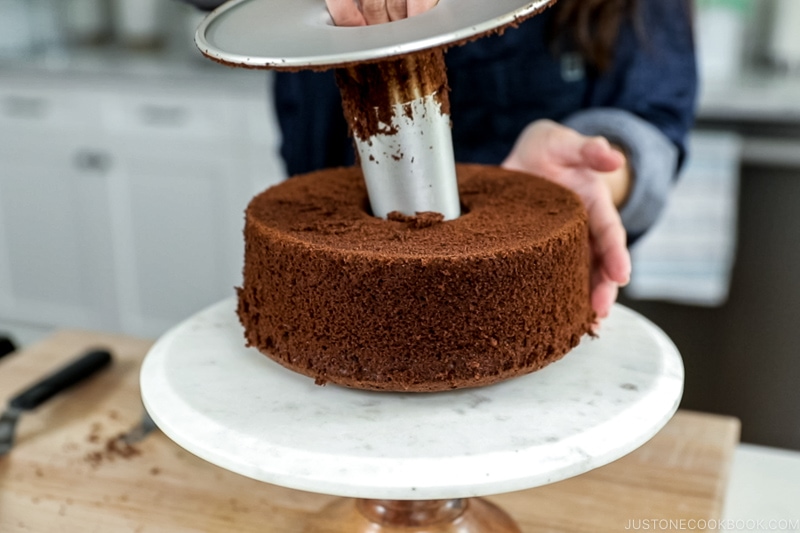
- Gently take out the removable base and cake from the outer pan. Then, run the offset spatula along the bottom of the cake to release it from the base.
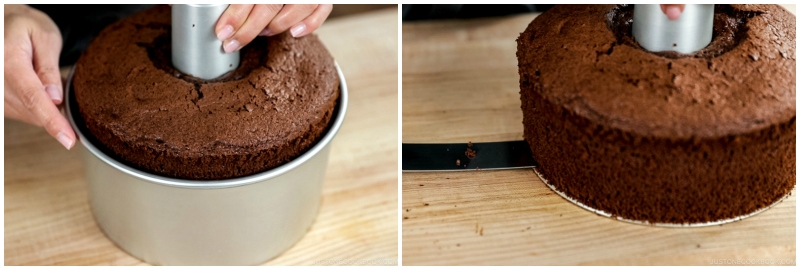
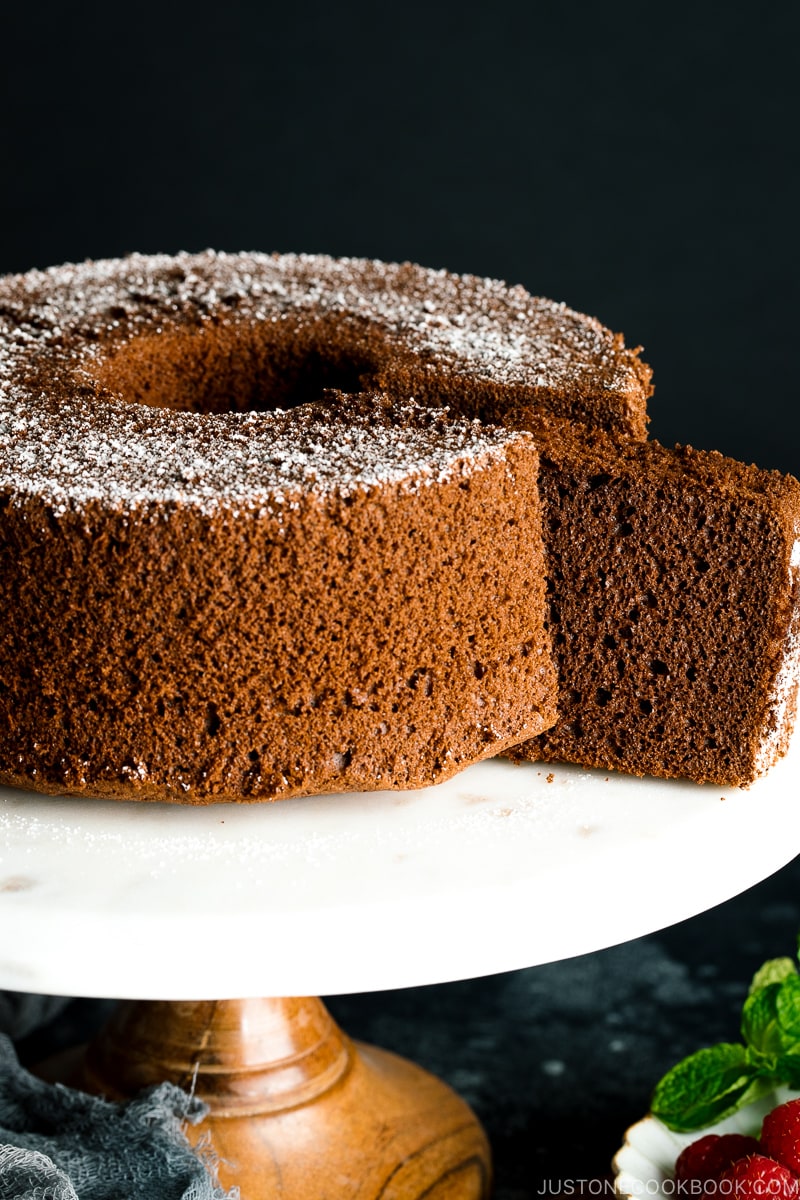
- Invert the cake with the removable base onto a plate or cake stand. The cake will slide off the inner tube. Chiffon cake is served “upside down” with the flat bottom on top.
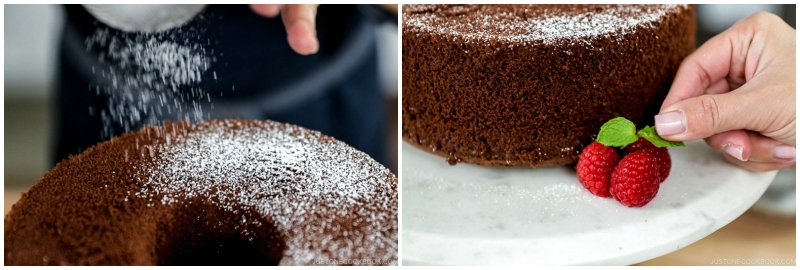
To Serve
- Dust the top of the cake with 1 Tbsp confectioners’ sugar and decorate with raspberries and mint leaves, if you‘d like. Slice and enjoy.
To Store
- I strongly recommend consuming the cake sooner for the best freshness. However, you can keep the cake covered on a plate or stand at room temperature in a cooler place for 1–2 days. To keep it longer, wrap individual slices in plastic wrap or put in an airtight container and store in the refrigerator for 3 days or in the freezer for 2 weeks.
Notes
- Make sure your beaters and mixing bowl are clean and dry. A speck of oil or egg yolk on either one can minimize the volume of the beaten egg whites.
- Avoid plastic bowls, as even clean ones may hold oily residue that can affect the beaten quality of the egg whites.
- Use a bowl that’s wide enough to keep the beaters from being buried in the egg whites.
- Do not overbeat or underbeat the egg whites or your cake may fall. Egg whites should have a stiff peak, pointing straight up (or maybe a little bit folding over just at the very tips).
Nutrition
Editor’s Note: This post was originally published on February 5, 2020. It’s been republished with more helpful tips on November 23, 2022.


I made this with a few modications (trying to be clever, hahaha)
Sugar reduced from 130g to 85g. Most of the sugar went to make the meringue.
I did the meringue with semi cold egg whites.
I also bloomed the cocoa powder with hot soy milk. I added a tsp of instant coffee powder.
This created a rather thick paste, The resulting batter was a bit difficult to mix with the meringue compared to the usual chiffon cakes I make. More mixing was required, which I am sure resulted in some loss of egg white volume.
The result was really good though. A little bit shorter than my regular chiffons, but still respectable height. Texture and taste were more than fine. It was not an ultrasoft chiffon, but still very airy and yummy.
Hi, Ho Xu! Thank you for reading Nami’s post and sharing your baking experiences with us! It sounds delicious as well! 😃
Hi, I notice that your recipe contains much less flour than other similar recipes, eg I saw another chocolate chiffon cake recipe that uses 190mg cake flour for the same size pan. Was wondering what the difference in cake texture would be?
Hello there! Thank you for visiting the JOC website!
If you use too much flour, the cake’s structure will change. Perhaps the other recipe had additional milk to balance the texture?
We hope you enjoy Nami’s recipe and the cake texture. 🤗
Really good nice & light but I bought pan suggested & when I first put in oven it overflowed & spilled in oven. So naturally I opened oven door to check on it. However, after it baked it didn’t come out as high as pan. What did I do wrong?
Hi, Patricia! Thank you very much for trying Nami’s recipe!
We’re sorry to hear that the cake didn’t turn out tall; there could be a few causes. Please see “What went wrong” in this link.
https://www.justonecookbook.com/perfect-chiffon-cake/
We hope this helps! 🫶🏻
I made chocolate chiffon again, but after lessons learned from the previous iteration (primarily, that chocolate chiffon doesn’t rise as much), I increased the recipe by 1.5x to better fill the Asai Shoten “tall” pans. This time, I used the 14cm tall pan (which normally works well with JOC 15cm / 6” conversion), and baked a recipe scaled for 17cm, basically 3/5 of this 5 egg recipe (instead of just 2/5).
I made chiffon sando with whipped cream and raspberry (delicious!). The chiffon taste and texture were good, but I think I should’ve baked longer for the larger recipe (rather than based on the smaller pan size). This chiffon cooled and the “top” (technically the bottom inside the pan) had slumped into a “U” shape a bit.
Hi TJ! Thank you for trying out Nami’s recipe and sharing these images!
I have one question: did you turn the pan upside down to cool it down this time? If you did, I agree that it would need to be baked for a bit longer. As always, thank you for sharing the outcome with us!🥰🫶🏻
Hi Naomi, yes I did have the pan cooling upside down, I realized I didn’t take a picture of that this time!
I see. We hope that extra baking time results in a better result next time! 🤗🫶🏻.
美味しい!レシピをありがとう!
Made this yesterday for my birthday, turned out perfectly, despite the fact that I forgot the baking powder. I’m curious how much more it might have risen if I remembered it. I will have to compare next time I make it, because there’s definitely going to be a next time!
I did have a question: I’m curious why this recipe is for an 8″ tin and all of the other chiffon cakes are for 7″?
Hi, Chelle! Happy birthday! 🎉
Thank you very much for trying Nami’s recipe!
We’re happy to hear you enjoyed the cake.
Nami used 8″ for this recipe because it’s popular. 😃
I just made this recipe, my first ever chiffon cake and first time using Asai Shoten “tall” 17cm chiffon pan! I scaled the recipe using the JOC guide to 17cm size (3 eggs).
Question for JOC team: Is it normal for the chocolate chiffon to not rise as much as the other chiffons (perhaps due to the richness of the whole milk)? I noticed for this recipe, Nami’s pictures show a bit of a space between the top of cake and rim of pan for chocolate chiffon, but the other recipes (matcha, orange, etc.) fill the pan more. I know the other recipes call for different size of pan, but the proportions are adjusted.
The “tall” pans are about 25% taller than regular, and I think I got about 60mm height, so perhaps the height is similar in proportions
Hi T J, Thank you for trying Nami’s recipe!
As per their website, a 17-cm-tall chiffon pan has a capacity of approximately 20% more than the standard size. So, for a 17-cm-tall chiffon pan, we recommend using the four-egg recipe. To determine the ingredient amount, you may multiply 4/5 of this recipe. 🙂
Yes, the chocolate version may be slightly shorter than the basic version due to the difference in fat content from cocoa powder. We hope this information helps with your next baking success!🫶🏻
Thanks Naomi, I will definitely try a 4 (large) egg recipe for the chocolate chiffon again, there is ample room for additional rise. I don’t keep whole milk often, so might make with skim milk powder and water.
For the other JOC chiffons I want to try (matcha, orange cardamom, etc.), I might first make the regular 17cm size recipes since they appear to rise more than chocolate chiffon. From what I can read of the Ashi Shoten base recipe in Japanese, it appears that their 4 medium egg recipe (for 17cm tall chiffon) is closest to the JOC 3 large egg recipe (in terms of flour, sugar, etc.), so I’d not want to risk making too much chiffon batter all at once. I guess I could bake any extra in a smaller chiffon pan, but I’m still new to chiffon, so am not sure how full the pan should be to get optimal rise and height without overflowing. Baking is fun so I will keep practicing!
You’re welcome, TJ!
Please keep us updated if you try it out! 😃 Happy baking!
Hi there, can I make the Meringue first, then the egg yolk batter? Because I have only one mixer and I’m not good at besting by hands, and prefer less washing if possible 😅 thanks!
It worked!!! 😀 😀 😀
I transfered the done Meringue and put it in the fridge while I quickly make the egg yolk better.
Taste very good👍🏼👍🏼👍🏼
This is the end result…. 😁
Hello, JuEk! We’re glad to hear you refrigerated the Meringue! It loosens the air bubble otherwise.
Thank you for attempting Nami’s recipe and sharing your results with us.
Happy Baking! 🥰