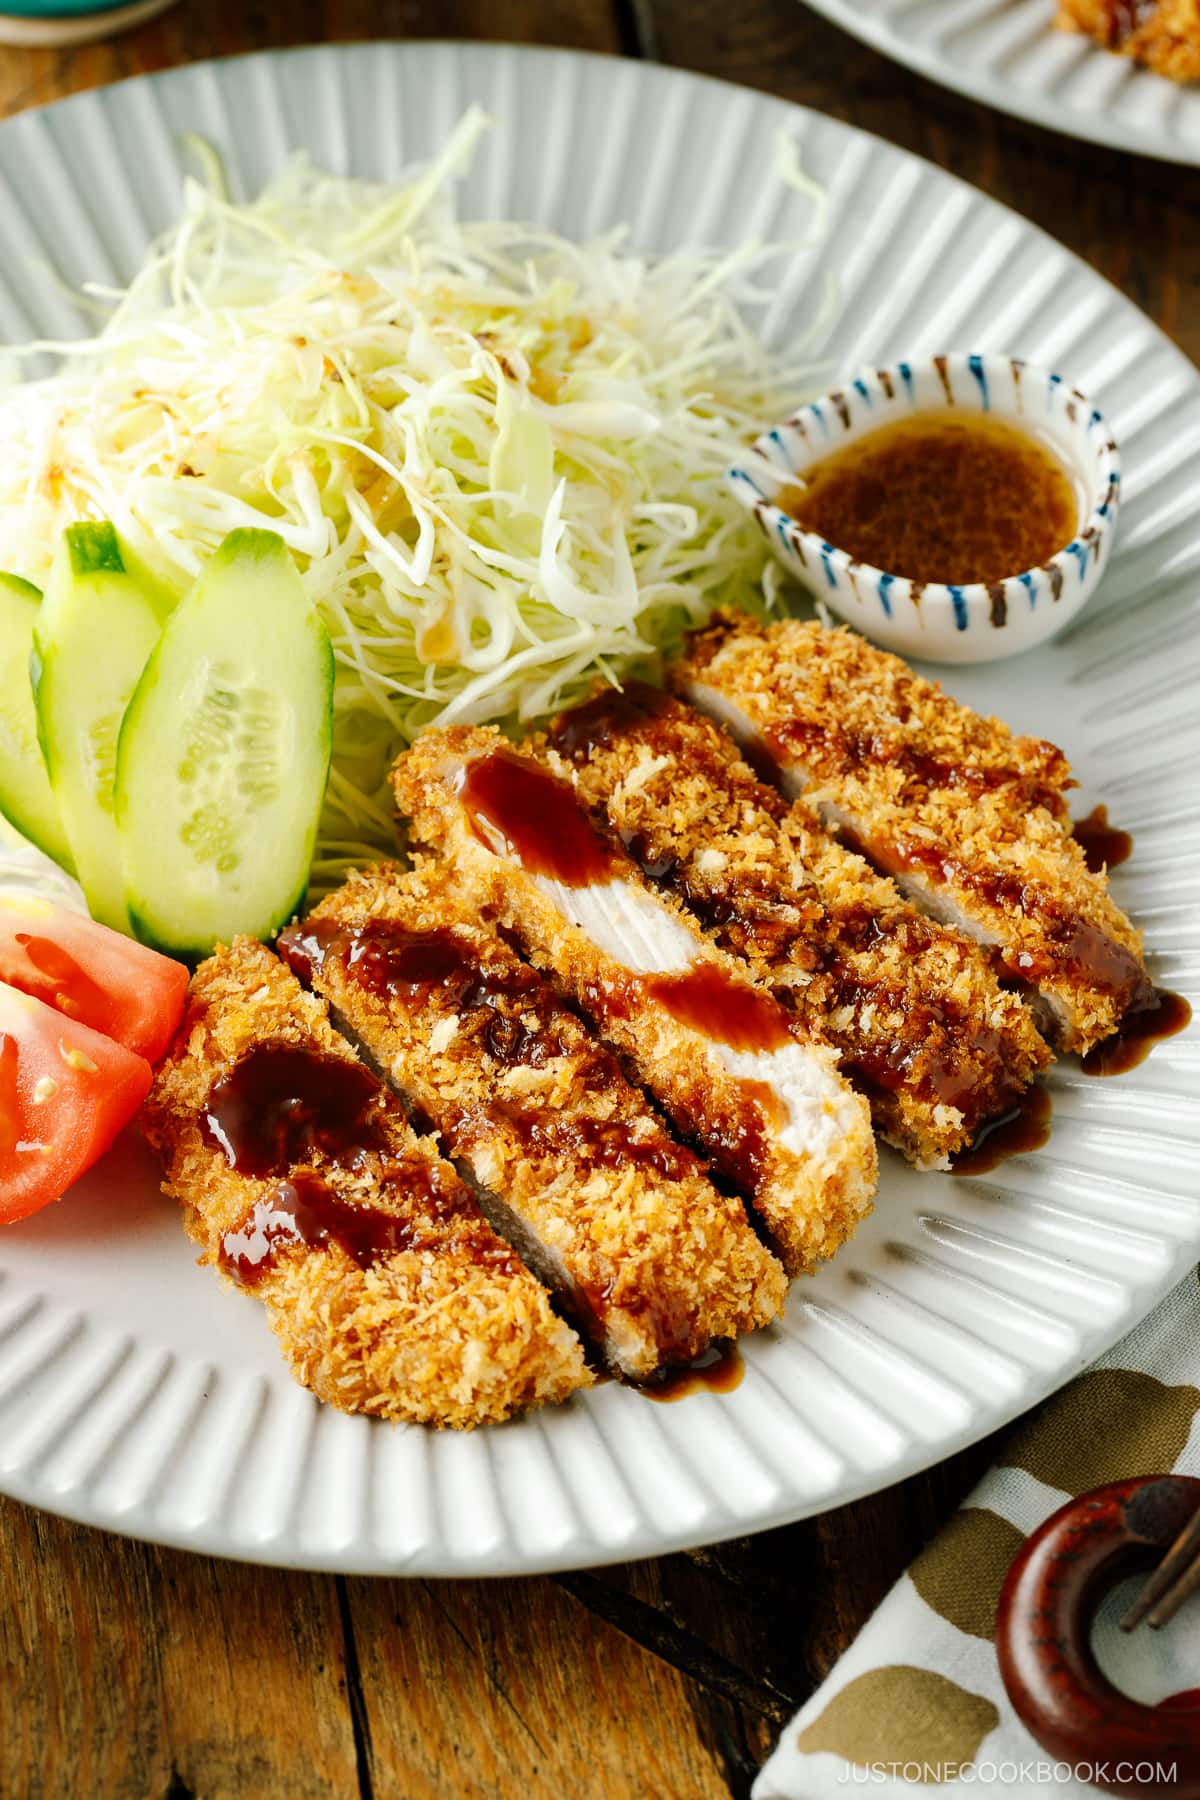
Crispy on the outside and juicy on the inside, this Baked Tonkatsu recipe is a total game changer. All you need are the right techniques and tips to achieve perfection. Served with a special sesame tonkatsu sauce, you can now enjoy this popular dish at home.
Tonkatsu (とんかつ) or Japanese pork cutlet is one of the well-loved dishes on the Japanese menu. Imagine taking a big bite of tender juicy pork chop encased in crispy panko that is deep-fried to perfection. That alone will make anyone’s mouth water.
Since tonkatsu requires deep frying, it’s understandable why this delicious pork cutlet is not a common dish to make at home. Most people prefer not to deep fry food at home because of the grease and the smell. So today I’m going to show you how you can make Baked Tonkatsu that’s juicy on the inside and crispy on the outside!
Table of Contents
What is Tonkatsu?
Tonkatsu (豚カツ) is one of the top popular Japanese foods consisting of a breaded, deep-fried pork cutlet. It’s crunchy and juicy and typically served with shredded cabbage and a drizzle of a savory sauce.
You can read about the origin and background of tonkatsu here!
As a purist and a true foodie, I’ve always made my tonkatsu the original way, that is to deep-fry the cutlet. All for the love of good food! When I received requests for a non-fried version, I was rather hesitant but once I perfected this oven-baked technique, it completely changed my mind. The baked version of tonkatsu is just as good, and to be honest, so much more crunchier!
Now, I have two options for you when you wish to make tonkatsu at home: Original Tonkatsu (Deep-Fried) and a baked version.
Why You’ll Love Oven-Baked Tonkatsu
- Bake, instead of deep-frying. Such a wonderful healthier alternative! If you don’t want to deep-fry, this recipe is for you!
- Easy to make. The cooking process is very easy. You can even have your children to help out.
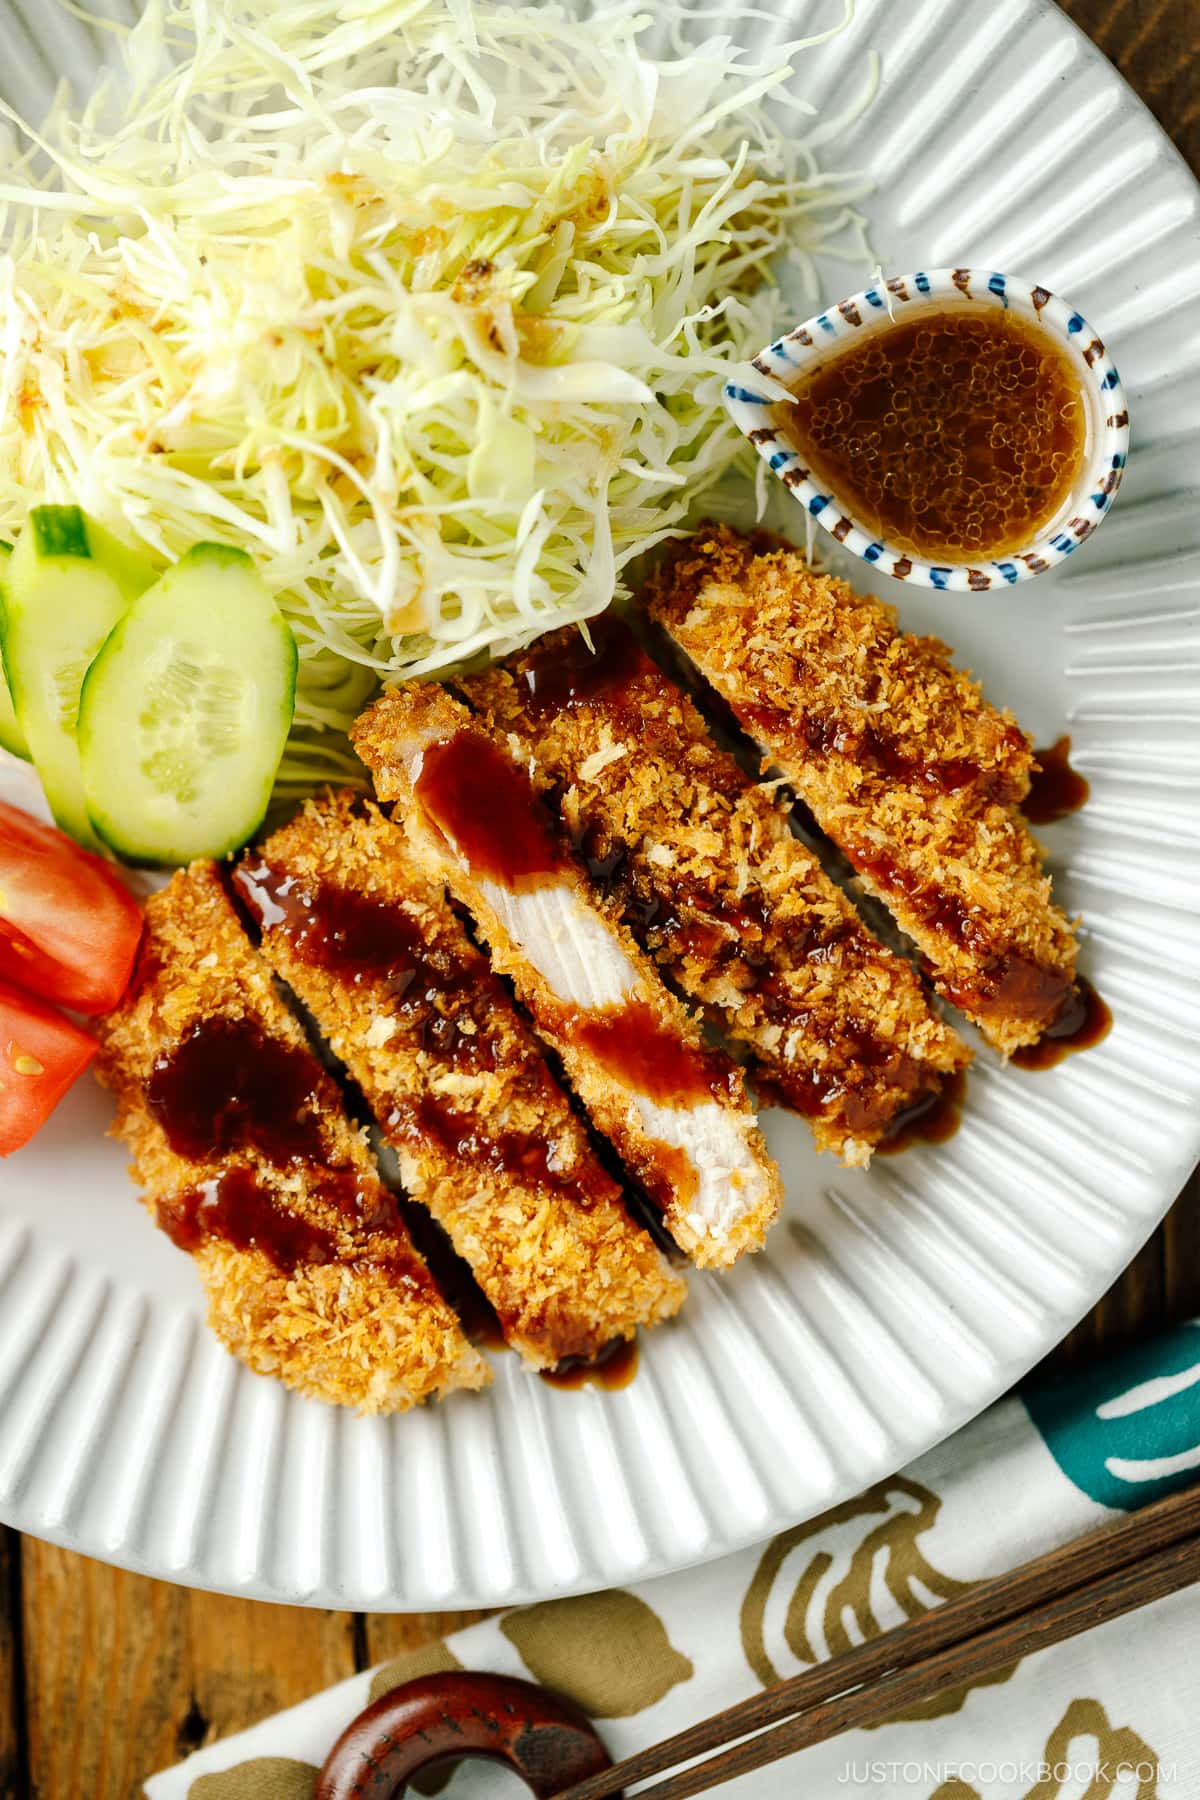
- Perfect texture. The crust is unbelievably crispy, and the meat inside tender and juicy. A foolproof oven-baked technique!
- Easily adaptable. If you don’t like pork, use chicken, shrimp, salmon, or firm tofu.
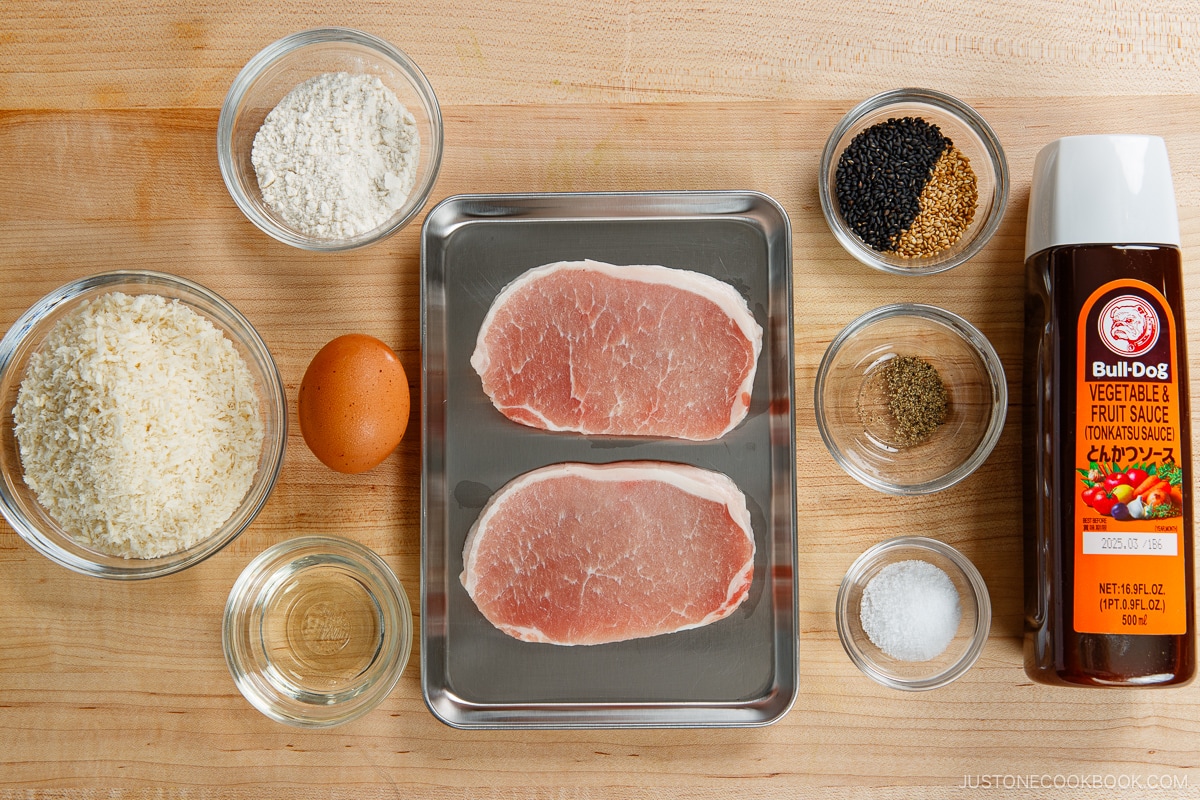
Ingredients for Baked Tonkatsu
- Boneless pork loin chops – It should be half an inch thick. Pork loin chops
- Flour
- Eggs
- Panko – Make sure to get Japanese breadcrumbs called panko.
- Cooking oil
- Tonkatsu sauce – You can always make my Homemade Tonkatsu Sauce, if preferred!
How to Make Baked Tonkatsu
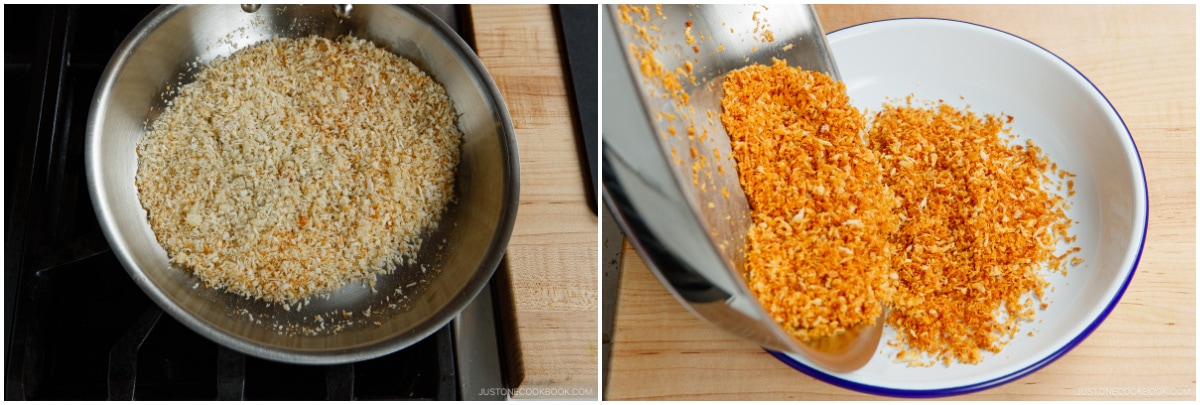
- Toast the panko till golden brown in an ungreased pan.
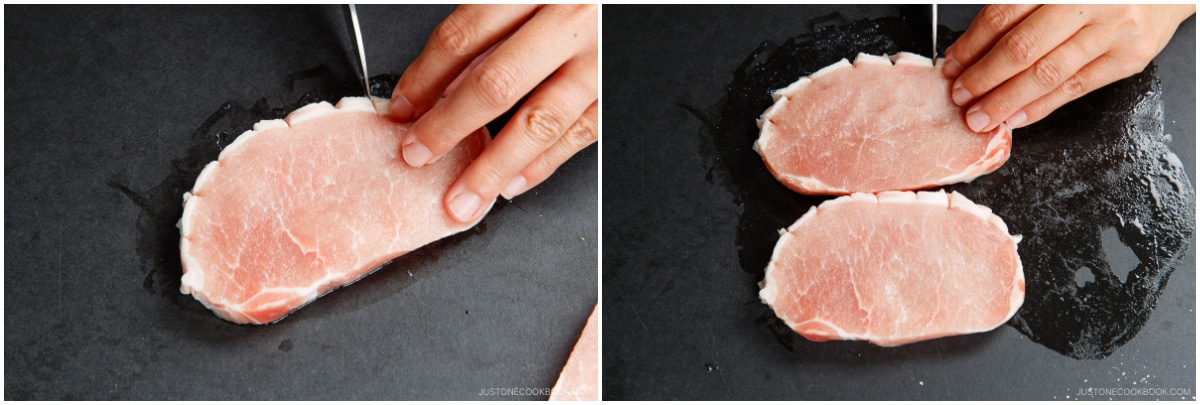
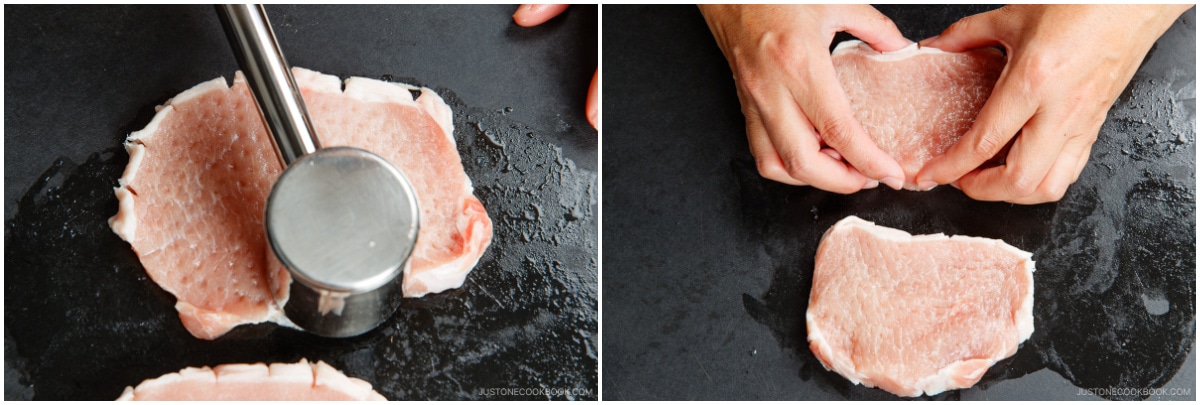
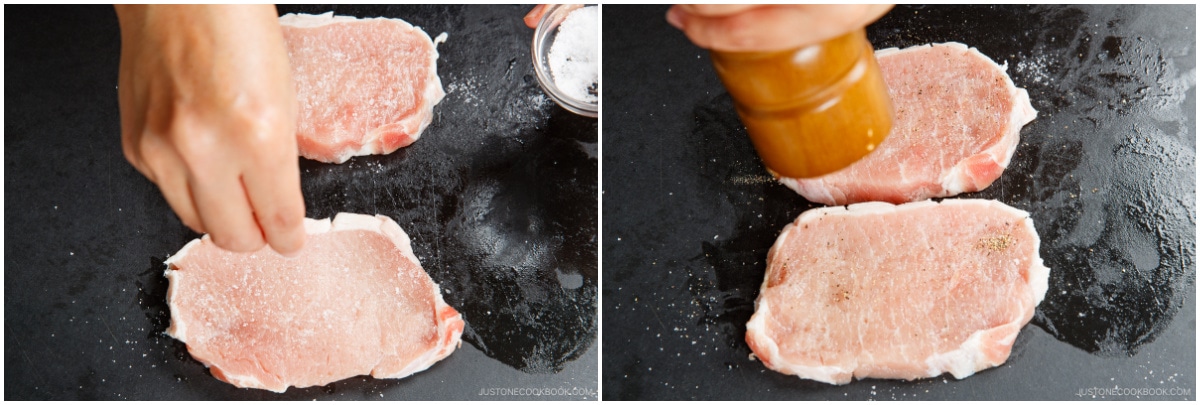
- Prepare the meat by making slits on the connective tissue and fat, pounding the meat, and seasoning with salt and pepper.
- Dredge the pork in the flour, egg, and toasted panko.
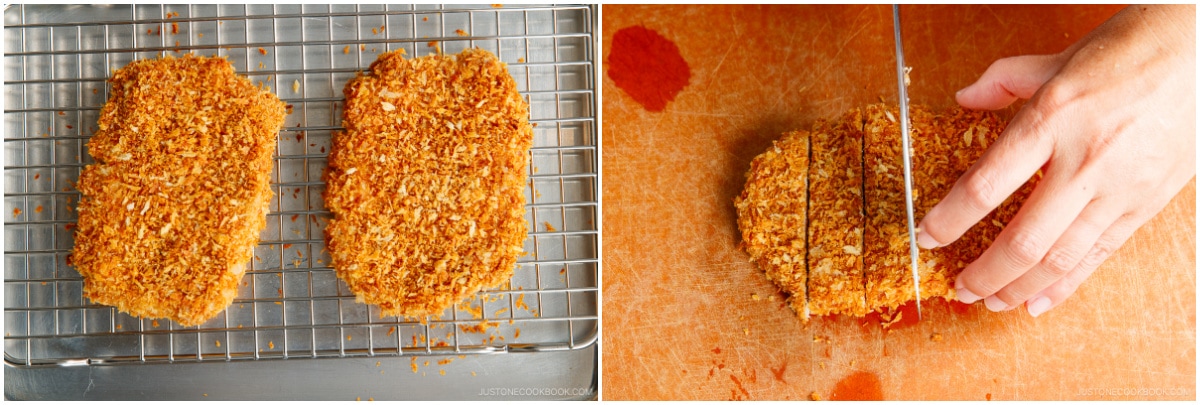
- Bake in the oven until the pork is cooked through.
- Cut into 1-inch (2.5 cm) thick pieces and serve.

Cooking Tips
1. Use panko (Japanese breadcrumbs).
Don’t use regular breadcrumbs when you make tonkatsu. Panko (Japanese breadcrumbs) have larger flakes and stick better to the cutlet, yielding a light yet ultra-crispy texture for your tonkatsu.
2. Toast the panko in a frying pan before breading.
Just like how I prepared the Crispy Baked Chicken Katsu recipe and Crispy Salmon recipe
The key for panko to stay crispy and golden brown is to pre-cook panko before breading the pork. With the pre-cooked panko, you don’t have to worry about taking too much time to brown the crust and this helps to prevent the pork loin from overcooking.
3. Use 1/2-inch thick pork loin chops.
Please use only thin slices of pork loin when baking the cutlet so it cooks fast and evenly. The thickness of pork should be no more than 1/2 inch (1.2 cm).
Remember to use good quality meat and pound it so that the pork loin will be nice and tender after it’s been cooked. When the food is as simple as this, the quality of the ingredients speaks for itself.
4. Make slits on the connective tissue.
Red meat and fat have different elasticities, and they will shrink and expand at different rates when they are cooked. Making a few slits will allow the tonkatsu to stay nice and flat and prevent the cutlets from curling up.
5. Use a wire rack when baking.
The panko-coated pork loin should be placed on a wire rack over a baking sheet. This way, the air circulates underneath the pork so the panko underneath will be crispy.
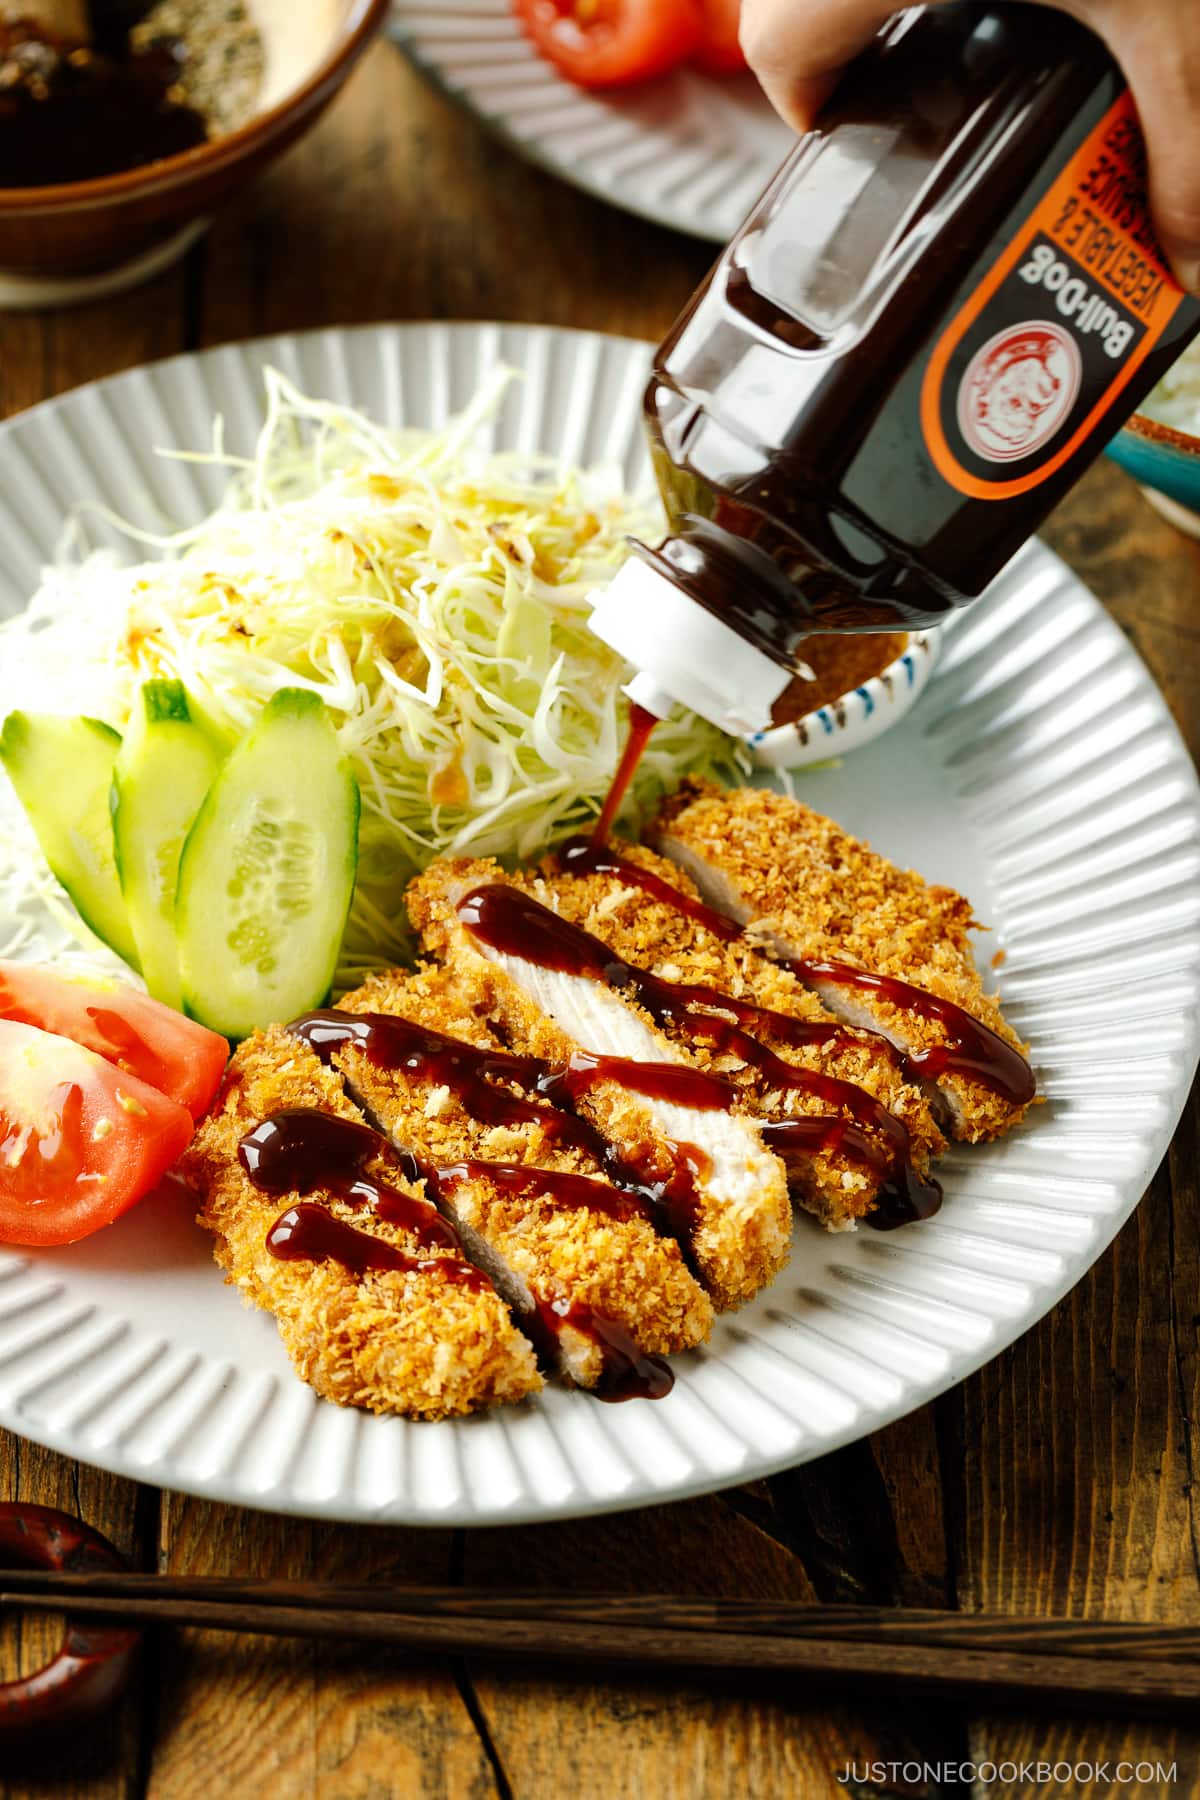
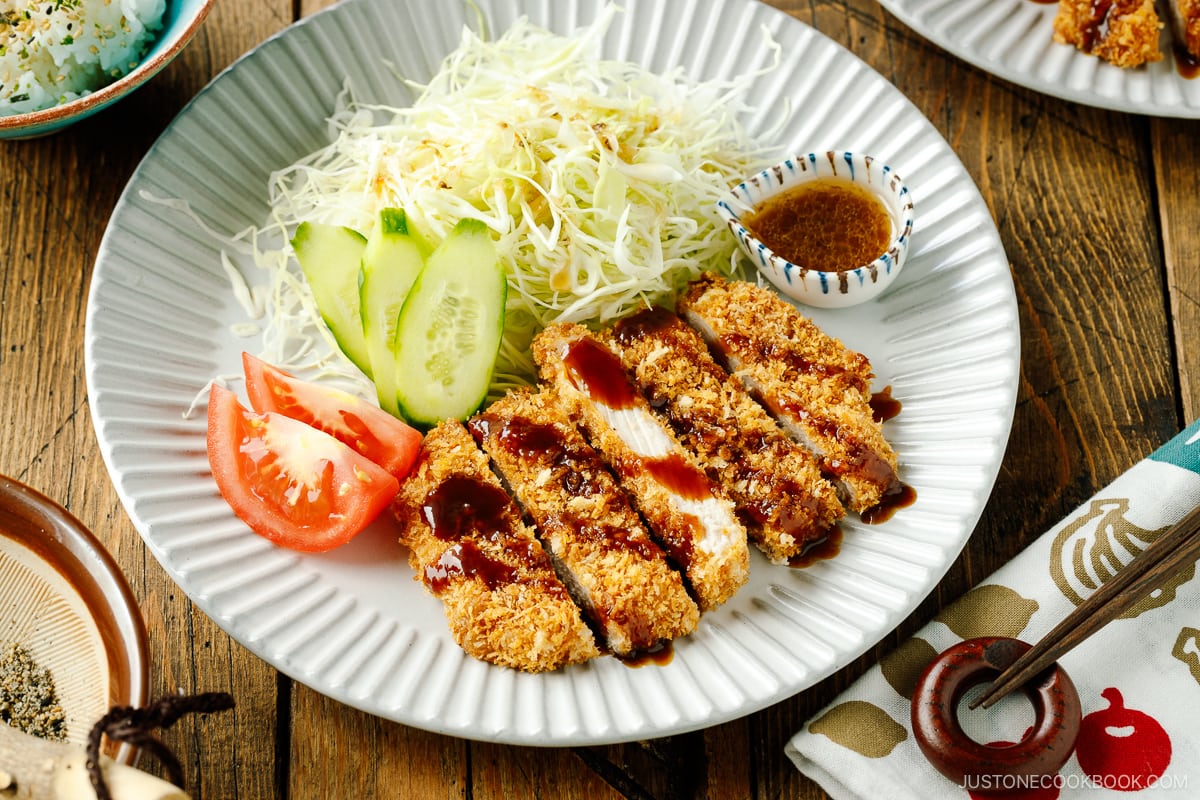
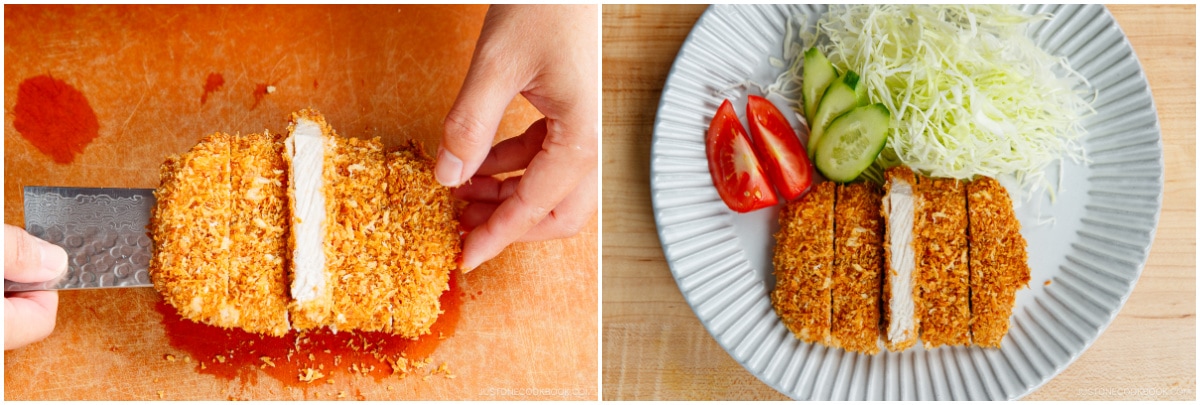
How to Serve Tonkatsu
Enjoy the baked-to-perfection tonkatsu with tonkatsu sauce and freshly ground sesame seeds (I like to use both black and white sesame seeds).
In Japan, panko-breaded cutlet dishes are commonly served with shredded cabbage salad, along with a dressing of your choice.
I use this cabbage slicer to thinly shred the cabbage head. You can use a sharp knife, but it’s a lot easier to use this slicer. Unlike a typical mandoline, the cabbage slicer is wide enough for a small head of cabbage to fit.
Prefer Classic Deep-Frying Method?
Here’s my regular deep-fried tonkatsu recipe, which I do indulge in occasionally. Both versions bring different enjoyment, but for a healthier alternative, this baked tonkatsu is AWESOME!
More Katsu Recipes
- Baked Chicken Katsu
- Gluten-Free Baked Chicken Katsu
- Chicken Cheese Katsu
- Ebi Katsu (Shrimp Cutlet) Burger
- Crispy Salmon Baked Nuggets
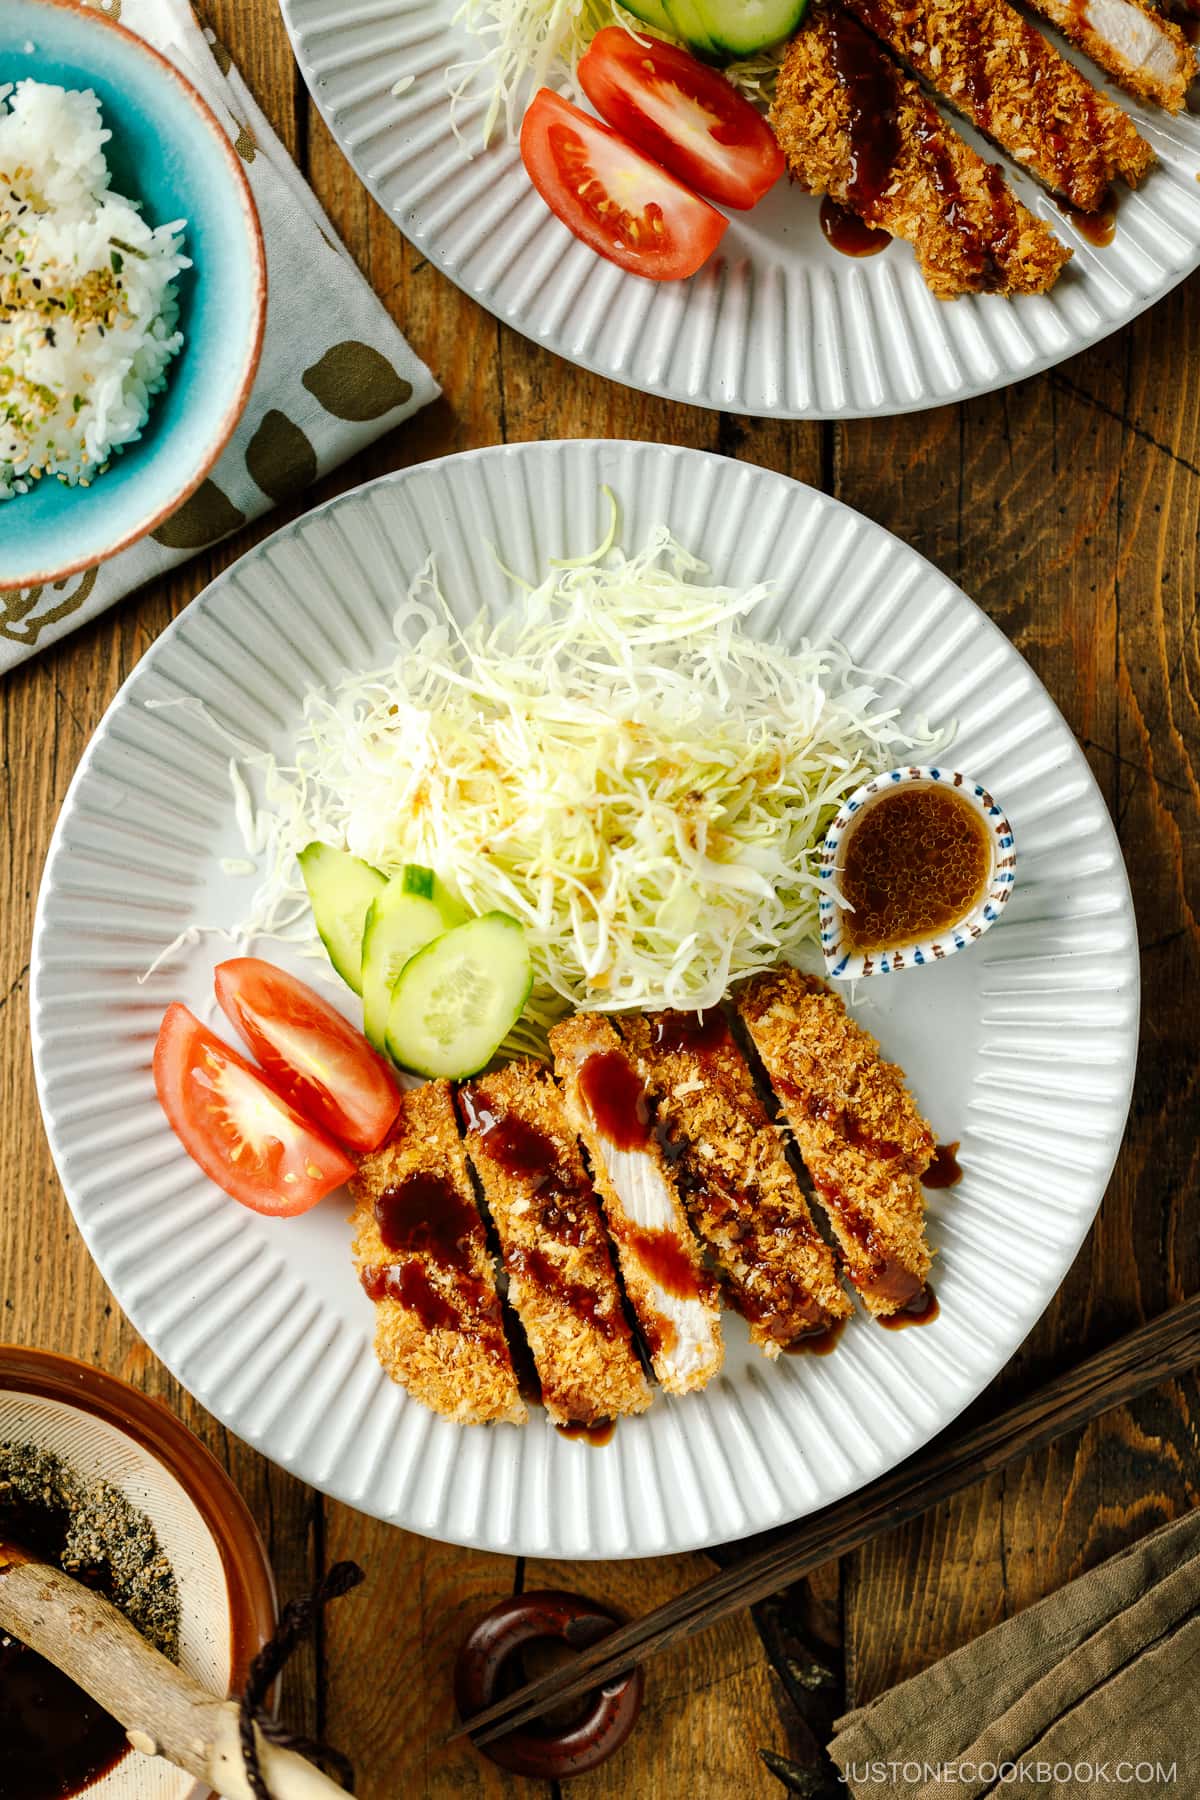
What to Serve with Baked Tonkatsu
- Rice: Steamed Rice
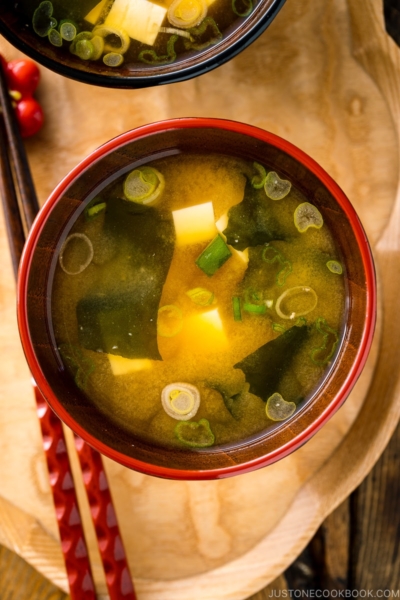
- Soup: Tonjiru (Pork and Vegetable Miso Soup), Clam Miso Soup
- Sides: Simmered Kabocha, Spinach Ohitashi
Wish to learn more about Japanese cooking? Sign up for our free newsletter to receive cooking tips & recipe updates! And stay in touch with me on Facebook, Pinterest, YouTube, and Instagram.
Baked Tonkatsu
Video
Ingredients
- ¾ cup panko (Japanese breadcrumbs)
- 1 Tbsp neutral oil
- 2 boneless pork loin chops (½-inch thick) (½ lb, 227 g)
- ½ tsp Diamond Crystal kosher salt
- freshly ground black pepper
- 2 Tbsp all-purpose flour (plain flour)
- 1 large egg (50 g each w/o shell)
- ½ Tbsp neutral oil
- tonkatsu sauce (or make my Homemade Tonkatsu Sauce)
For the Sesame Tonkatsu Sauce (Optional)
Instructions
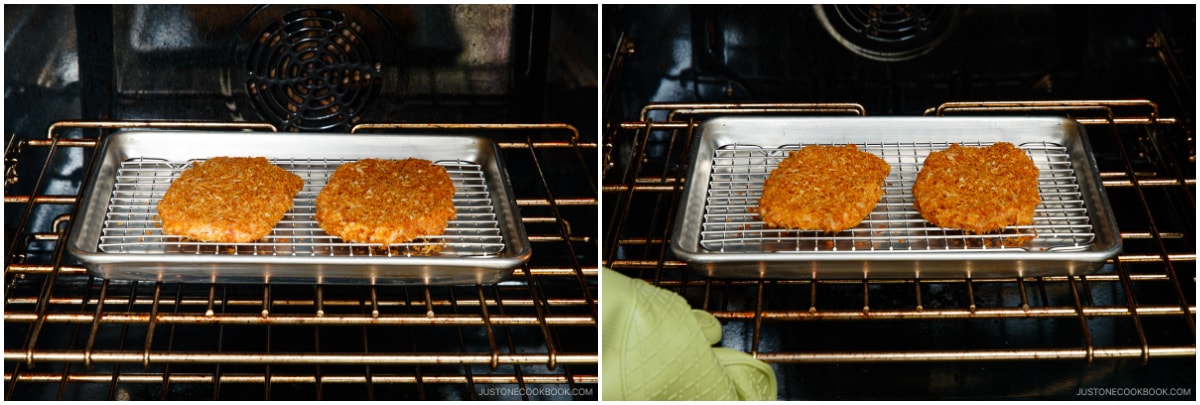
- Gather all the ingredients. Adjust an oven rack to the middle position and preheat the oven to 400ºF (200ºC). For a convection oven, reduce the temperature by 25ºF (15ºC). Prepare a rimmed baking sheet with an oven-safe wire rack as it allows hot air to circulate around the cutlets and prevents the panko underneath from getting crushed.
To Toast the Panko
- Add ¾ cup panko (Japanese breadcrumbs) and 1 Tbsp neutral oil to a frying pan.

- Turn on the stove‘s heat to medium and stir the panko and toast until golden brown. Transfer the toasted panko to a shallow dish and allow it to cool.
To Prepare the Pork
- From 2 boneless pork loin chops (½-inch thick), cut off the extra fat and make several slits on the connective tissue between the meat and remaining fat. Tip: Red meat and fat have different elasticities, and they will shrink and expand at different rates when they are cooked. Making a few slits will allow the Tonkatsu to stay nice and flat and prevent the cutlets from curling up.
- To tenderize the meat, pound both sides of the cutlets with a meat pounder; if you don’t have one, then use the back of the knife. Mold the flattened meat back into the original shape with your hands.
- Sprinkle the cutlets with ½ tsp Diamond Crystal kosher salt and freshly ground black pepper.
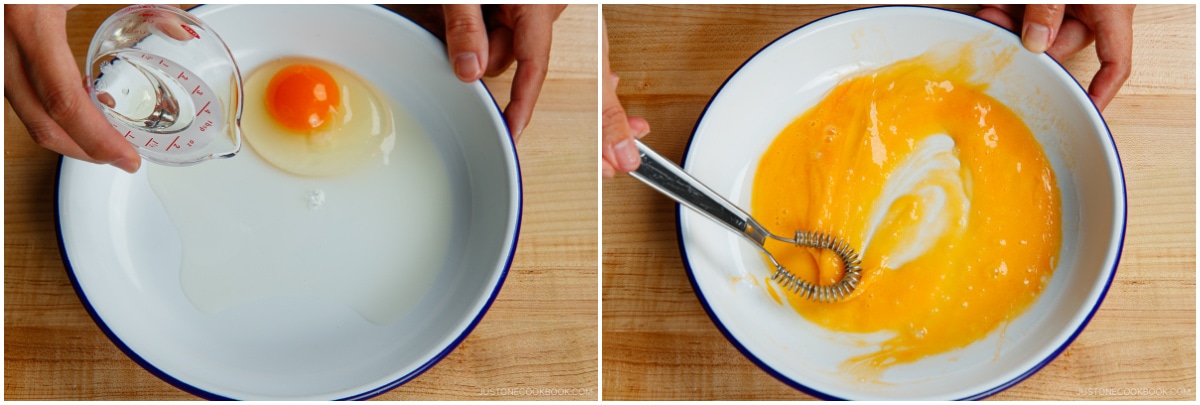
- Beat 1 large egg (50 g each w/o shell) and ½ Tbsp neutral oil in a shallow dish.
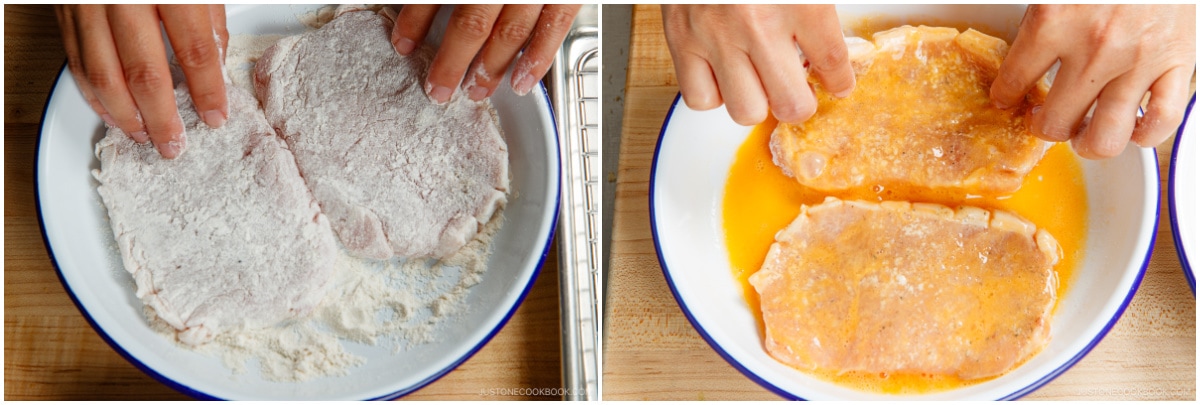
- Next, add 2 Tbsp all-purpose flour (plain flour) to a shallow dish.

- Dredge each pork piece in the flour and pat off the excess. Next, dip the cutlets into the egg to coat them completely.
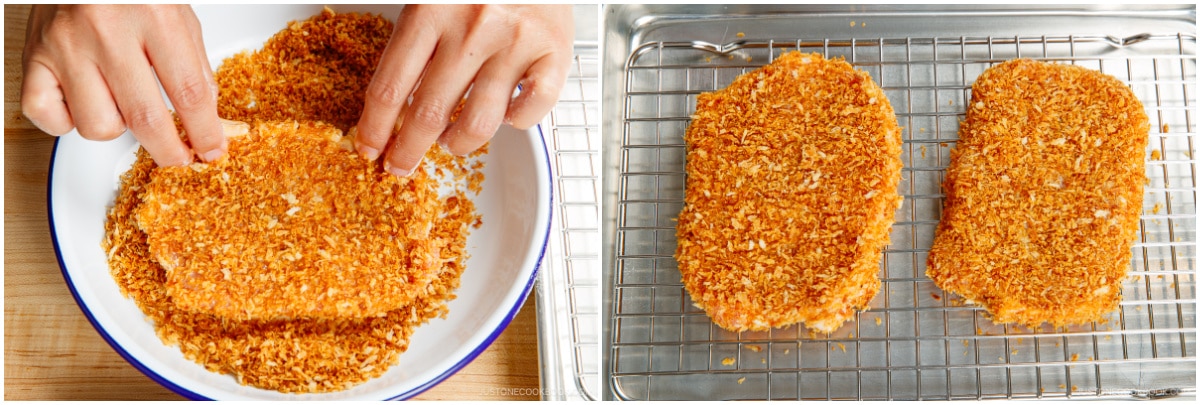
- Then, cover completely with the toasted panko. Press on the panko flakes to make sure they adhere to the pork. Place the pork cutlets on the oven-safe wire rack (so the air can circulate underneath) or parchment paper in the prepared baking sheet.
To Bake
- Bake at 400ºF (200ºC) until the pork is no longer pink inside, about 20 minutes. Once it's done, remove it from the oven.
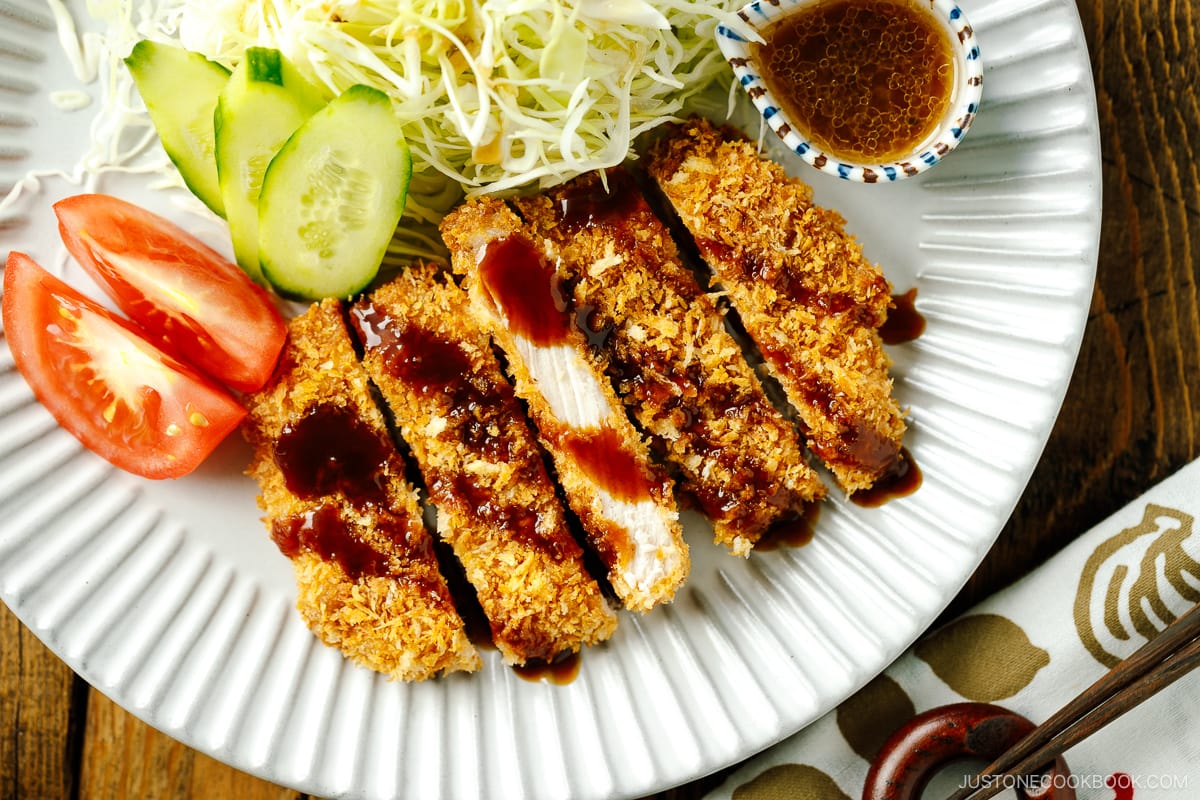
- Rest the Tonkatsu for 3 minutes on the countertop. Then, cut the Tonkatsu into 1-inch pieces (so you can eat them with chopsticks) by pressing the knife directly down into the cutlets, instead of sawing back and forth. This way, the panko crust will not come off.
To Serve
- Flip the middle piece to show the interior of Tonkatsu as some restaurants would do. Transfer to individual plates and serve immediately.
- Drizzle tonkatsu sauce as you like at the table.
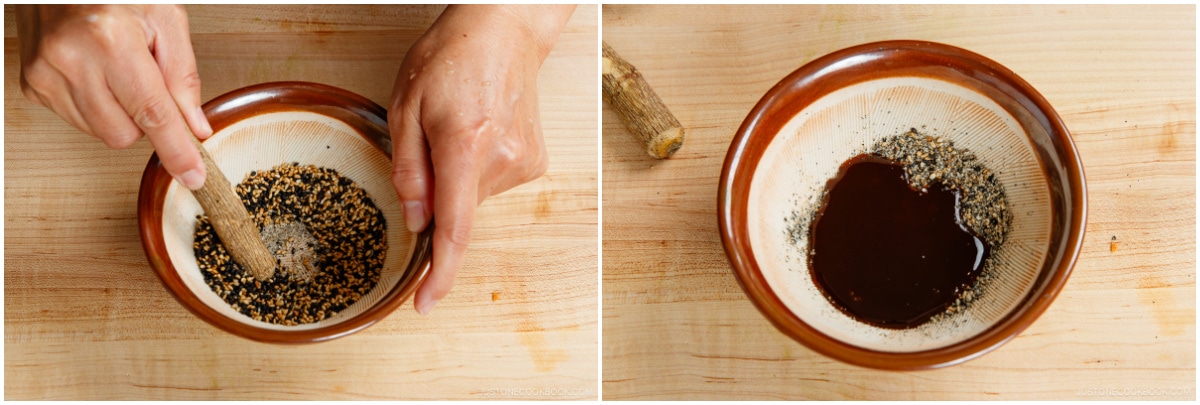
To Make the Sesame Tonkatsu Sauce (Optional)
- I recommend making this Sesame Tonkatsu Sauce. It's easy to make and delicious! Grind 2 Tbsp toasted white and black sesame seeds in a mortar and pestle, add the tonkatsu sauce, and mix it all together. Dip your tonkatsu pieces to enjoy!
To Store
- You can freeze the fried and cooled baked cutlets in an airtight container or freezer bag for up to a month. To reheat, bake it at 375ºF (190ºC) on a wire rack until the inside is warm.
Nutrition
Editor’s Note: This post was originally published on May 11, 2014. It’s been republished with a new video, new step-by-step and final images, and more helpful content on September 29, 2023.


Hi! Have been following and trying out all your recipes for quite sometime and they always turn out so well!!
but for this recipe it didn’t turn out crispy even tho I followed all the steps. When it came out of the oven it was very crispy, but once I let it rest on the wire rack before cutting, it started getting soggy fast, any idea why? Was it because I did not toast the panko beforehand with the oil? I simple toasted in without the oil, inside the pan.
Hello, Wei! Thank you for trying Nami’s recipe.
We toasted panko with oil and liked the results, so we recommend trying it.
Hopefully, this works for you!🤗
Very nice recipe. I’ve made this several times now. I used to fry tonkatsu and this is so much better. I have much more control than I did when frying, so they are always perfectly done and juicy. I can bake enough cutlets for a large party and have them all ready at one time rather than frying them in stages. Clean up is also much easier.
Hello, Charles. Thank you so much for trying Nami’s recipe and providing such positive feedback!
We are happy to hear you enjoyed the baked method. Thank you very much for your encouragement!🤗
I made this for dinner tonight sing the homemade tonkatsu sauce. Everything turned out perfectly. The pork was juicy and tender, and the crust was crispy. The sauce is easy to make and tastes delicious. I can’t wait to make this again!
Hello, Tiffany! Thank you for trying Nami’s recipe and sharing your experience as well as a photo of your Tonkatsu! It looks fantastic!😊
We are happy that you enjoyed the dish. Happy Cooking!
I’ve made this recipe about a dozen times and honestly love it. The crunch isn’t QUITE fried but it’s very satisfying.
The biggest changes I make are:
1. I omit the salt from the seasoning of the chop and instead mix in 1/8tsp of baking soda into the flour. Because there’s a bit of rest time naturally in dredging and prepping before it goes into the oven, and you have a longer residence time baking vs. frying you get a bit of the velveting/tenderizing effect of the baking soda and some of the saltiness. Careful not to over do it though.
2. After you put the breadcrumbs on and as you are arranging the meat on the rack, make sure you don’t spread out the meat too much (don’t let it get too thin) otherwise you’ll dry out too fast. Just think about re-compressing the size of the hammered out piece back to the size it was before tenderizing.
3. I bump the temperature up to 425F and use a temperature probe right before a quick hit in the broiler. Puling the chops precisely at 142-144 ensures a really tender meal. The baking soda does help this a bit and temping this thin of a piece is tough but you can do it. Right when it hits about 135, I throw it under the broiler for 1-2 minutes. If I’m paying very close attention, I’ll try and do it at 120 for a few minutes longer to brown both sides but… literally playing with fire on that one.
The reheat really well from the fridge – I just don’t broil them and will stop the temp closer to 130 on the bake or pull a few early as opposed to what I’m going to eat tonight so they don’t overcook.
The only thing that is only ok but not great is reheating from frozen.. they are fine but I haven’t figured a way I really like yet.
Hello there, Ethan! Thank you so much for trying Nami’s recipe and sharing your detailed cooking experience.🙂
To reheat frozen Tonkatsu, you can thaw them in the microwave first, then use the toaster or the oven as directed in the reheating method for Tonkatsu at the bottom of the recipe card. We hope this helps at your next attempt!
This was super easy to follow! Toasting the breadcrumbs was the secret I didn’t know I needed!
Hi Teri! We are glad to hear you enjoyed Nami’s recipe and tip!
Thank you so much for trying her recipe and for your kind feedback.
This is absolutely fantastic. Just tried making it today. It’s soooo good.
Hi George! Thank you so much for reading Nami’s post and trying her recipe!
We are so happy to hear you enjoyed Baked Tonkatsu! Happy Cooking!
Fantastic! I was going to fry up some Tonkatsu but it got late and I didn’t feeling like frying with all the mess it creates. Found this recipe and I am so happy with the results – I think the key is browning the panko before baking. I may never fry Tonkatsu again. Thanks so much JOC
Hi Tom! Thank you so much for reading Nami’s post and trying her recipe!
We are so happy to hear that the baking method worked well for you! Thank you for sharing your experience with us.
This method also works well in an air fryer!
Hi Sue! Thank you so much for experimenting with Nami’s recipe!
We are glad to hear this method worked in an air fryer! Happy Cooking!
Please what temp. and time for the air fryer?
Love this recipe!! It turned out very well. Thank you Nami!
Hi Asyera, Thank you so much for trying Nami’s recipe and for your kind feedback!
We are so happy to hear that the recipe worked well for you. 🤗
Happy Cooking!
Hello Nami san, I’ve followed your recipe but my Katsu is not very crispy. Any advise on how to make it crispy?
Hi Judy! Thank you for trying Nami’s recipe!
Try resting the Tonkatsu for 2 to 3 minutes after baking next time, then cutting it into 1-inch pieces.
We hope this helps!
Hello!
Have made both methods of tonkatsu, but this one is truly amazing. I love all things deep fried…but this,without the cleanup…Yay, yay, yay! thank you Nami!
Hi Marty! Thank you for trying both methods of Tonkatsu recipes!
We are so happy to hear you enjoyed them.😊
Happy Cooking!
After making this recipe a few times, I tried the technique on fish fillets (swai) and it worked beautifully! I seasoned the fish, toasted the breadcrumbs, breaded the fish the same as usual, and baked at 425 convection for 12 minutes on a foil lined sheet pan. (I’ve never bothered with using a wire rack for pork or for fish and it hasn’t seemed to matter so far). The results were great: crispy panko coating and flaky fish.
Hi Alex! Thank you very much for trying Nami’s recipe and sharing your cooking experience with us!
We are glad to hear you enjoy the technique of this recipe!🙂
Here is Nami’s version of the Crispy Baked Salmon Nuggets recipe.
https://www.justonecookbook.com/crispy-salmon/
We hope you will give it a try one day. Happy Cooking!
I was skeptical at first, since I didn’t have a wire rack, and I’ve tried countless recipes before that bake a dredged item that is normally fried. I have never been able to achieve a crispy texture or prevent the breading from falling off… but this recipe worked like a charm! I think following all of the instructions (including tenderizing the meat, adding cuts, and frying the breadcrumbs) made a huge difference in my results! Only difference is that I used a stoneware pan, thus increasing my cook time.
But wow was the end result crispy and well seasoned! Perfect with the homemade tonkatsu sauce and rice. Would recommend.
Hi Lucy! Aww. We are so happy to hear Nami’s recipe worked out very well for you!
Thank you very much for trying the recipe and sharing your cooking experience with us.
Happy cooking!
I came across this recipe as I wanted to eat something fried but as the prices of fry oil is shooting into the high I found this, truly a great recipe. I just tried it on the weekend but the panko got soggy partly after the finishing baking, what do I need to do to prevent that?
Hi Hajiko, Thank you very much for trying Nami’s recipe!
To prevent Panko from getting soggy, we recommend using an oven-safe wire rack for baking, and let Tonkatsu cool on the wire rack before you serve it on the plate. So there is no condensation built-up.
https://www.amazon.com/dp/B00R0M2TSC?tag=onamzjusoneco-20&linkCode=ssc&creativeASIN=B00R0M2TSC&asc_item-id=amzn1.ideas.YKKAQ37QH14H&th=1
We hope this helps!