Learn how to make homemade Umeboshi (Japanese pickled plum), a centuries-old superfood known for its distinct sour and salty taste! You‘ll need sea salt, ripe golden-yellow ume, and red shiso leaves to make this precious delicacy at home.
What is Umeboshi
Umeboshi (梅干, pronounced [ɯmeboɕi], literally ‘dried ume’) is a type of pickled plum, known for its extremely sour and salty taste. The acidity is so intense that it makes your face pucker and lips crumple.
For most people, the initial taste can be overwhelming. It may also remain an acquired taste to some, but umeboshi has a respective place as an ingredient and food in the Japanese cuisine.
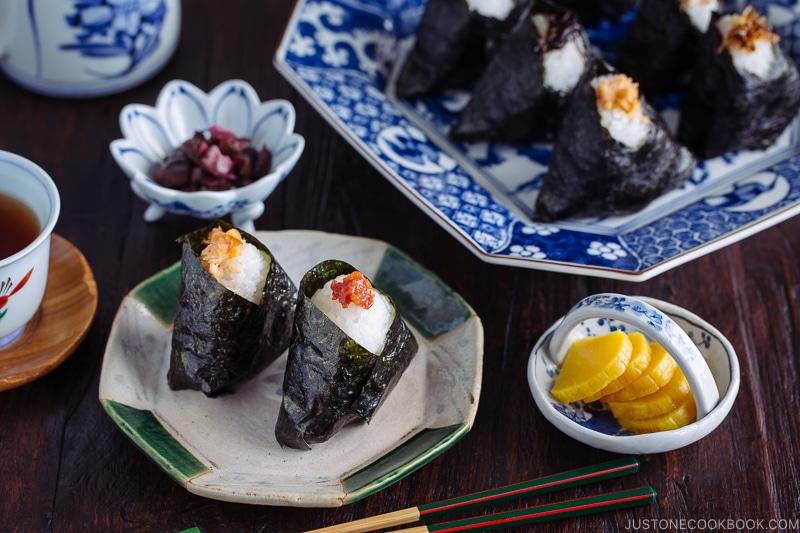
We often serve umeboshi with steamed rice, ochazuke, okayu (rice porridge), sometimes as a filling inside onigiri (rice ball), or even in Japanese-style pasta!
Is Umeboshi Healthy?
It has long been said that you do not need a doctor if you eat one umeboshi a day. The effects of citric acid (クエン酸) on plums are said to be good for restoring energy, preventing heat stroke, and keeping obesity at bay.
Since you can store umeboshi at room temperature, it is considered as emergency food. However, it’s also recommended not to take too many, as umeboshi is quite salty. Everything in moderation.
Umeboshi Process & Timeline
You can make umeboshi at home with fresh ume. The process is roughly a month long, but it is not difficult at all. I’ll go over each step quickly here.
In mid-June when ripen yellow ume start to appear in stores, it’s time to begin umeboshi making. First, add ume plums and salt to a crock and let pickled for 7 days. Then around late June when red shiso leaves are available, add them in the crock for natural red coloring.
It’s the rainy season in Japan around this time, so you will need to wait until the season is over. When the forecast shows strong sunlight for 3 straight days, get ready for the final step and dry the pickled ume under the sun. This is a crucial step for umeboshi, as you can tell from its name – ‘ume’ (= plum) ‘boshi’ (= dry).
Japan Umeboshi Timeline
| Month | Ingredient in Season | Umeboshi Process |
| Early-June | Green ume | (Make plum wine and syrup!) |
| Mid-June | Yellow ume | Pickle yellow ume with salt |
| Late-June | Red shiso leaves | Add red shiso to the pickled ume |
| Early-July | ||
| Mid-July | ||
| Late-July | Dry ume in sun for 3 days |
California Umeboshi Timeline
| Month | Ingredient in Season | Umeboshi Process |
| Early to Mid-May | Green ume | (Make plum wine and syrup!) |
| Late-May | Yellow ume | Pickle yellow ume with salt |
| Early to Mid-June | Red Shiso leaves | Add red shiso to the pickled ume |
| Early-July | ||
| Mid-July | Dry ume in sun for 3 days | |
| Late-July |
The Ume Plum
Native to China, ume (梅, うめ) or Japanese plums grow on large broad-leaved trees with a very short growing season.
Although generally referred to as a plum in English, they are more closely related to the apricot.
In Japan, Nanko Ume (南高梅) is a very popular variety, and it is mainly used for making Umeboshi.
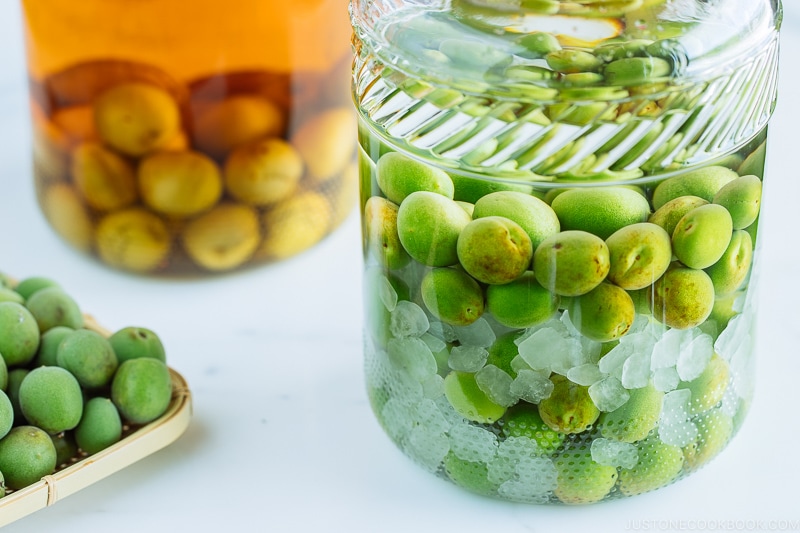
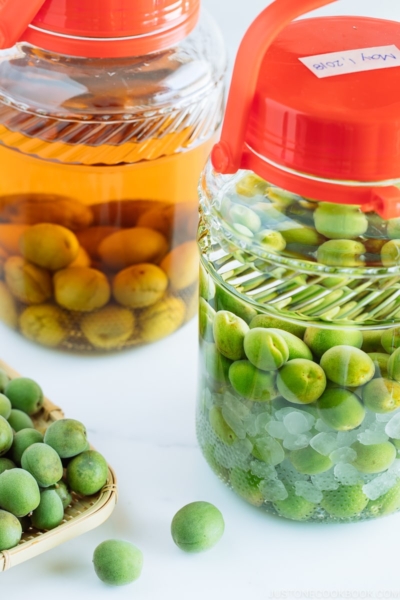
Young, Green Ume
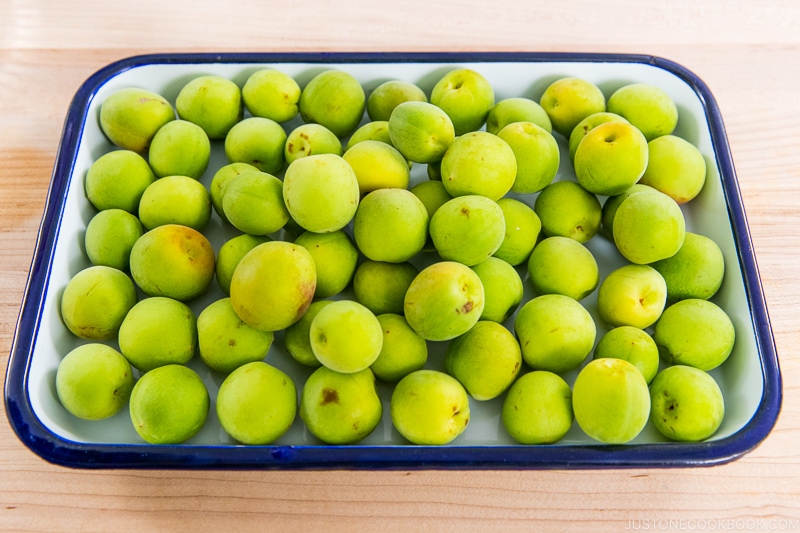
The young bright green fruits are commonly used to make umeshu (plum wine) and ume plum syrup.
Ripen, Yellow, Blushed Ume
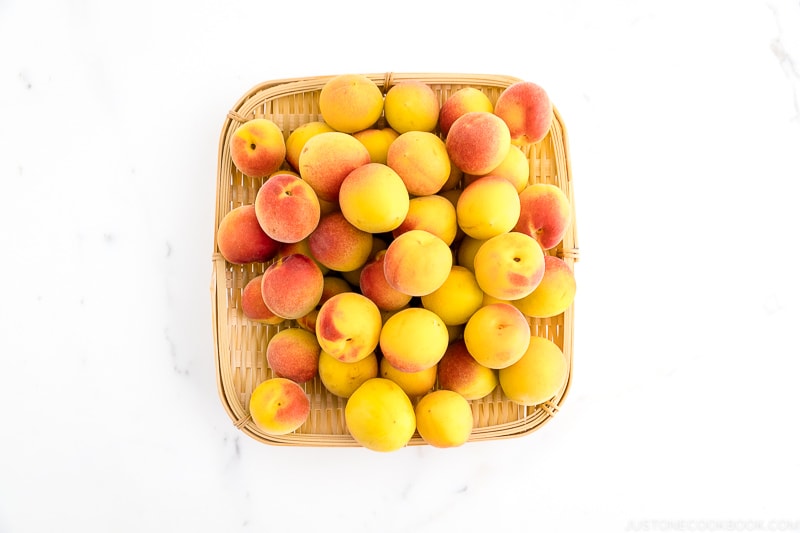
These ripen ume are called Kanjuku Ume (完熟梅) and they are the best to make umeboshi. If your ume are still green-ish, you can leave them out at room temperature and wait for them to fully ripen.
Where to Get Ume
Both Japanese and Korean grocery stores sell these plums around early to mid-May. You can also find them at specialty fruit producers online. You need to be alert and look for them as they are in the store for a short period, probably 2 weeks or so.
- Nicholas Family Farms (Text or call Penny at 559-393-3009)
- Kudo Farms (organic ume 10 lb per box; ship within the 48 states)
- Good Eggs (SF Bay Area)
- GreatPlentifulShopCA (They also sell semi-ripe ones)
How to Make Umeboshi
All You Need is 3 Ingredients
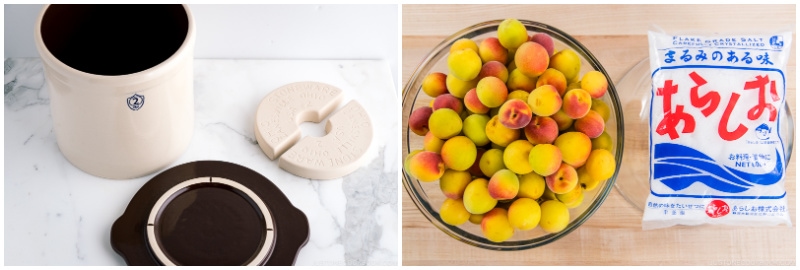
1. Ume Plums
To make umeboshi, you will need ripened, yellow, and blushed ume plums called Kanjuku Ume (完熟梅).
You can make umeboshi with the green ones, but they have too much astringency, so you will need to soak the ume in water for 6 hours before you process. You will also need to use heavier weights to properly pickle.
2. Sea salt (Arajio 粗塩)
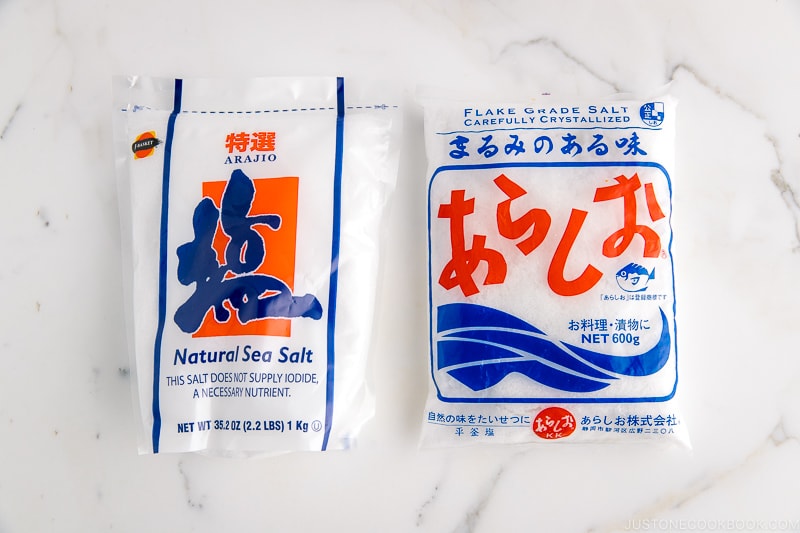
I use Japanese type called Arajio, but it’s basically coarse sea salt. Do not use table salt for pickling.
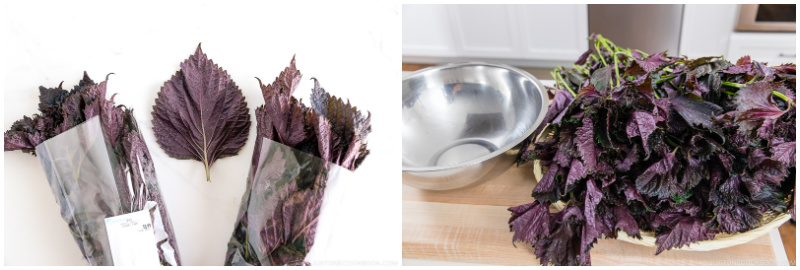
3. Red shiso (Akajiso 赤紫蘇)
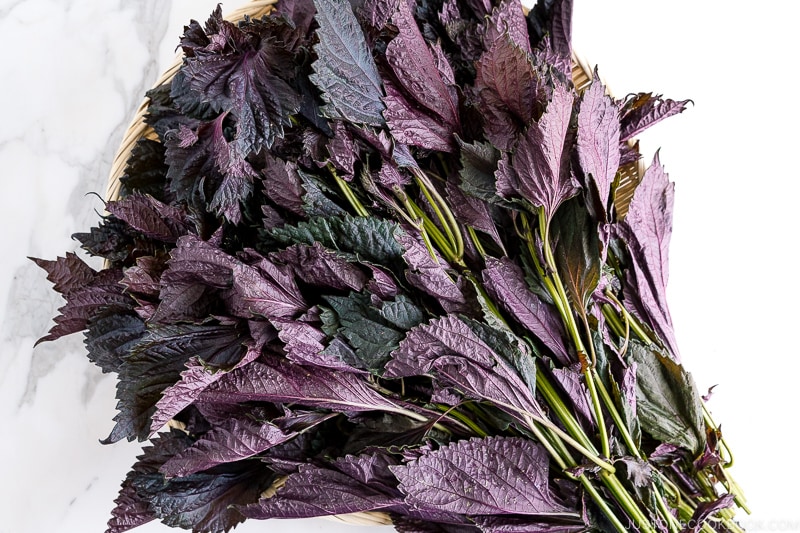
Be patient and wait until red shiso leaves are in season, usually mid to late-June. Or grow your own! You can leave your ume in the crock as long as they are soaked in the pickling solution (ume plum vinegar).
If you see red shiso in the store before your ume plums reach 7 days, go ahead and purchase them while supplies last. When you get home, wrap the stems with damp paper towels, and store the shiso in the refrigerator.
Red shiso contains astringency (‘aku‘ in Japanese), so we must knead and massage the leaves with salt first before use. Do not skip this step.
5 Helpful Tools You’ll Need
1. 2-Gallon Crock
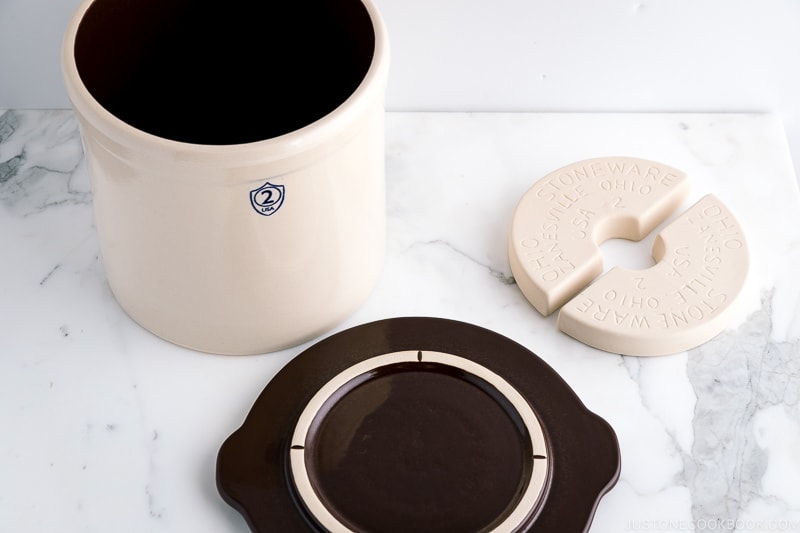
The #2 crock from Ohio Stoneware is sturdy and durable and it’s perfect for preserving and storing vegetables. It can contain 2 gallons, and the width is 9.75 inches, the height is 9 inches, and the depth is 9.75 inches. The 2-gallon crock starter kit comes with the crock, the lid, and 3.85 lb weights.
You can also use: Any wide-mouth glass or ceramic container.
Tips: Start looking for a crock as early as you can! I had a very difficult time finding a crock in my area. I’ve tried ordering a 2-gallon crock on Amazon 3 times, but each time the crock arrived cracked. I had to call hardware stores outside of my city and finally found two that I needed.
2. A large bamboo strainer (Bonzaru)
The Japanese uses a large bamboo strainer called bonzaru (盆ざる) to put the ume for sun drying. I have two large bonzaru from MTC Kitchen.
The strainer is good for air circulation and helps to keep the bottoms of the ume dry. If you use a plate, the bottoms don’t get dry. So use some kind of wooden rack. Do not use a metal rack.
What else can we use a Bonzaru for? How about using it as a serving tray for Onigiri (rice balls), Daifuku Mochi, or Taiyaki for parties?
Tips: Initially I debated if I should just use this mesh hanging dry net, but I bought one anyway. In the end, I ended up using the hanging net for drying red shiso (akajiso) to make Yukari (more about it in my recipe).
3. Mesh Food Cover Tent
To avoid fruit flies, bugs, or bird droppings, it’s best to protect these precious babies with mesh food cover tents.
You can also use: Two of these mesh hanging dry nets instead of purchasing large strainers and food cover tents.
Tips: If you live in a windy neighborhood like ours, you may need to tape it down so the food cove tents won’t fly away!
4. Homemade Plastic Drop Lid
To evenly distribute the weights over the ume, you’ll need a drop lid. My ume supplier friend, John recommended making a DIY drop lid with a cheap plastic cutting board, and it worked perfectly (Thank you John!).
You can also use: A plate. Do not use a metal drop lid.
Tip: Cut the plastic cutting board slightly smaller than the crock opening. I made it a bit too tight that I can only lift the drop lid with a (food styling) tweezer (haha!). Don’t follow my mistake.
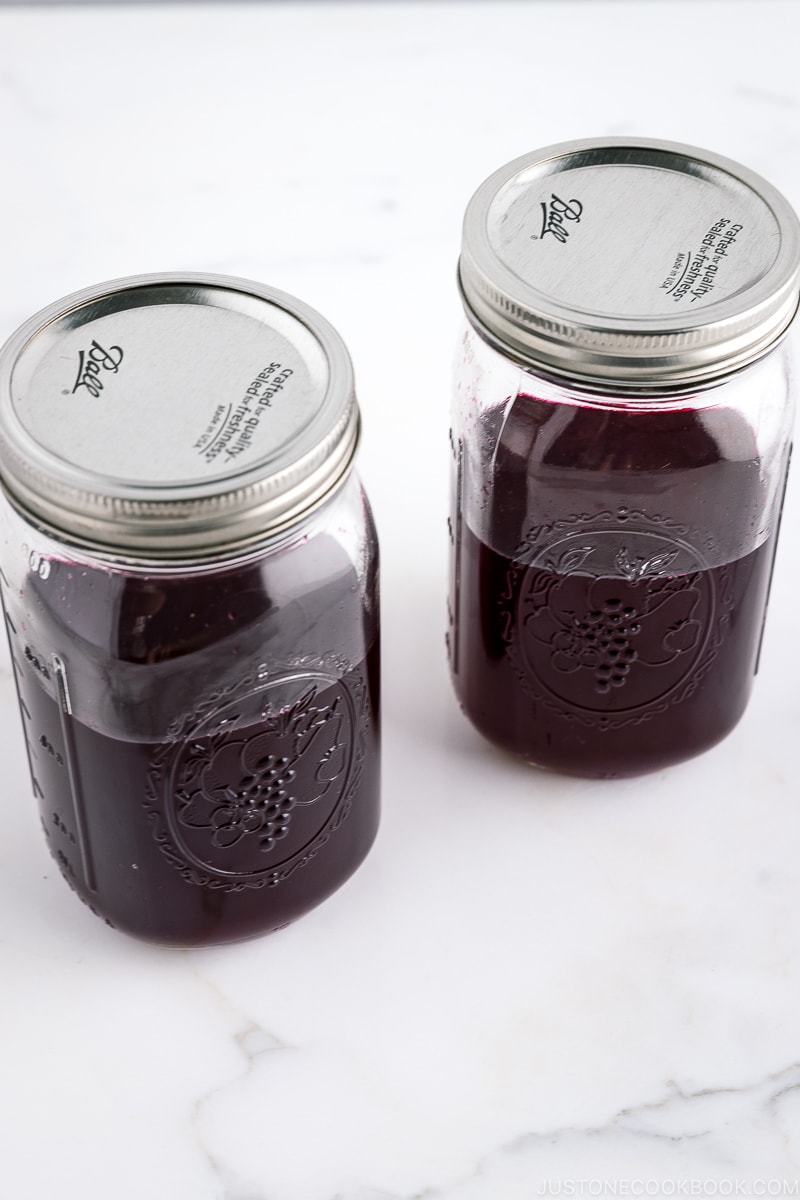
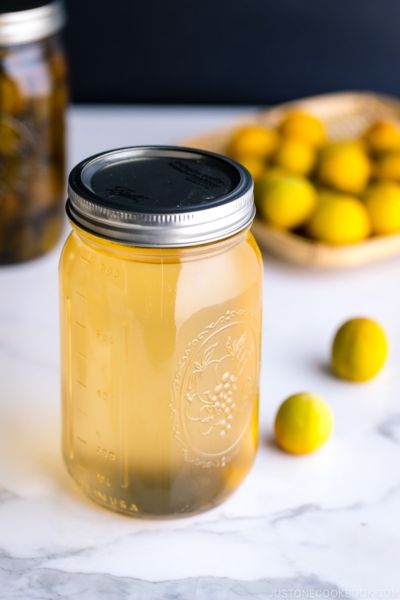
5. Mason Jars to Store Umeboshi and Ume Plum Vinegar
You will need some sterilized mason jars to store the completed umeboshi and ume plum vinegar.
You can also use: Any airtight containers.
Quick Overview
- Early-June: In a crock, layer the salt and the ume alternately. Store in a dark, cool place for 7 days (or more till red shiso is in season)
- Mid-June: Remove astringency from red shiso leaves with salt and add to the crock. Store in a dark, cool place for a month.
- Mid-July: Sun dry the ume and red shiso for 3 days and pack in jars.

Tips on Umeboshi Making
The number one enemy when it comes to umeboshi making is mold growth. Luckily, I live in a very dry and cool climate even during the summer, so I don’t have to worry too much. But if you live in a hot and humid climate, please follow the instructions carefully.
1. Salt must be 18% of the weight of the ume plums.
Traditionally it is 20%, but these days many people make umeboshi with 18%. The higher content of salt is to preserve the ume, keeping it safe from mold growth. Do not lower the amount.
2. Sterilize equipment with alcohol.
You must clean all the equipment with alcohol. You can use any alcohol that is higher than 35% ABV, like shuchu and vodka.
3. Use the right amount of weights.
The weights help pressing down the ume plums, drawing the moisture out of the fruits and creating brine for umeboshi. This brine, ume plum vinegar, keeps the umeboshi from mold growth.
To speed up the process of brine making, use heavy, double weights of the ume. You can remove the weights after the ume are completely covered by the brine.
When the weights are too heavy, they may smash the ume and tear the skin. So be careful.
4. Use good ume and discard damaged ones.
Don’t try to save the damaged plums. It’s not worth throwing the entire batch away just because you tried to save one that has a damaged spot.
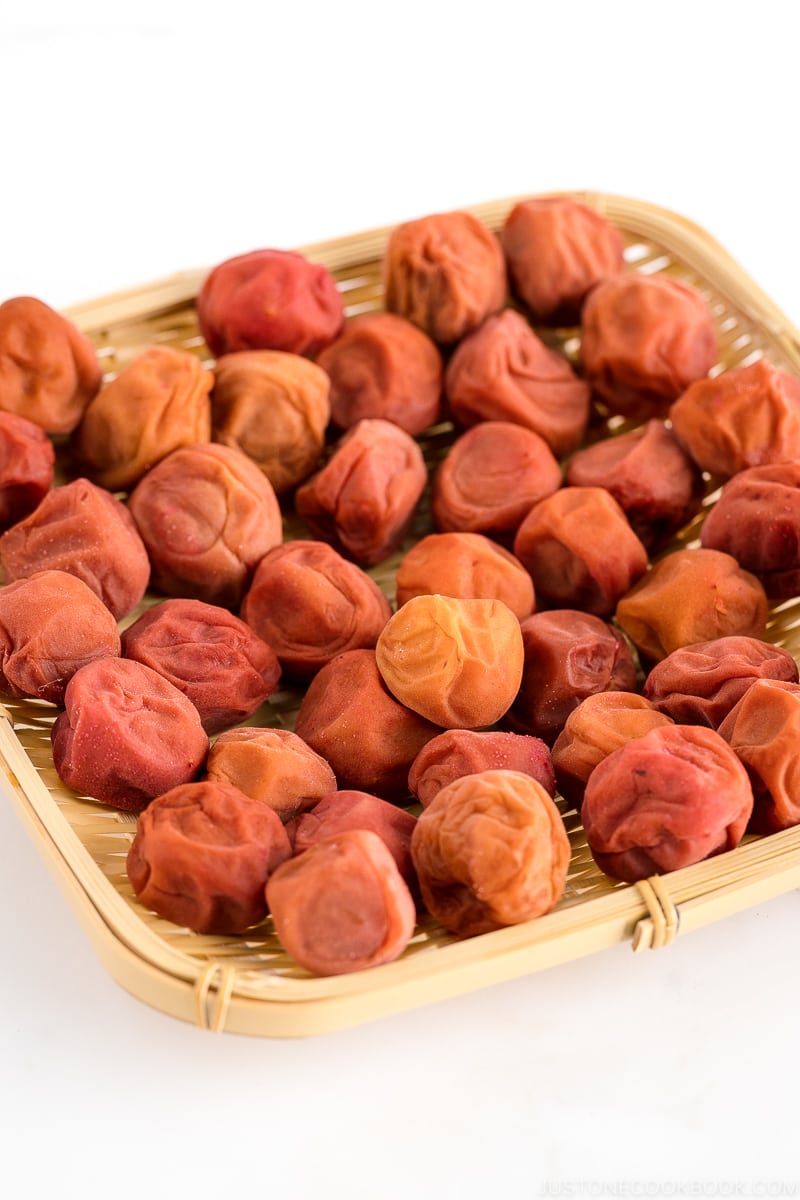
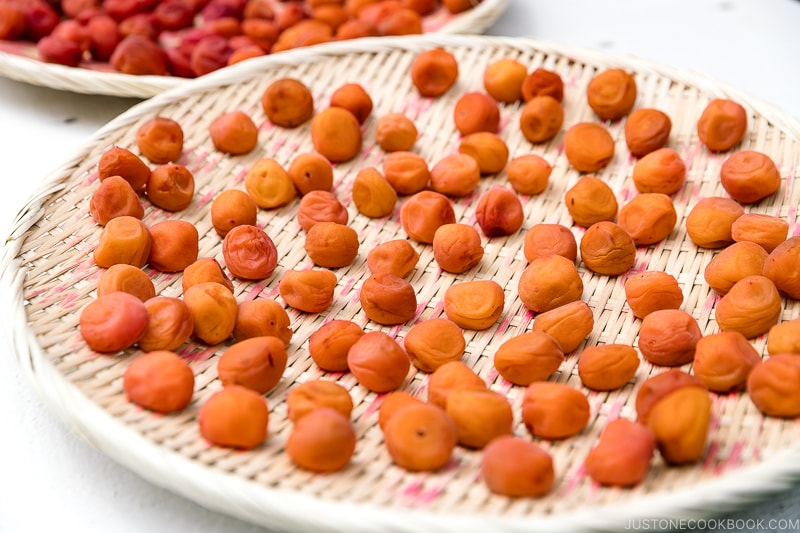
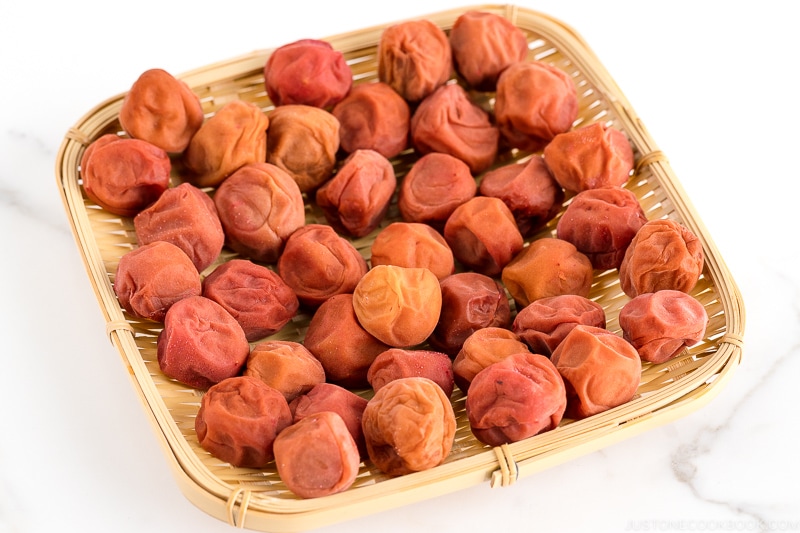
5. Dry the ume for 3 days in bright sunlight.
The ume are dried in the sun for about three days after being pickled in salt and red shiso leaves. This process not only helps with the shelf life of umeboshi, but also improves the meaty texture from moisture evaporation, giving you the characteristic wrinkly look.
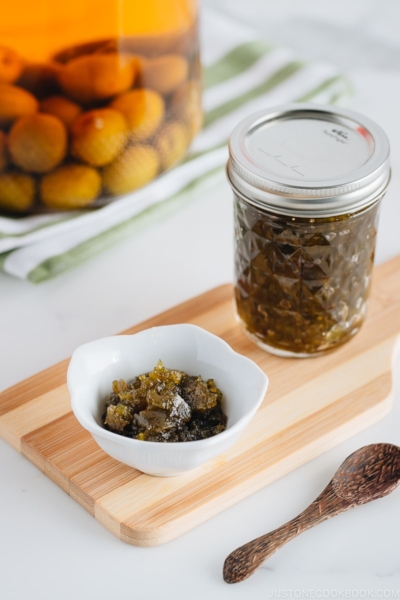
What to Do with Red Shiso and Ume Plum Vinegar
When I dry my umeboshi, I also leave the red shiso under sunshine until they are completely dried, about 2 days or so. Then I run them in the food processor to make homemade yukari (ゆかり), Japanese rice seasoning.
The leftover red-color ume plum vinegar (umezu) can be used for beni shoga (pickled ginger), salad dressing, or for coloring ingredients.
Despite its name, ume plum “vinegar” is not a true vinegar. The sourness comes from the natural sour and tangy ume and saltiness from umeboshi’s salt-pickling process. This by-product is unique and the fruit of your hard work, so don’t throw it away.
Your homemade red plum vinegar tastes better than a bottled ume plum vinegar that is available for purchase at a Japanese grocery store or Amazon.
Other Ume Plums recipes
If you are looking for more ume recipes to try, here are some of my favorites. Enjoy!
Sign up for the free Just One Cookbook newsletter delivered to your inbox! And stay in touch with me on Facebook, Pinterest, YouTube, and Instagram for all the latest updates.
Umeboshi (Japanese Sour Salted Plums)
Ingredients
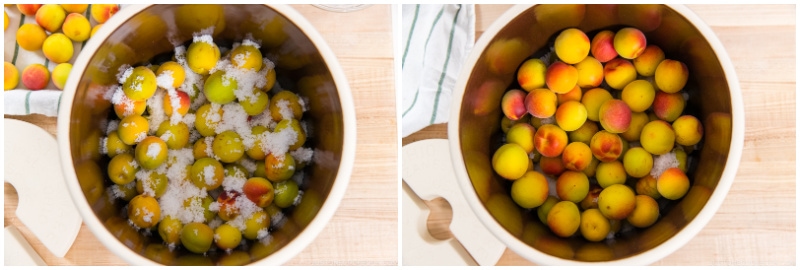
- 3 kg ume plums (use fully-ripened, golden yellow ume with blushes of peachy-pink; if yours are slightly green, ripen them at room temperature before using)
- 540 g coarse sea salt (use 18% of the weight of the ume, or 180 g salt per 1 kg ume)
- 120 ml shochu (for sterilizing; or use vodka or any alcohol higher than 35% ABV)
For the Red Coloring (optional)
- 600 g red shiso leaves (perilla) (use 20% of the ume‘s weight; roughly 100 g leaves in a typical packet from Nijiya market)
- 108 g coarse sea salt (use 18% of the shiso‘s weight)
Instructions
To Prepare the Equipment (Before Ume Season)
- Prepare your equipment ahead of time as you may need to order online. You will need a large bowl; a 2-gallon crock; crock weights (double the ume‘s weight; I used the 3.85-lb weights that came with the crock plus a bag of salt); a drop lid (you can make your own with a thin plastic cutting board cut slightly smaller than the crock’s opening); one or two large Japanese bamboo strainers called bonzaru; and a mesh hanging dry net.
[Optional] To Soak the Ume the Day Before (Day 0; June 4)
- Many recipes mention to soak the ume overnight to remove astringency (aku in Japanese). If you are using green ume, you may want to soak for 6 hours. If you are using green ume that you ripened, soak for 2–3 hours. If your ume are yellow and blushed like mine, skip this step as most have less astringency. Soaking also may discolor, dent, and promote mold growth on the ume. If you damage any ume, you can trim the damaged parts and use the ume to make jam.
To Pack the Ume in Salt (Day 1; June 5)
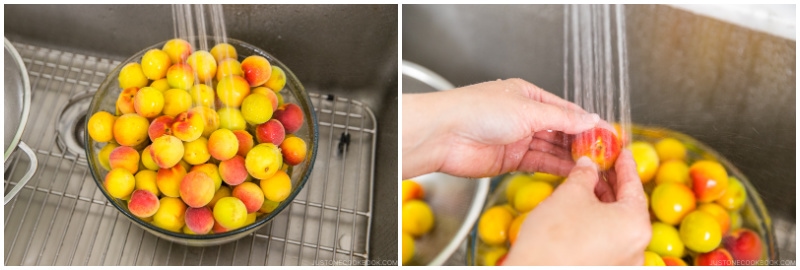
- Rinse 3 kg ume plums under cold running water. If you see blemishes or damage on the ume, don’t use it because they can start to grow mold from there.
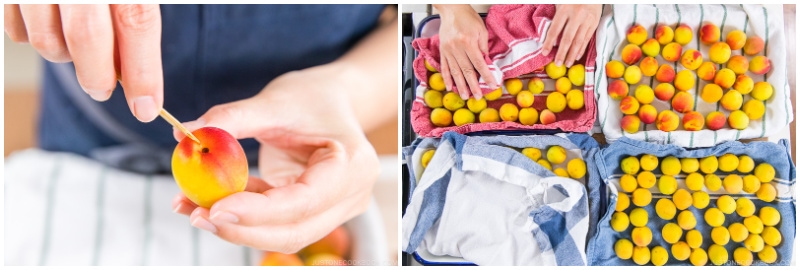
- Using a bamboo skewer, carefully remove the woody bits where the fruits were attached to their stems. It’s tedious work, but please do not skip. Gently dry the ume completely with a clean kitchen towel.
- With very clean hands, pour some of the 120 ml shochu on a clean kitchen towel and wipe the inside of the crock with the alcohol to sterilize.
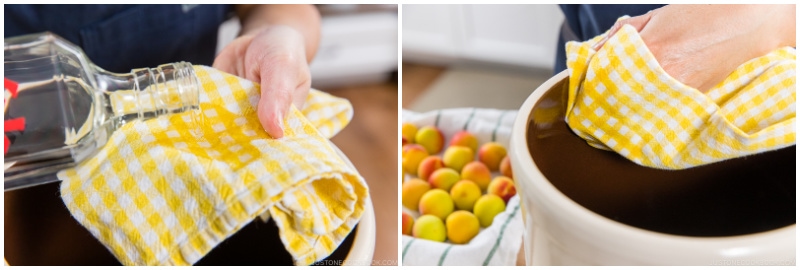
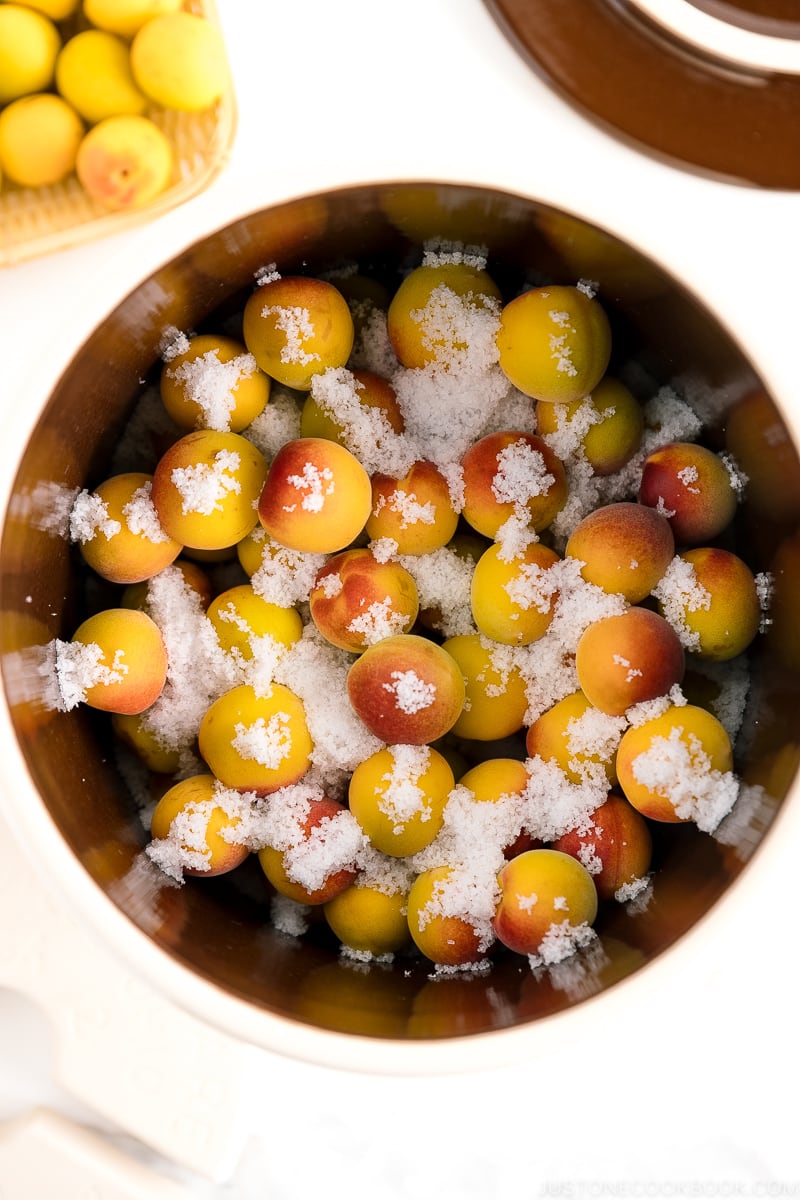
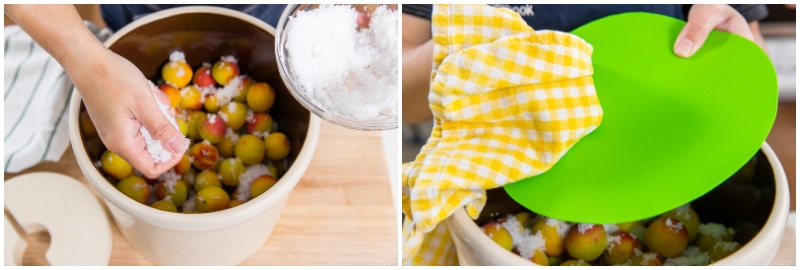
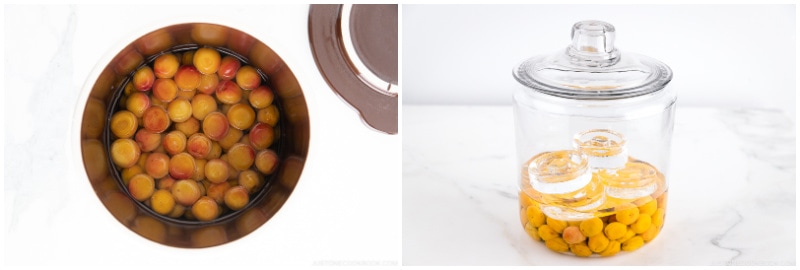
- Sprinkle some of the 540 g coarse sea salt to cover the bottom of the crock. Then, add 2 layers of ume.
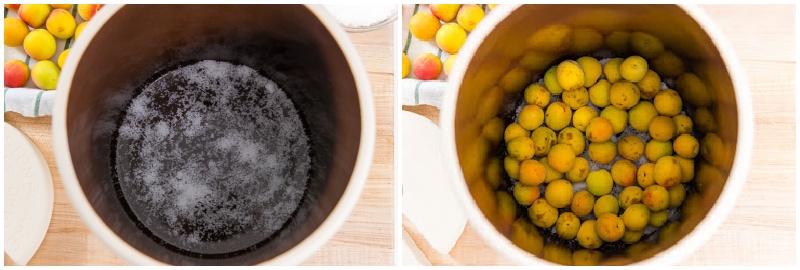
- Sprinkle more salt on top followed by 2 layers of ume.
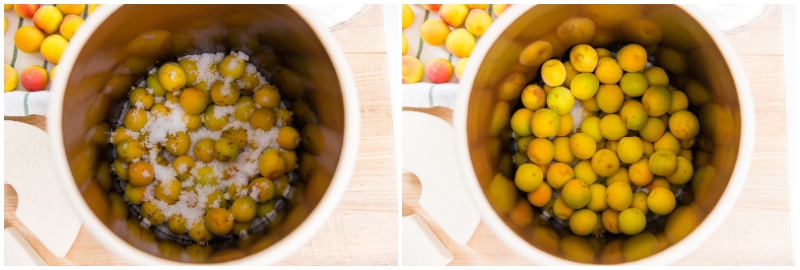
- Continue to layer the salt and ume alternatively.
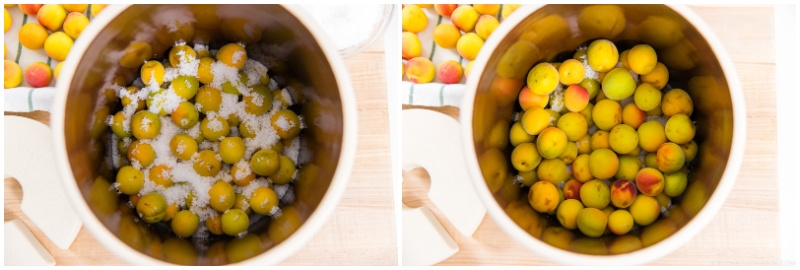
- If you use the same size crock as mine, the ume should fill it around two-thirds of the way to the top.
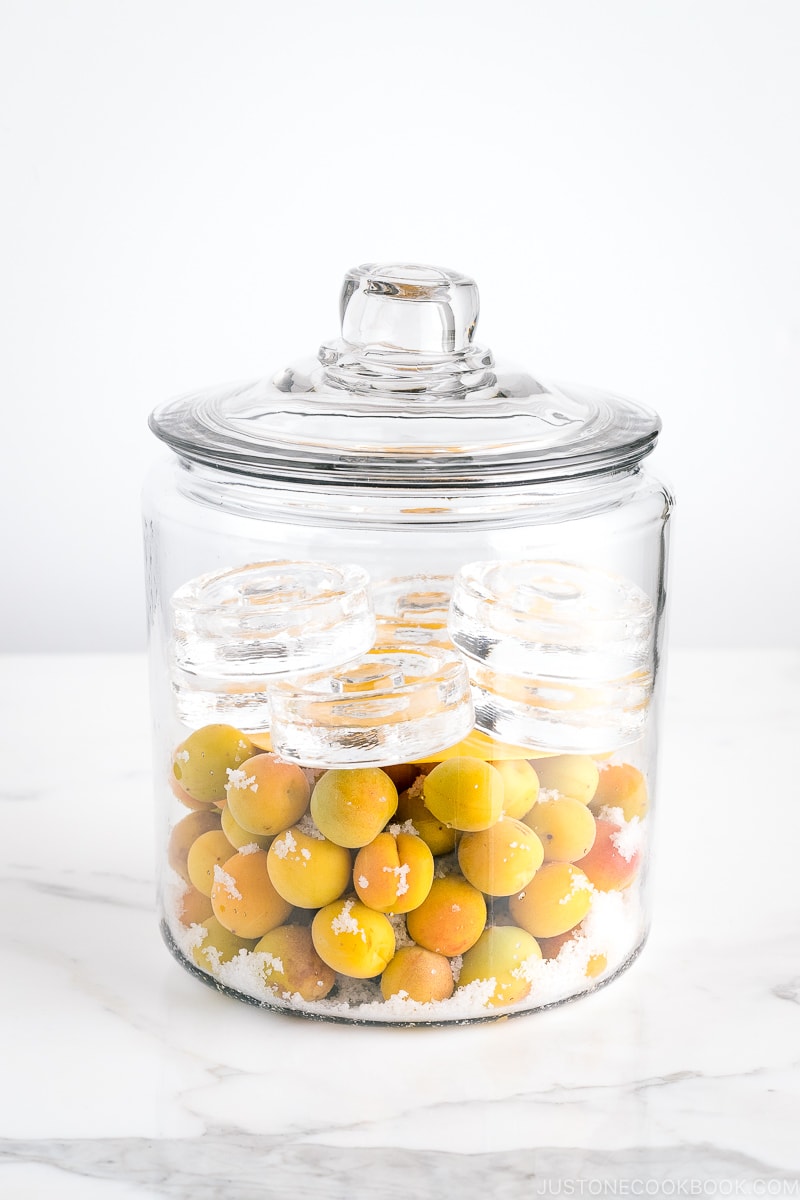
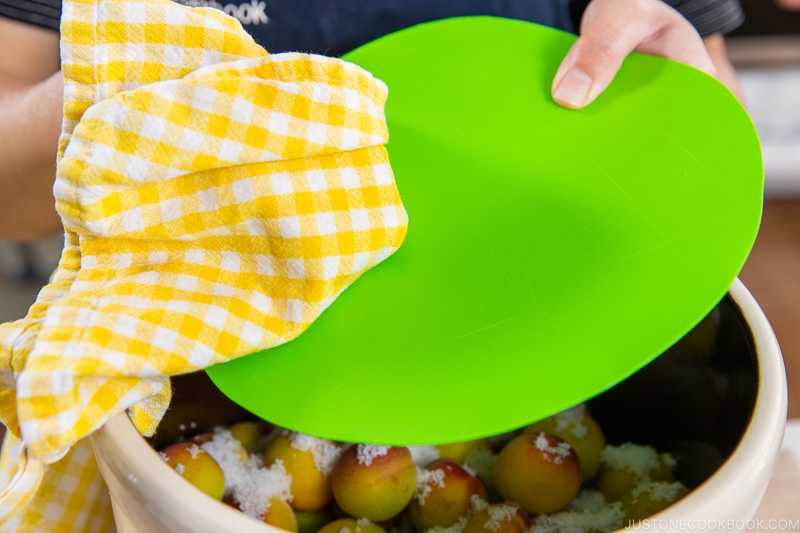
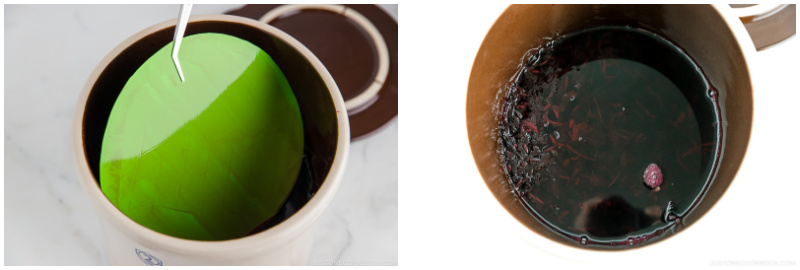
- End with a layer of salt. With some shochu on a clean kitchen towel, wipe to sterilize the plastic drop lid where it touches the fruit. Place on top of the ume.
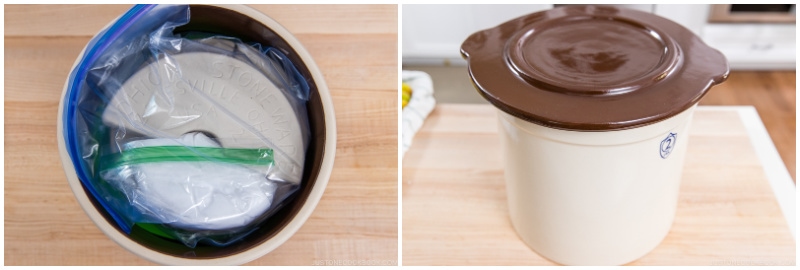
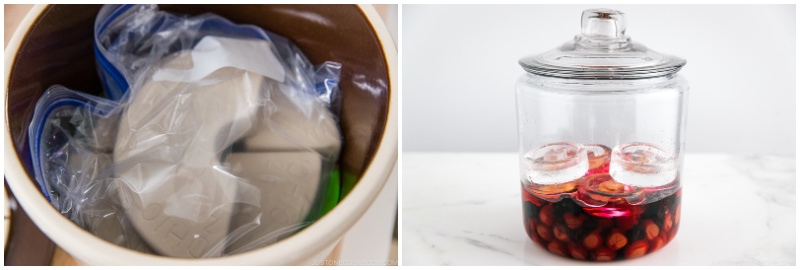
- Place the weights on top of the drop lid. You‘ll need twice the ume‘s weight (6 kg or 13.2 lb). Cover with the crock lid. Optional: If you live in a place with high humidity, you may want to wrap the top tightly with plastic and cover the crock with paper to prevent the umeboshi from growing mold. Label the crock with today’s date and leave the crock in a dark, cool place.
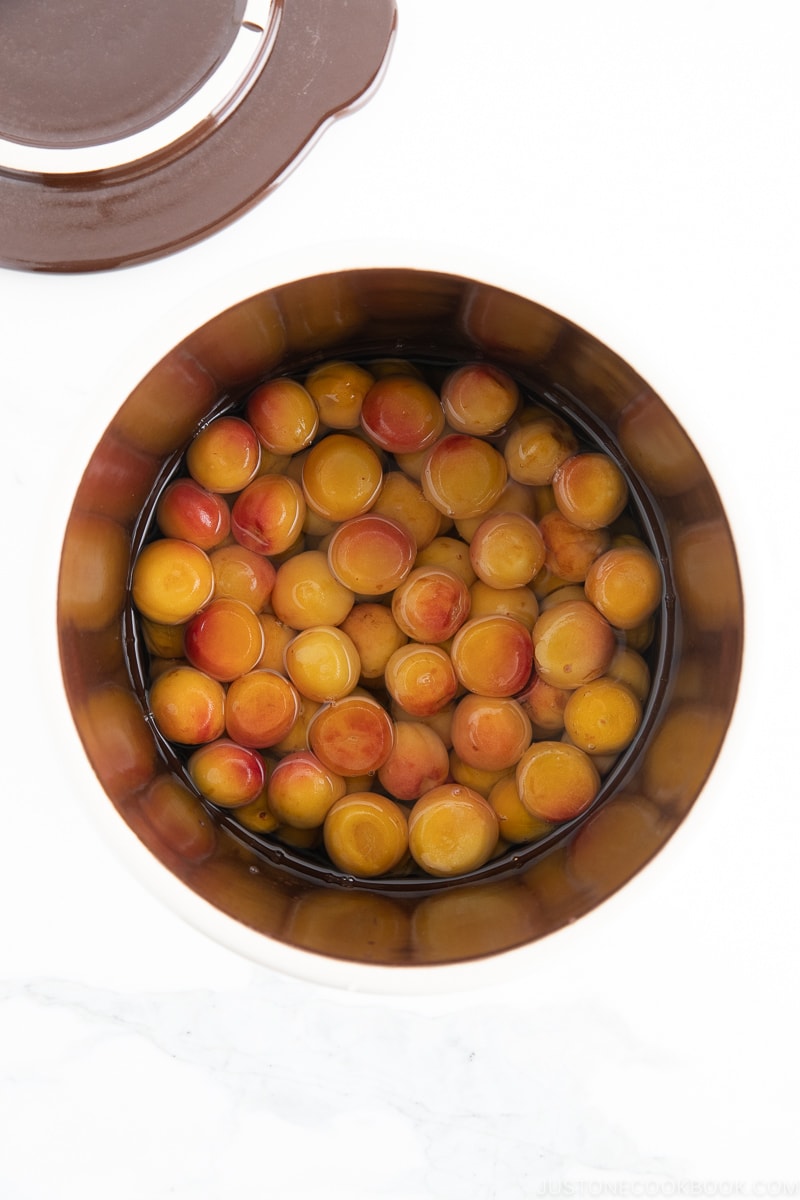
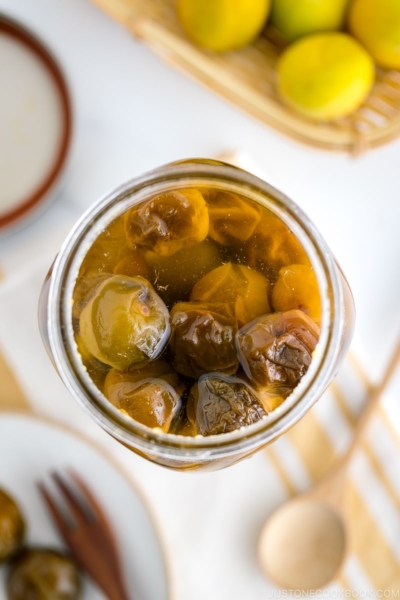
To Check for Ume Plum Vinegar (Day 2–3; June 6–7)
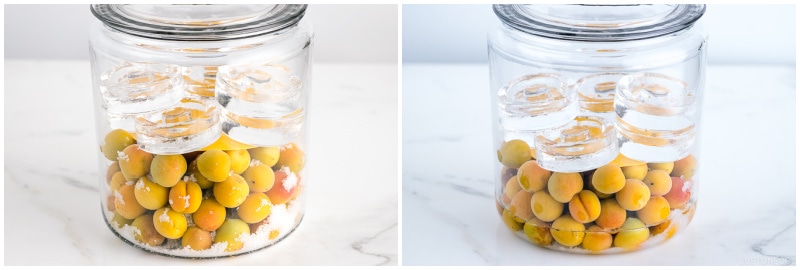
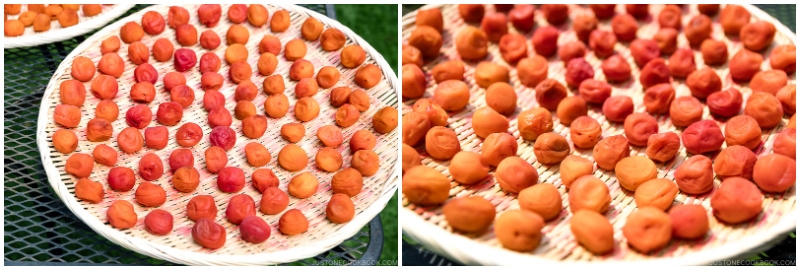
- After a few days, the ume will start releasing moisture. You should see a layer of ume plum vinegar (梅酢, umezu) on top. If the vinegar does not come up easily, increase the weight so that the ume sinks into the vinegar (this will protect the umeboshi from growing mold and going bad). The image below shows Day 1 and Day 2. It takes about 7 days to release enough vinegar to completely submerge the ume.
To Adjust the Weights (Day 7; June 11)
- Open the crock lid for the first time! Using clean hands and equipment, check to see if the ume are completely submerged in plum vinegar. If so, you can add the red shiso anytime, but it may not be available yet.
- Adjust the weights, as needed. If the ume plum vinegar is 1 inch (2.6 cm) above the plums, decrease the amount of weights to roughly equal the weight of the plums. If the plums are smashed or torn, also decrease the weights. You can store the crock in a cool and dark place for at least 1 month or so while you wait for the red shiso to be in season. Make sure to keep the ume completely submerged in the plum vinegar during this time. I added red shiso on Day 14 due to availability in my area.
To Wait Until Red Shiso Are Available
- In the meantime, patiently wait until red shiso (perilla) is in season, usually in mid- to late-June. You can leave your ume in the crock as long as they are submerged in the ume plum vinegar. Get red shiso when available in the Japanese grocery store. If your ume haven‘t reached 7 days at that time, wrap the shiso stems with a damp paper towel and store them in the refrigerator. If you can't get red shiso, you can skip and go straight to the sun-drying step.
To Add the Red Shiso (Day 14; June 18)
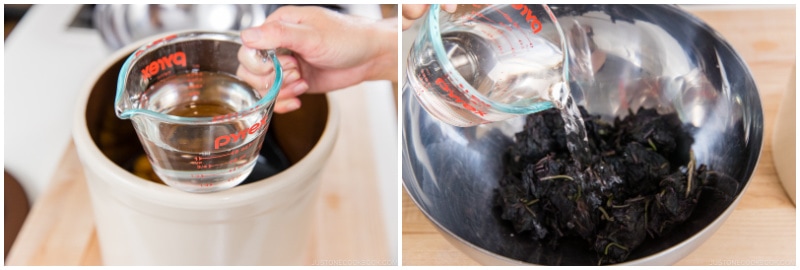
- Pick 600 g red shiso leaves (perilla) from the stems and put them in a large bowl.
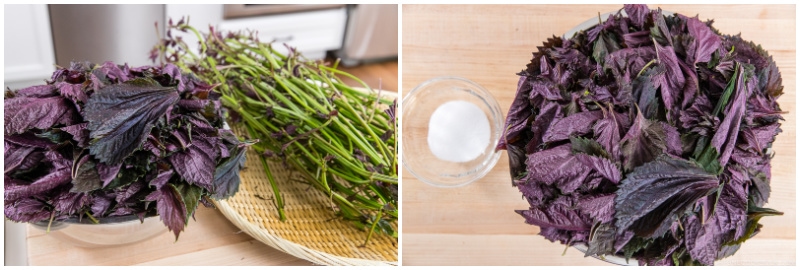
- Rinse them in plenty of water and drain well.
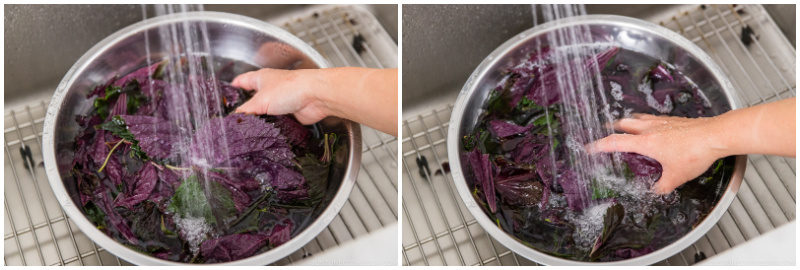
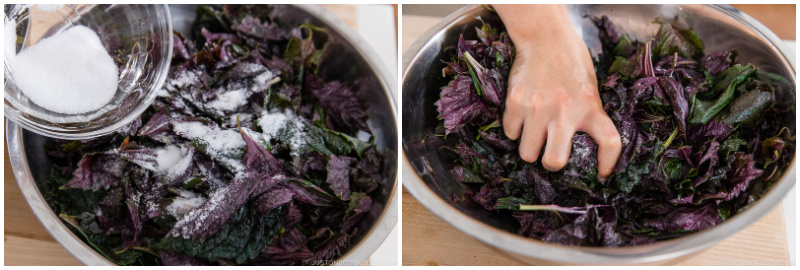
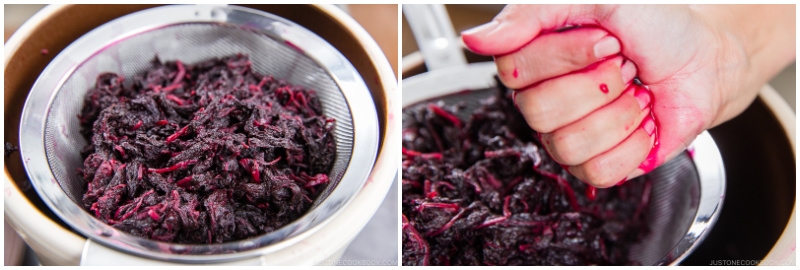
- Sprinkle with half of the 108 g coarse sea salt and knead the shiso really well. The salt slowly starts to draw the moisture from the leaves as you knead. Note: Red shiso is a powerful dye and will stain your hands red for a day or two. You can wear disposable food prep gloves to avoid this.
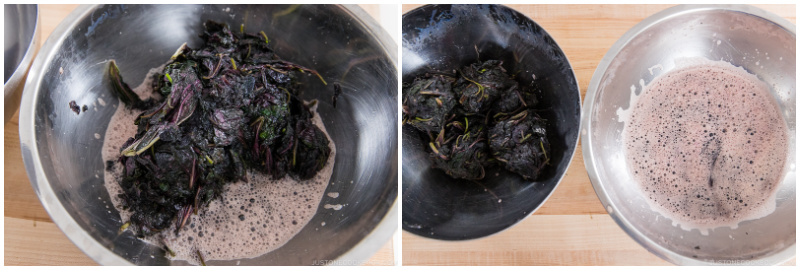
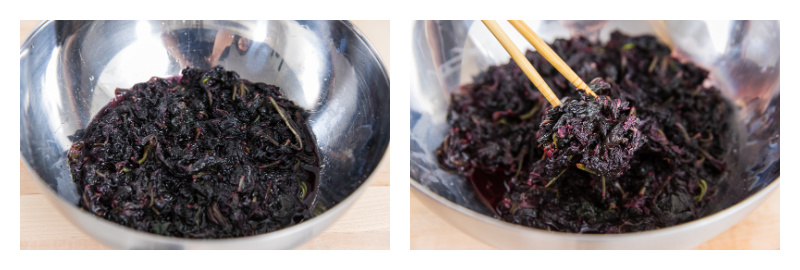
- The dark, frothy, purple shiso liquid contains astringency (aku). Squeeze the shiso tightly and discard the dirty water.
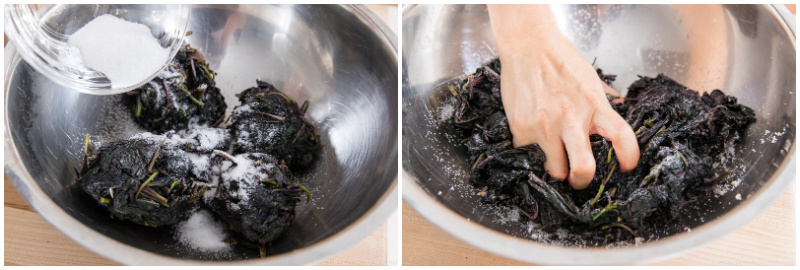
- Then, add the remaining salt to the squeezed shiso and loosen them up. Knead and rub until they release more juice. If you don’t get rid of the astringency at this stage, your umeboshi will be darker. So, do not skip this step.
- You will see more liquid coming out. This time, it’s a slightly prettier color than the first time. Squeeze the shiso and discard the dirty water again.
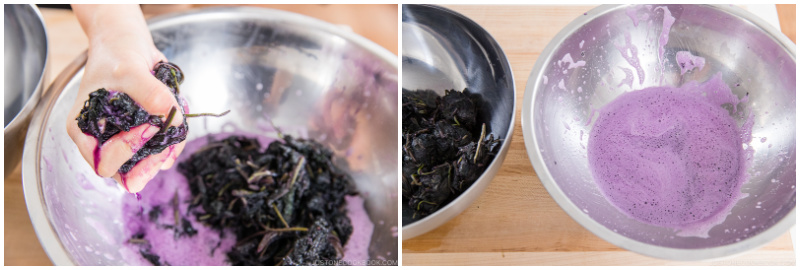
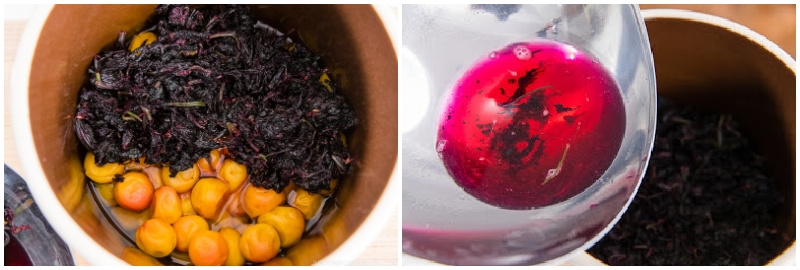
- Open up the crock. Take out 1 cup of clear ume plum vinegar (umezu). Add it to the squeezed shiso in the bowl.
- When you loosen up the red shiso, the ume plum vinegar will soon turn a bright purple/red color.
- Pour the red shiso leaves and remaining shiso liquid over the ume in the crock.
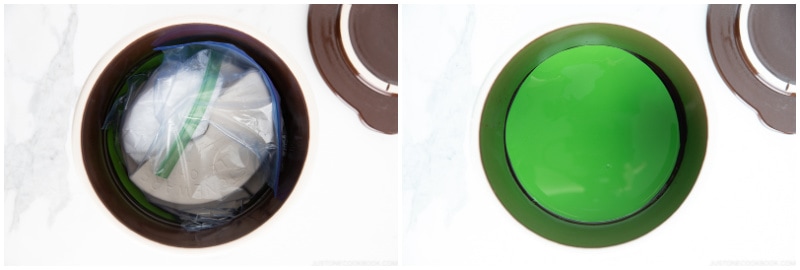
- Evenly distribute the shiso leaves to cover the ume. Replace the plastic drop lid on top.
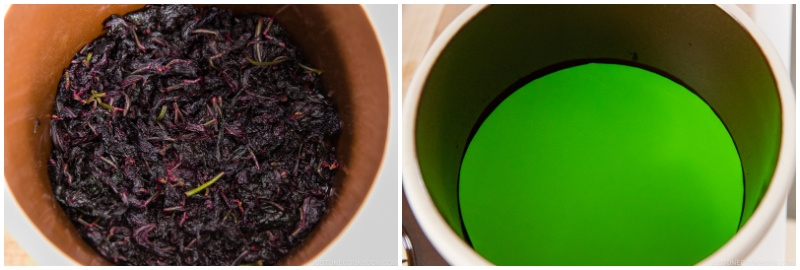
- Place weights on top again, this time equal to the ume‘s weight (3 kg or 6.6 lb). Cover with the crock lid and put it back in the dark, cool place for one month. Over the next month, the shiso‘s red color will permeate the ume plum vinegar and ume. When the vinegar exceeds 1 inch (2.5 cm) above the shiso leaves, reduce the weight so the ume does not tear.
To Sun-Dry the Ume (One Month After Adding the Shiso; July 17–19)
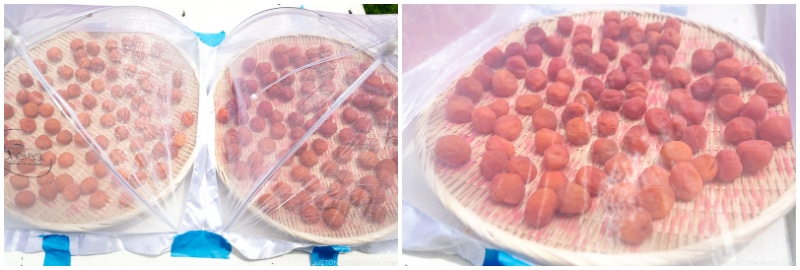
- Check the forecast and plan on 3 straight days of ume drying on sunny days. On these 3 days, expose the ume all day to the strong summer sunshine to prevent mold growth. The moisture also evaporates, which yields more concentrated flavors and a meaty texture.
- Open the crock lid and remove the weights and drop lid. The ume plum vinegar now has a beautiful deep red color.
- Scoop away or move the layer of red shiso so you can see the ume. I just moved them aside so I can pick up the plums. The skin is very fragile, so handle it with care.
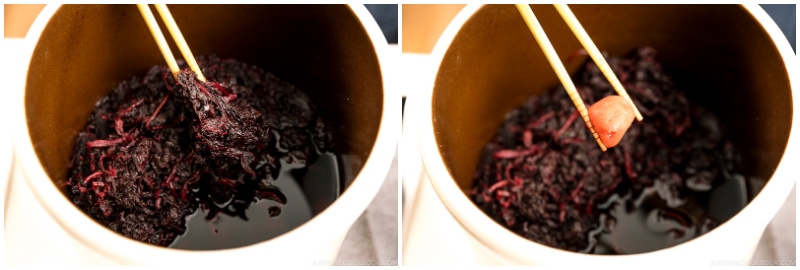
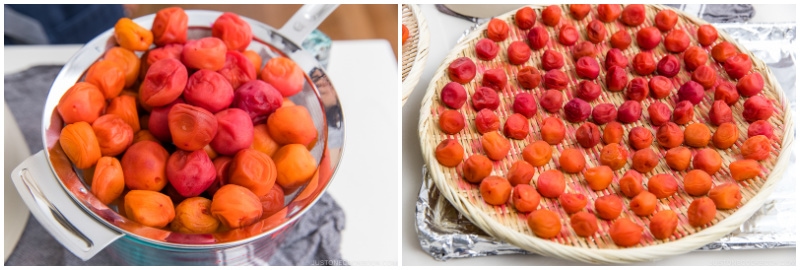
- Remove all the ume from the crock. Drain them in a sieve placed over a large bowl (I use a 4–cup measuring cup here) to catch the liquid.
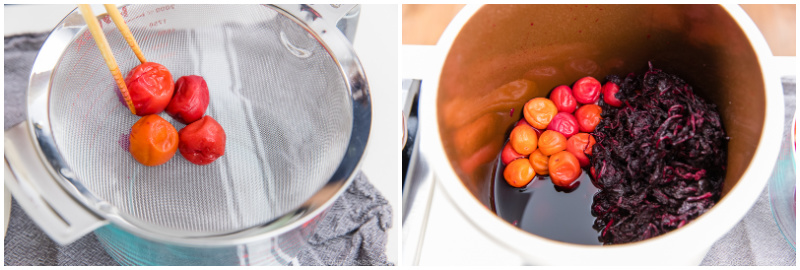
- The ume closer to the layer of shiso has a darker red color. Transfer the ume to a flat bamboo strainer, keeping some space between each of them. You will probably need 2 large strainers.
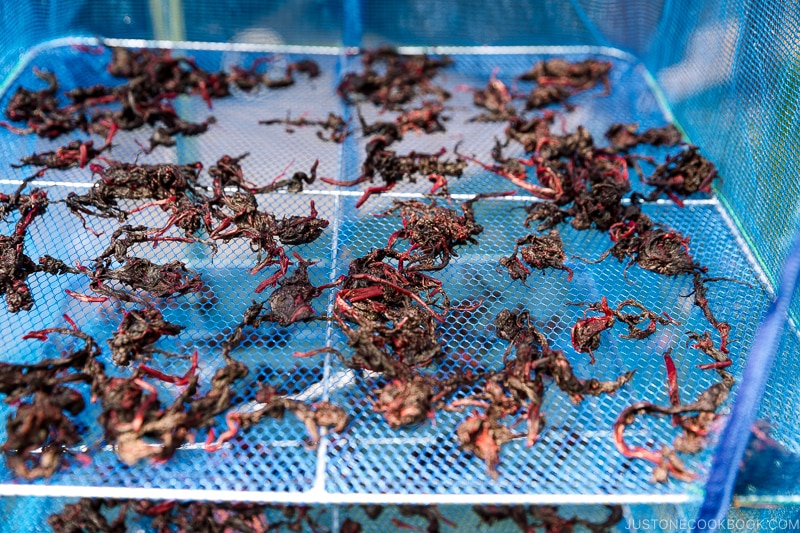
- Remove the shiso leaves from the crock and drain in the sieve placed over a bowl/measuring cup. Squeeze the liquid out.
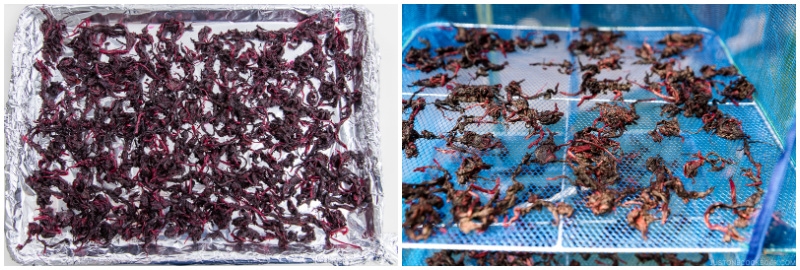
- Place them over a tray lined with foil or parchment paper. Then transfer the shiso to the hanging dry net and place outside for 2–3 days until they dry out completely (in the mid-afternoon, take them inside the house with umeboshi).
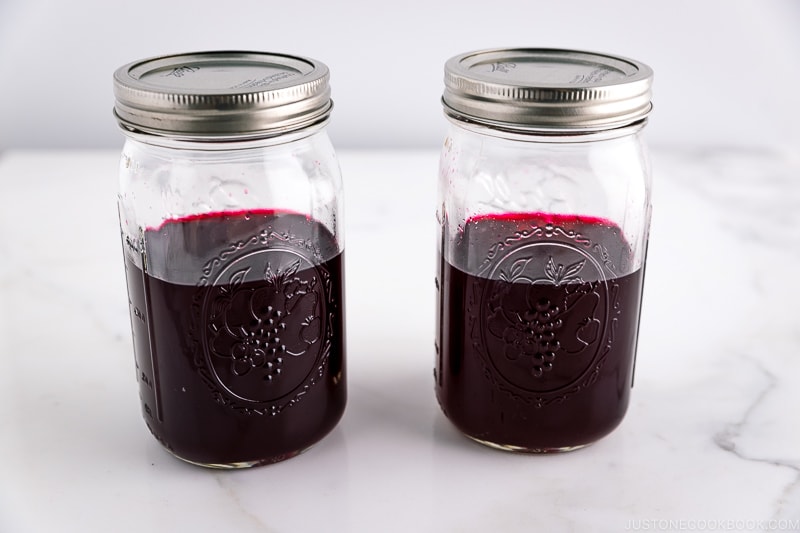
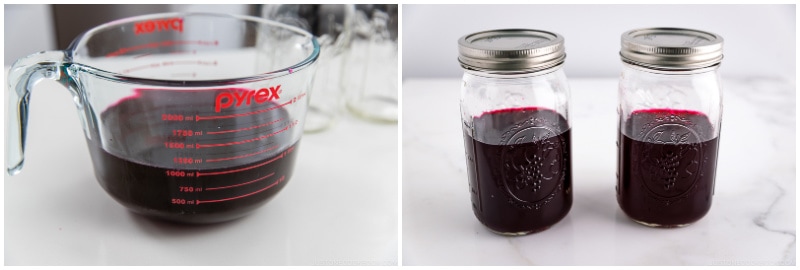
- Transfer the ume plum vinegar from the crock to sterilized mason jars. Keep it in the refrigerator.
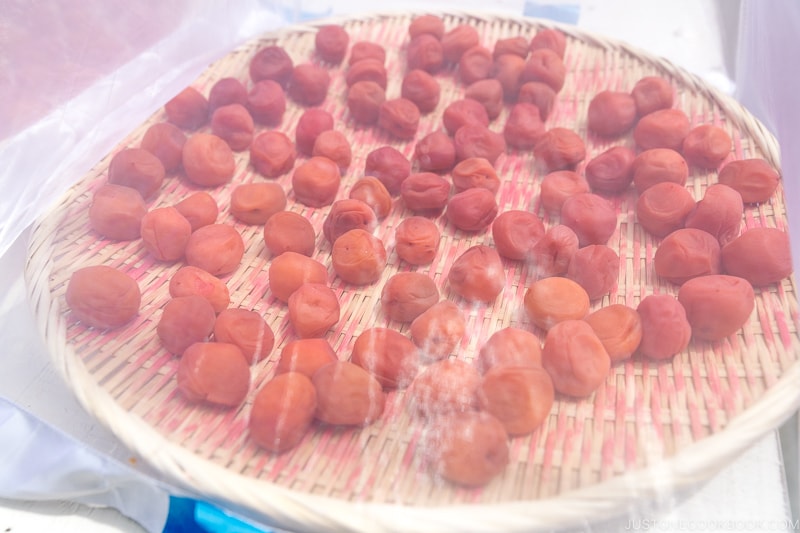
- Place the ume under the sunshine all day, from morning to mid-afternoon before the air gets cool and the moisture starts to build up.
- You may use food cover tents to protect the ume from bugs. When I bring the ume indoors in the mid-afternoon, I keep them on the bamboo strainers. Some people put the ume back in the plum vinegar so they can absorb more juice and color after drying all day. It‘s up to you. The next morning, flip over the ume before you take the strainers outdoors again. The ume skin does not stick to the strainer overnight, so it‘s easier to turn them over in the morning. Repeat this drying process for another 2 days. By the 3rd day, the umeboshi are plump but slightly wrinkled. Some may have white salt visible on their surface.
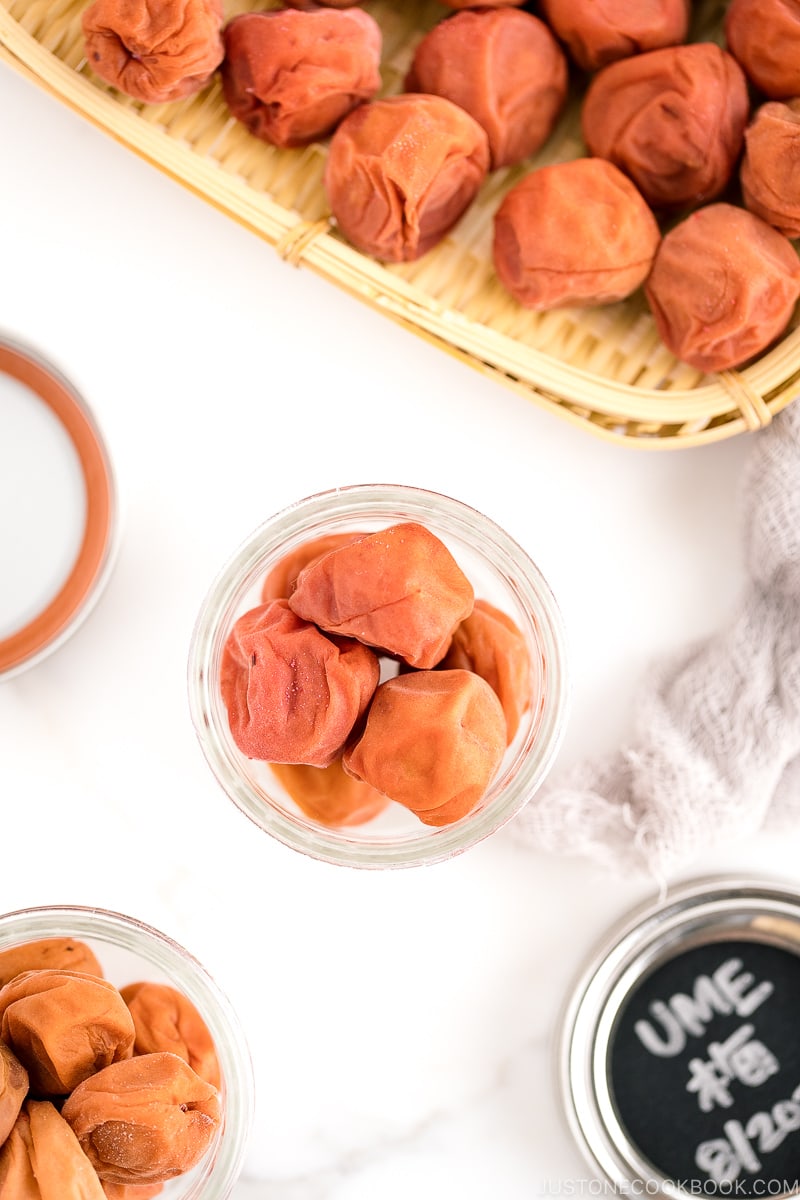
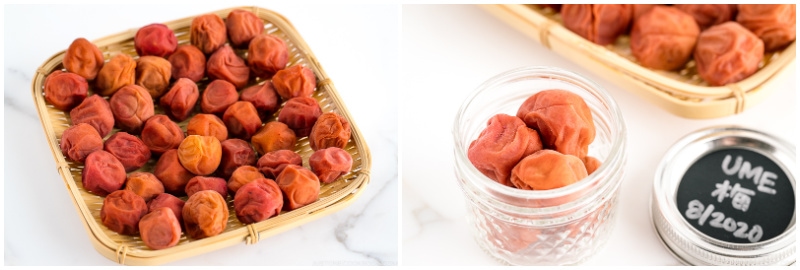
To Store
- After 3 days of sun-drying, they are ready to pack away. You have 2 options: 1) put the umeboshi back into the ume plum vinegar to preserve; or 2) keep the umeboshi in a sterlized airtight mason jar as is. The first method will yield bright red, juicy, more sour umeboshi. The second method will yield less red, stickier, and less sour umeboshi. I use the second method.
- It’s best to rest the umeboshi for at least 3 months so the flavors will mature (I wait for 6–12 months). Even if you can eat the umeboshi immediately, they are just too salty and are not very delicious. If they are stored for 3 months or more, they will mature and mellow out the salty, sour flavors slightly. You can keep the umeboshi in a dark, cool place for 2–3 years.
To Use the Umeboshi
- Your homemade Umeboshi are the classic accompaniment to many Japanese rice dishes like onigiri rice balls, mixed rice, and rice porridge. They‘re also a delicious flavoring for salad dressing, pasta, and bento. For more ideas, check my umeboshi recipes on the blog.


Do you have a recipe for honey umeboshi? I just tired one and like the sweeter version.
Hi Karen! Thank you for reading Nami’s post.
We currently don’t have a honey umeboshi recipe. Hopefully, we can share the recipe soon.
What should you do if the weather suddenly changes and you don’t have 3 days in a row of sunny weather? Should you continue the next time there’s sun or do you need to start at day 1 again? Should you act differently if you returned the ume to the ume vinegar after the day of drying? Thank you!
Hello, Cheryl! Thank you for trying Nami’s recipe!
If the weather unexpectedly changes, you can return the Ume to the Ume vinegar and continue drying when the weather is sunny again. (You do not have to start counting from the first day.)
You can also halt the process and enjoy the Umeboshi.
Some people love Umeboshi without the drying process and keep them in Ume vinegar, and it is totally up to you.
Just be careful not to over-dry the Umeboshi so that it retains a nice texture.
We hope this was helpful! 🙂