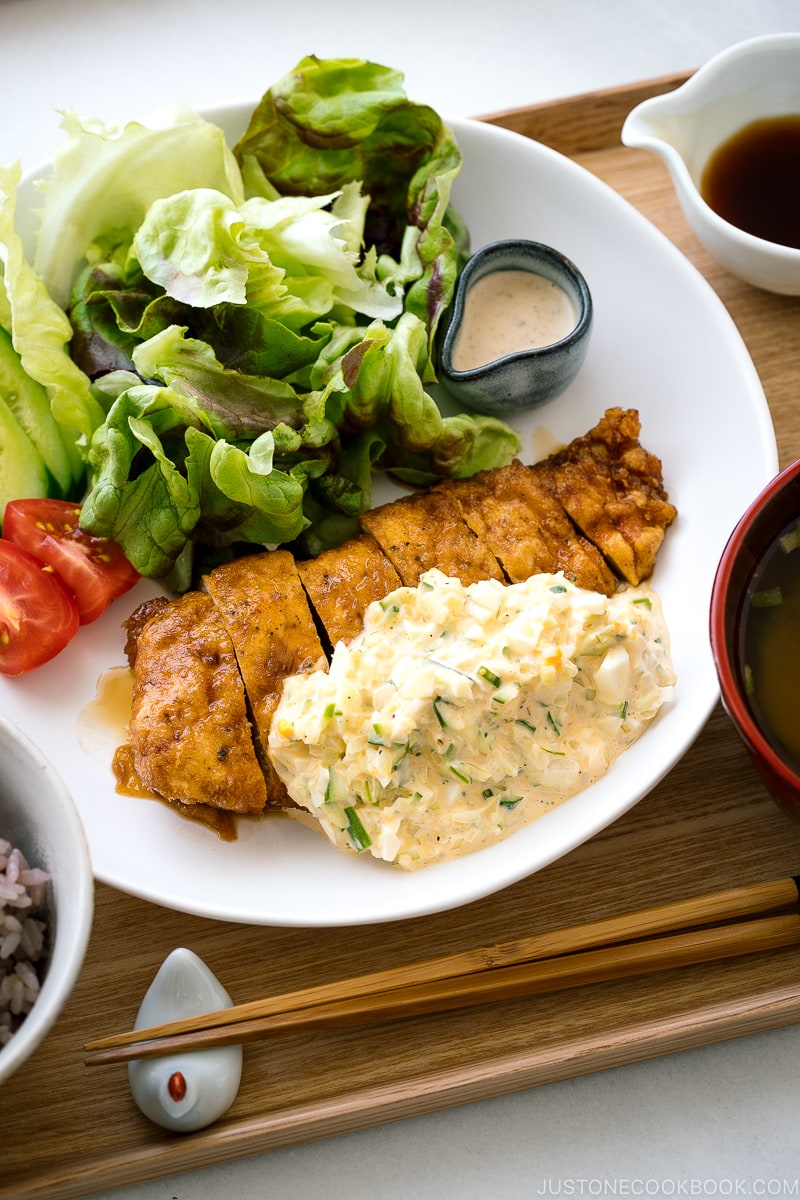
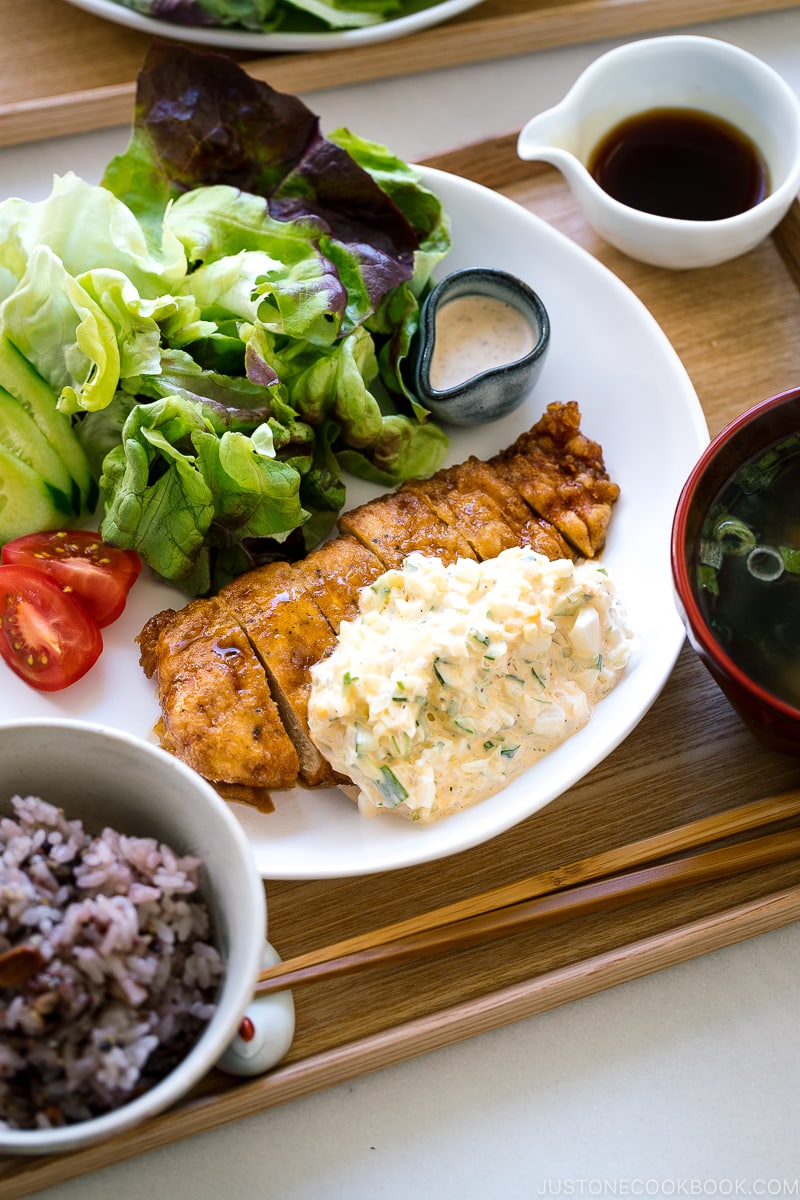
Inspired by Portuguese cuisine, Chicken Nanban is crispy chicken dressed with a tangy sauce and served with homemade tartar sauce. It’s fusion cuisine at its finest and one of Japan’s most popular ways to enjoy fried chicken.
From a small region in southern Japan, Chicken Nanban (チキン南蛮), once a relatively unknown dish, has become one of the country’s most popular ways to enjoy fried chicken (karaage).
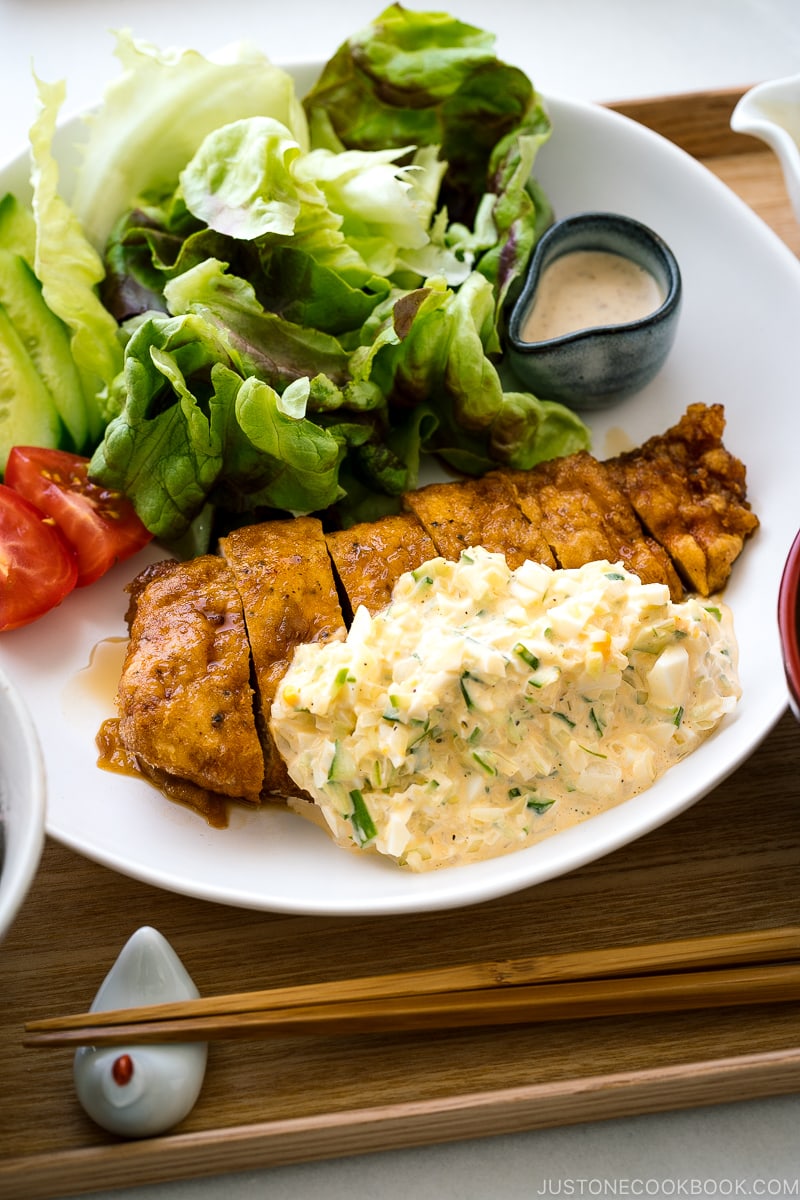
The dish is made with fried chicken dressed with a sweet and tangy nanban sauce and served with creamy tartar sauce for the finishing touch.
So, what sets Chicken Nanban apart from the other styles of Japanese fried chicken? The flour and egg coating. This method protects the meat from drying out while yielding a light, yet tasty crust that helps to soak up the sauces wonderfully. It is like a whole other level of chicken— you have to taste it to experience it!
What is Chicken Nanban
The origin of the word “nanban” (南蛮) has a pejorative overtone (literally translated to “southern barbarian” from the Chinese word “naanmaan”), but it became a term used in Japan to denote something foreign and highly desirable.
When the first Europeans came to Japan in 1543, they arrived from Portugal and brought with them innovative dishes that have become some of Japan’s most popular foods today. Some delicious examples of Portuguese-inspired Japanese dishes include Castella Cake, Tempura, and Salmon Nanbanzuke.
Chicken Nanban was created in a small town in the Miyazaki Prefecture of Kyushu, Japan’s southernmost island. Allegedly, it was a humble meal made for the staff of a local diner Nao-chan during the 1950s, and it quickly gained popularity as a menu item throughout Kyushu before finding its way around the rest of Japan.
Quick Overview of This Dish
- Flavor: The balance between tender bites of fried chicken, sweet and tangy nanban sauce and creamy tartar sauce are what leaves people wanting more! It’s a unique combination that everyone should try.
- Texture: The flour-coated chicken is dipped in beaten egg and goes straight into the hot oil. Fried chicken has a nice crunch until it is coated with the refreshing nanban sauce. While the breading is no longer crispy, it still adds to the texture of the dish as being distinctly different from the chicken. With the creamy tartar sauce, the chicken brings layers of unique textures.
- Time: The nanban sauce and tartar sauce take around 20 minutes to prepare, and prep time for the chicken is about 10 minutes. Once the frying process begins, this dish can be made in less than a half hour!
Nanban Sauce and Tartar Sauce
Chicken Nanban is served with both sweet and tangy nanban sauce (or nanbanzu in Japanese; 南蛮酢) and creamy tartar sauce. However, the original recipe served at Nao-chan did not, and still does not, come with tartar sauce.
There are countless variations of this dish and I personally enjoy the complex flavors of the juicy chicken, the slight acidity of the nanban sauce, and the tartar sauce—all in one bite!
How to Make Chicken Nanban
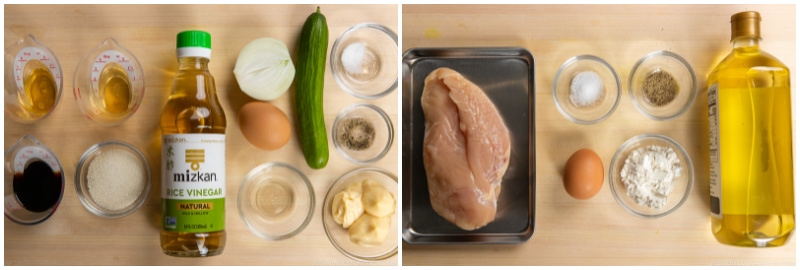
Ingredients You’ll Need
- Chicken: You can use boneless, skinless chicken breasts or thighs for chicken nanban—both variations are common in Japan. For my recipe, I used chicken breasts because it is easier to create an even thickness.
- Flour and Eggs: For coating the chicken.
- Nanban Sauce: Just 4 ingredients—rice vinegar, soy sauce, mirin and sugar.
- Tartar Sauce: You need a boiled egg, onion, cucumber, Japanese mayonnaise, rice vinegar, salt and pepper.
Overview: Cooking Steps
- Make the tartar sauce.
- Make the nanban sauce.
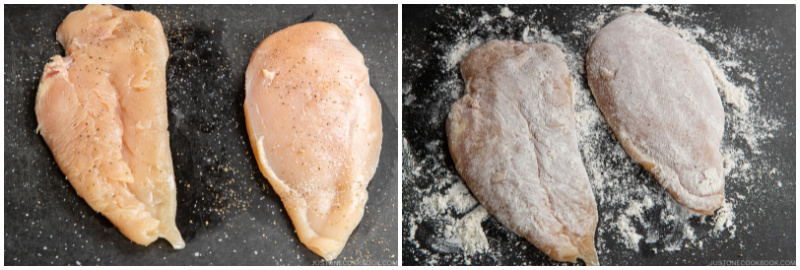
- Prepare the chicken and coat it with flour.
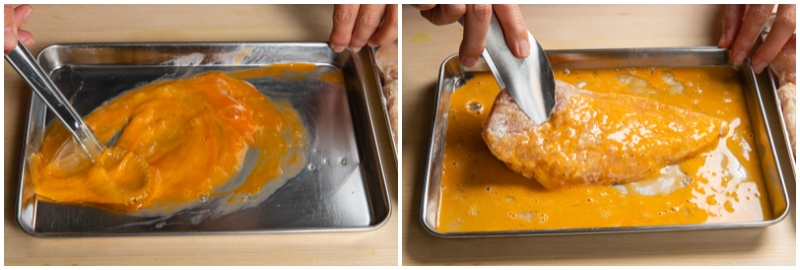
- Dip the chicken in beaten egg and deep fry until golden.
- After draining the excess oil, coat the chicken with the nanban sauce. Serve the chicken with the tartar sauce on top.
5 Recipe Tips for Chicken Nanban
Tip 1: Butterfly the Chicken
Typically, Chicken Nanban is served in one big piece— like a cutlet—that is sliced into pieces. You’ll need to make sure the entire piece of chicken is cooked through evenly, which can be tricky. Therefore, I prefer chicken breasts because they’re easier to butterfly and create an even thickness. When cooked right, breasts should never be dry.
On the other hand, thighs can be flavorful, but it could end up with the thinner side being overcooked and the thick side undercooked. If you prefer to use thighs, I suggest pounding them with a meat mallet or cutting them into bite-sized pieces before frying.
Tip 2: Fry at the Right Temperature
99% of a successful fried recipe relies on the technique. The number one rule is to make sure your oil is at the right temperature. Too low, the food will be saturated in oil; too high, the outside will cook faster than the inside. Also, never overcrowd the pan.
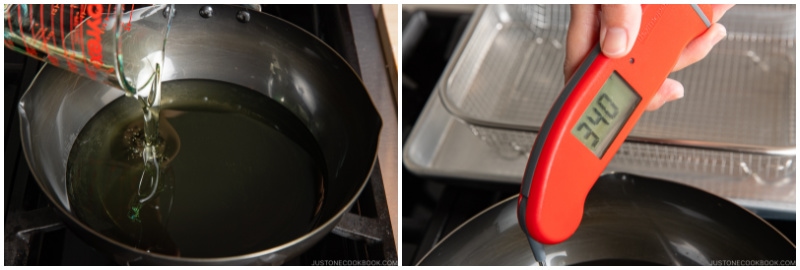
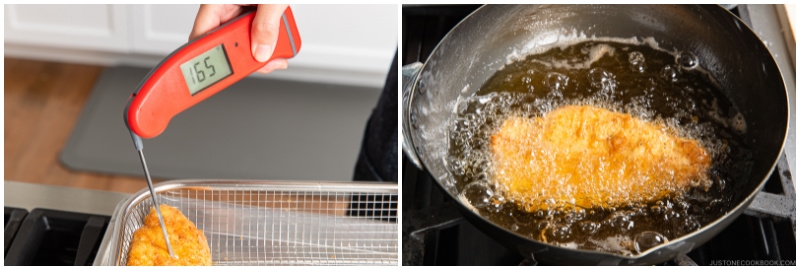
Use a thermometer for the oil (I use a Thermapen instant-read thermometer and love it!) It takes away any guesswork, ensuring your chicken is properly cooked every time. For a more comprehensive guide on deep frying food, read this post.
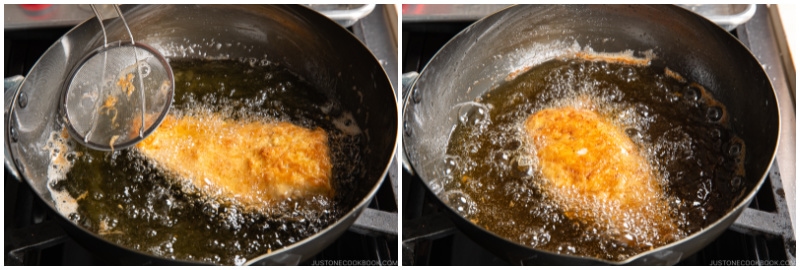
Tip 3: Don’t Touch the Chicken in the Oil for One Minute
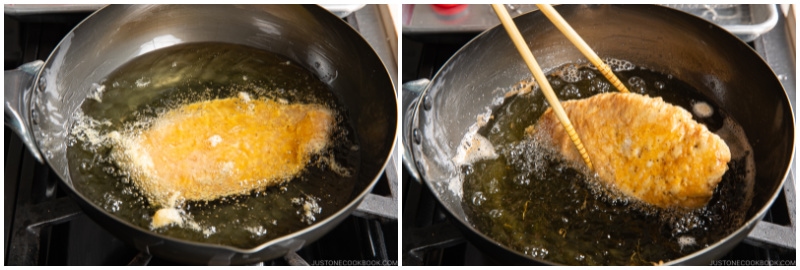
Once the chicken is added to the frying oil, do not touch or flip for at least a minute. This helps the egg coating to stick and stay on the meat. If you flip too quickly, your utensil may break the thin coating.
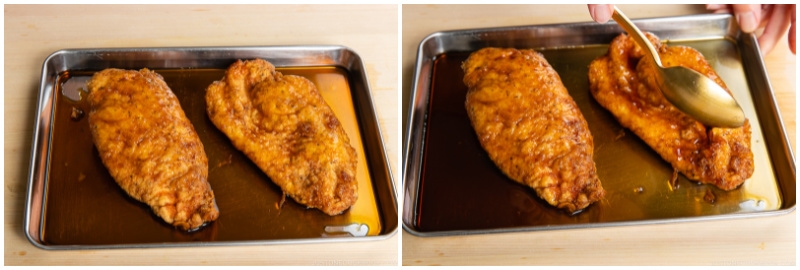
Tip 4: Coat the Chicken with Nanban Sauce While Hot
Once all the chicken is done being fried (with excess oil shaken off), toss your chicken with the nanban sauce immediately. This helps the chicken absorb the sauce quickly.
Tip 5: Soak the Chopped Onion in Water
Many people do not enjoy the raw onion taste (sharp and pungent!) and decide to skip it altogether. But wait, I have a tip for you: soak the onion in cold water for 5-10 minutes to rid the astringent taste! We use the same trick to make salad dressing and sauce.
For our tartar sauce, the texture of finely-chopped onion is extremely important, giving a fresh crisp bite in the creamy sauce. So, soak the onion prior to making your sauce and say goodbye to that pungent onion taste!
On the topic of the tartar sauce, use Japanese mayonnaise such as Kewpie, preferably. It has that signature taste that you’re looking for. If you can’t find it, I have a recipe hack here.
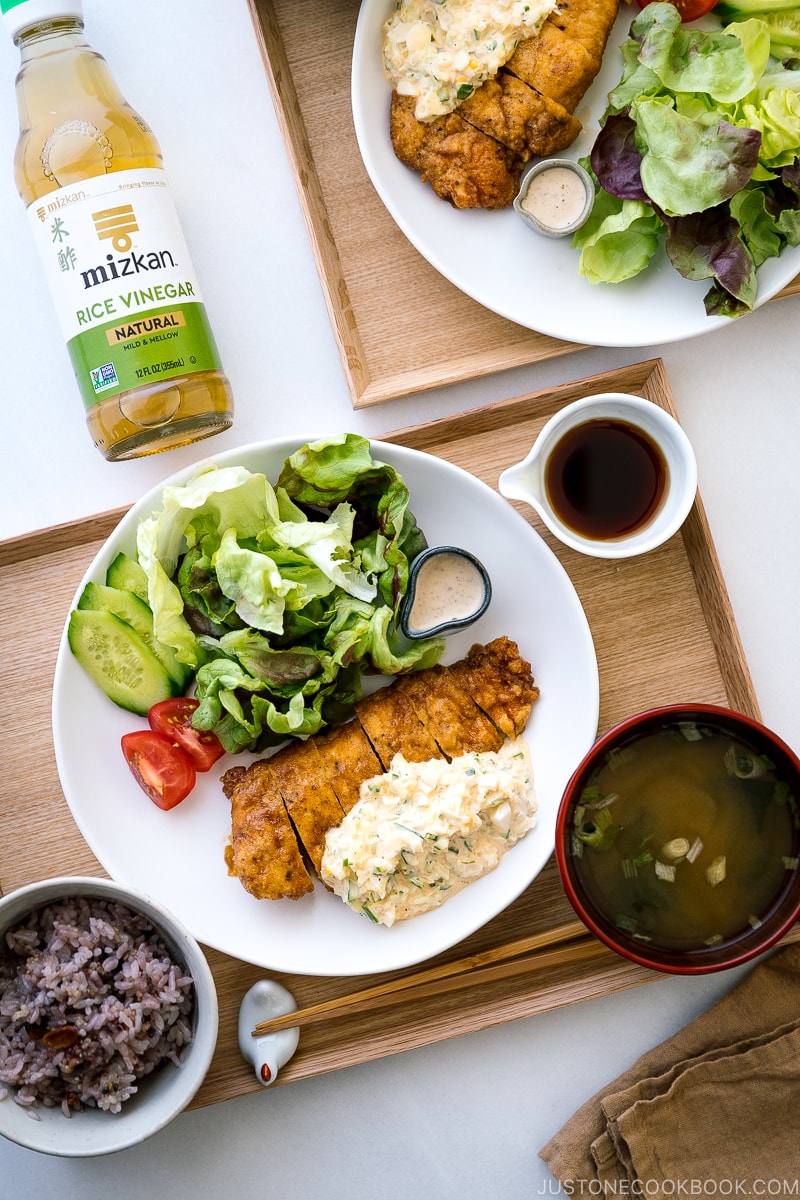
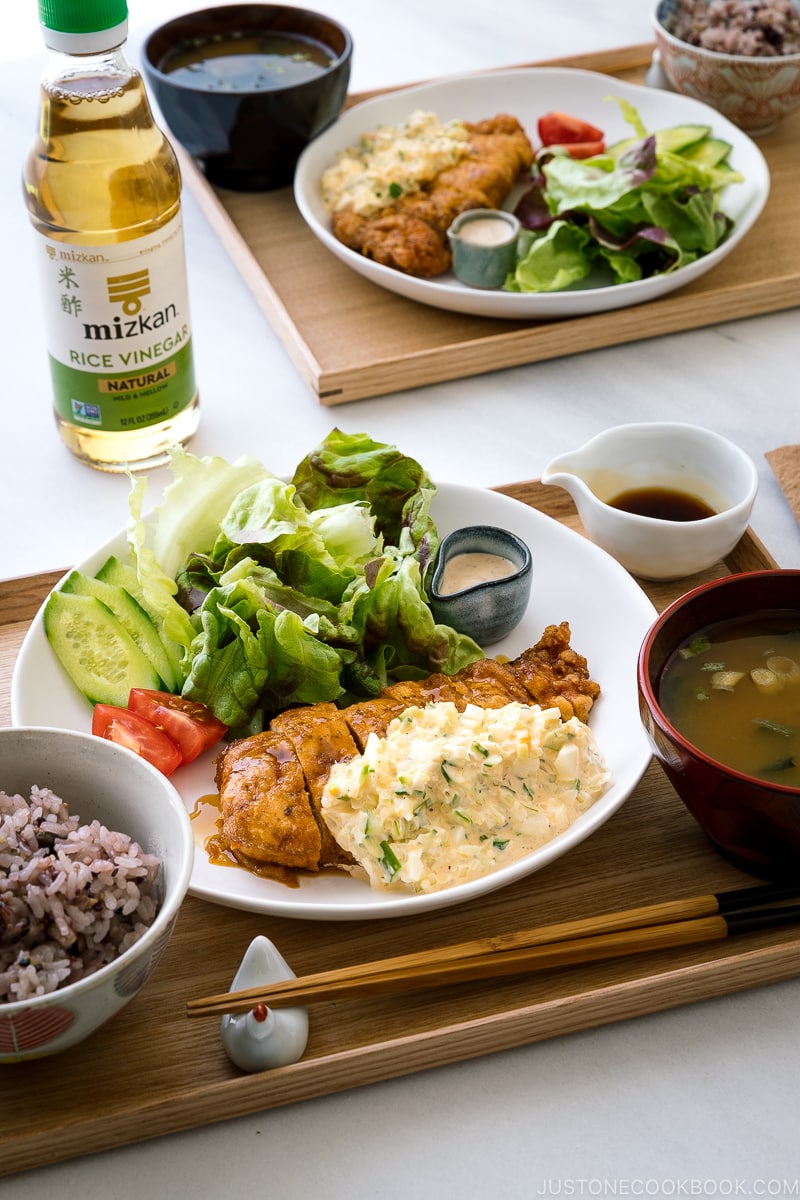
The One Vinegar You Need in Your Pantry
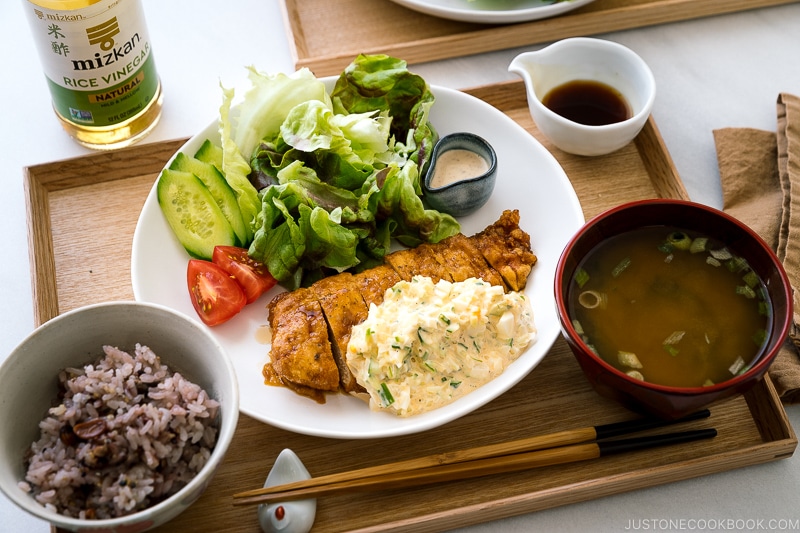
When making this four-ingredient nanban sauce, don’t be deterred by the vinegar. I use rice vinegar because it’s milder in taste and not quite as acidic as other vinegars. The sugar (and mirin) in this sauce is necessary to cut the acidity and complement the fried food.
I can’t emphasize enough that it’s important to use rice vinegar when making Japanese food. Rice vinegar is a lot milder than the other kinds of vinegar. The only brand I’ve been using ever since I started cooking is Mizkan Natural Rice Vinegar. I personally use many types of Mizkan sauces and condiments for my home cooking. As a leading brand in Japan for over 215 years, I trust Mizkan for bringing authentic Japanese flavors to our dinner table, just as my grandmother and my mom did.
If you love using vinegar in your cooking, you can follow Mizkan on Facebook, Instagram, Twitter, and Pinterest for Japanese-inspired recipes and other quick and delicious usage ideas.
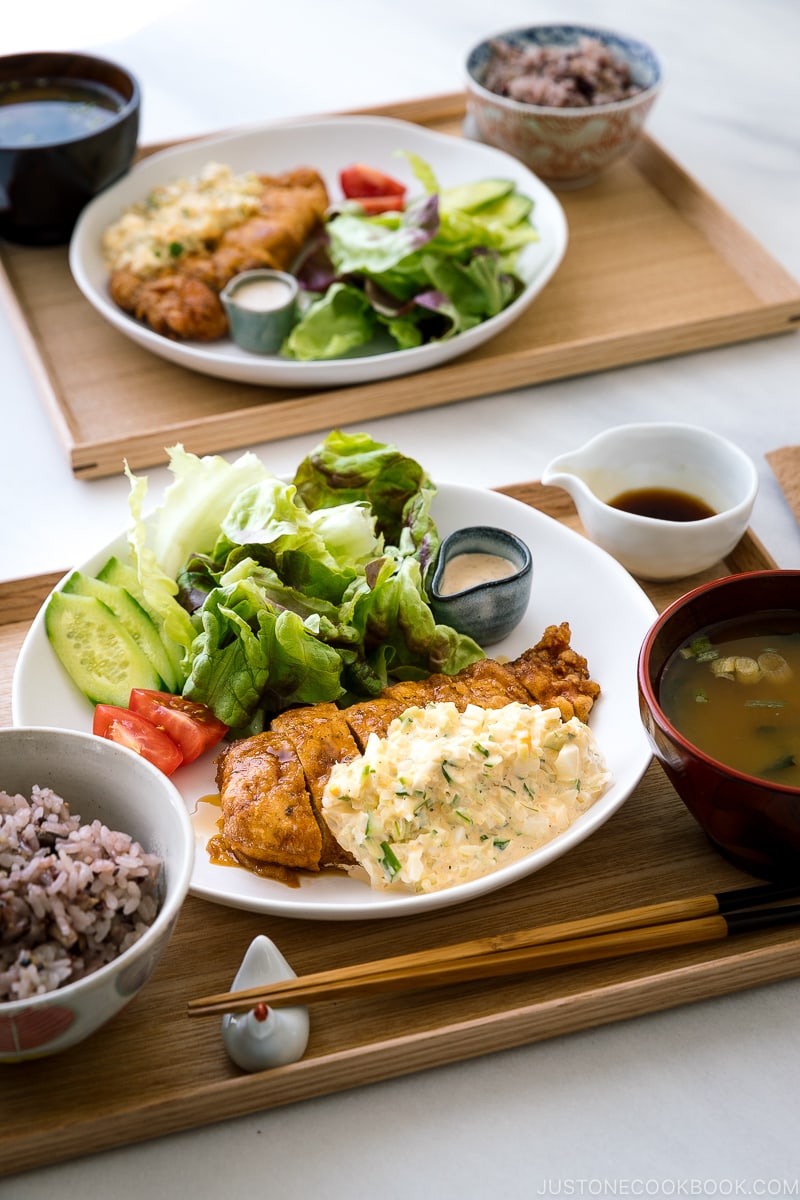
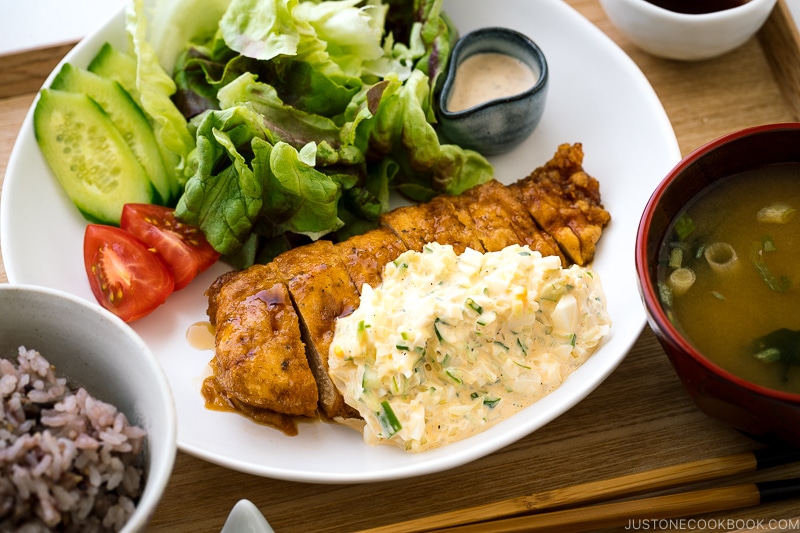
How to Enjoy Chicken Nanban
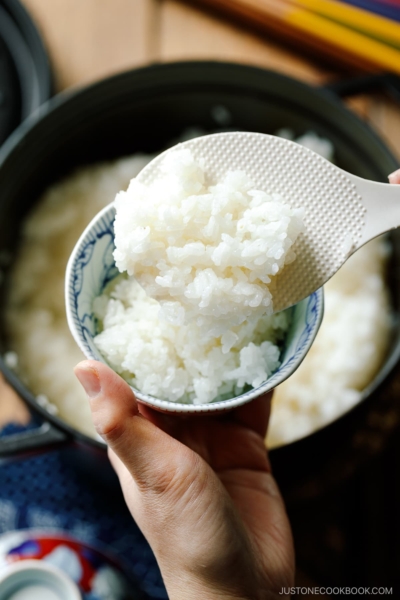
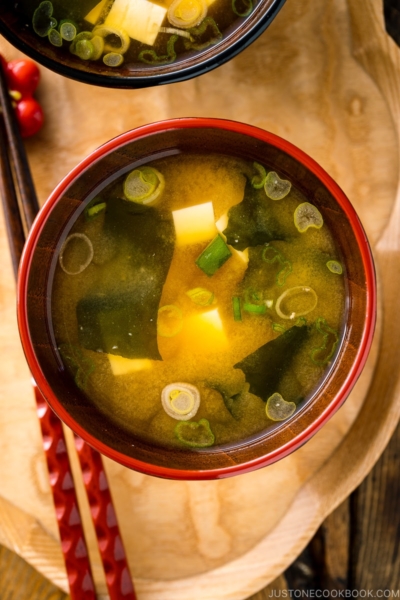
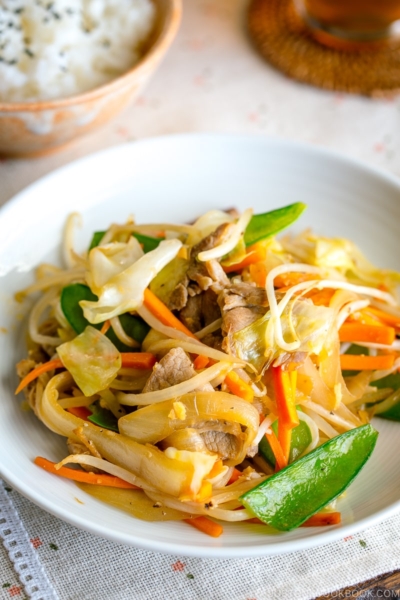
Chicken Nanban is typically enjoyed as a main dish to serve with rice and a side of soup. Since it’s a fried dish, it’s always best to serve with more vegetable-focused side dishes. Here, I serve the Chicken Nanban with the green lettuce with the Japanese sesame dressing, but you can enjoy it with other salads such as:
- Japanese Cucumber Salad
- Asian Coleslaw with Sesame Dressing
- Japanese Potato Salad
- Tofu Salad with Sesame Ponzu Dressing
- Japanese Kani Salad
- Harusame Glass Noodle Salad
- Japanese Macaroni Salad
Wish to learn more about Japanese cooking? Sign up for our free newsletter to receive cooking tips and recipe updates! And stay in touch with me on Facebook, Pinterest, YouTube, and Instagram.

Chicken Nanban (Fried Chicken with Tartar Sauce)
Video
Ingredients
For the Tartar Sauce
- 1 large egg (50 g each w/o shell)
- ¼ onion (1.8 oz, 50 g)
- ½ Japanese or Persian cucumber (1.8 oz, 50 g; about 4 Tbsp, finely chopped; if you don’t have a fresh cucumber, you can use a pickled cucumber and omit the rice vinegar below)
- 3 Tbsp Japanese Kewpie mayonnaise
- 1 tsp rice vinegar (unseasoned) (I used Mizkan Natural Rice Vinegar)
- ⅛ tsp Diamond Crystal kosher salt
- ⅛ tsp freshly ground black pepper
For the Nanban Sauce
- 2 Tbsp soy sauce
- 2 Tbsp rice vinegar (unseasoned) (I used Mizkan Natural Rice Vinegar)
- 2 Tbsp sugar
- 1 Tbsp mirin
For the Fried Chicken
- 1 boneless, skinless chicken breast (10.5 oz, 300 g)
- ⅛ tsp Diamond Crystal kosher salt
- ⅛ tsp freshly ground black pepper
- 1 Tbsp all-purpose flour (plain flour) (plus more, if needed)
- 1 large egg (50 g each w/o shell)
- 2 cups neutral oil (for deep-frying)
Instructions
- Gather all the ingredients.
To Make the Tartar Sauce
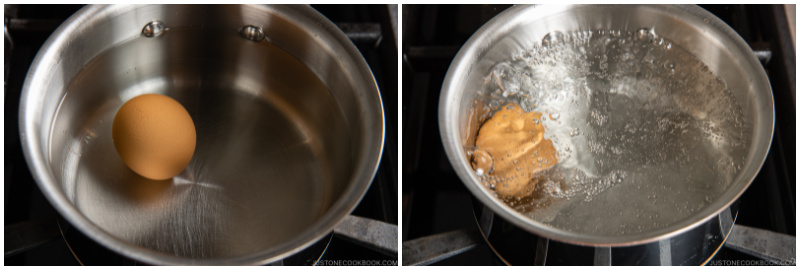
- Place 1 large egg (50 g each w/o shell) in a saucepan and cover with water by one inch. Bring the water to a boil on medium heat. Once the water boils, lower heat to maintain a gentle boil (but don’t let the egg jump around) for the next 12 minutes.
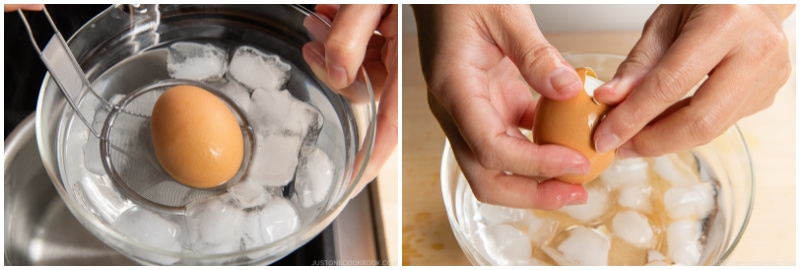
- Remove the egg from the boiling water and submerge it in iced water to stop the cooking. When the egg is cool, peel the shell and set the egg aside.
- Mince ¼ onion as finely as possible: Lay the onion flat side down on the cutting board. With the tip of a very sharp knife pointing toward the root end, make ⅛-inch vertical slices to within ½ inch of the root end. Next, rotate the onion 90 degrees and cut 2–3 horizontal slices toward the root end, again keeping the root intact.
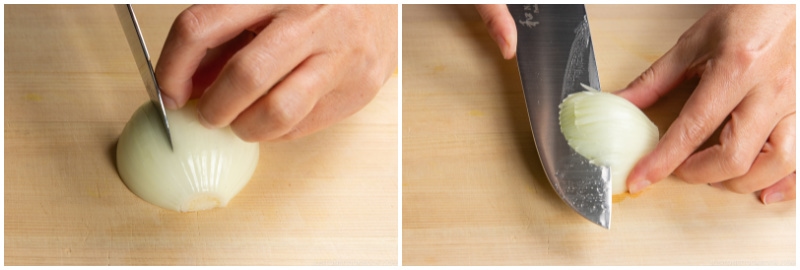
- Finally, cut ⅛-inch slices perpendicular to the previous slices you made. To finely mince, run your knife through the cut onions in a rocking motion. Put the finely minced onion in cold water for 5–10 minutes to remove the sharp, pungent, and astringent taste.

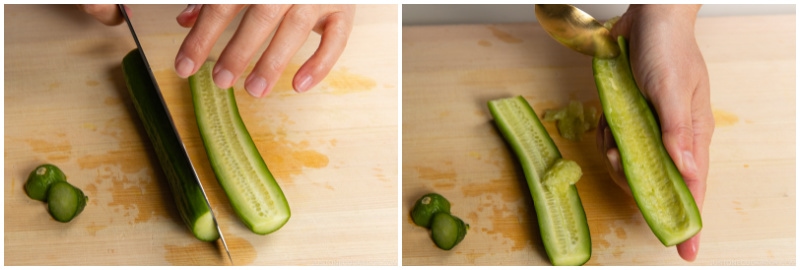
- Cut off the ends of ½ Japanese or Persian cucumber and slice in half lengthwise. Using a spoon, remove the seeds to help get rid of excess moisture from the cucumber.
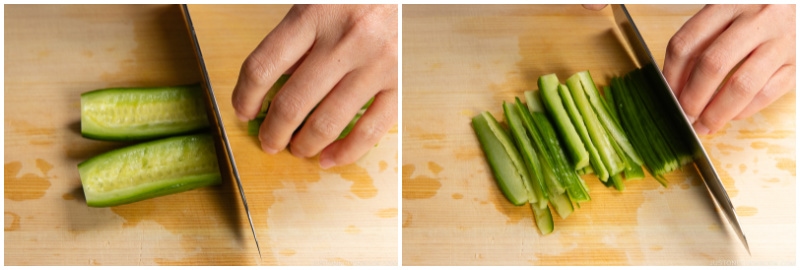
- Cut the cucumber halves into thin strips lengthwise.
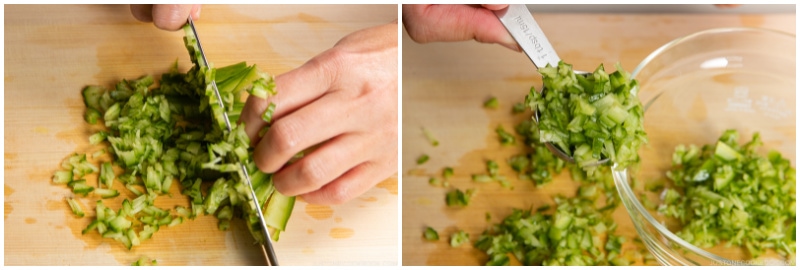
- Then, finely mince the strips into ⅛-inch pieces. Transfer the minced cucumber to a medium bowl. Here, I used 3 heaping tablespoons of finely chopped cucumber for two servings. I reserved the leftovers as a topping for a cold udon noodle dish.
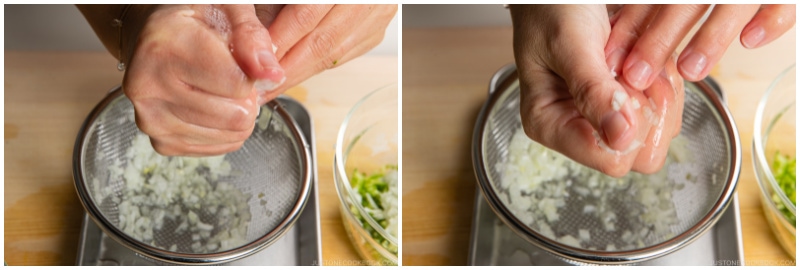
- Drain the onion in a fine-mesh colander, squeezing the excess moisture from the onion pieces. Next, add them to the bowl with the cucumber. You should have roughly the same amount of cucumber and onion.
- Mince the boiled egg, especially the egg white, and then transfer it to the bowl.
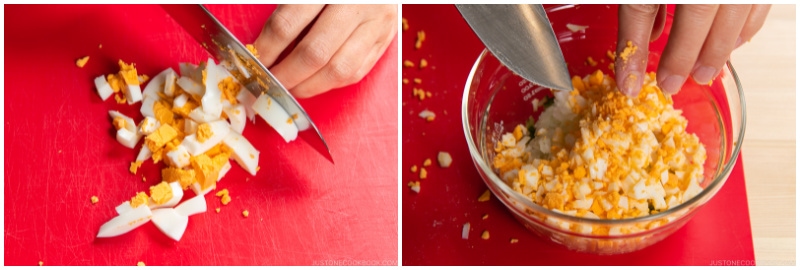
- Add 3 Tbsp Japanese Kewpie mayonnaise, 1 tsp rice vinegar (unseasoned), ⅛ tsp Diamond Crystal kosher salt, and ⅛ tsp freshly ground black pepper, and mix them all together. Cover the bowl with plastic and refrigerate until serving.

To Make the Nanban Sauce
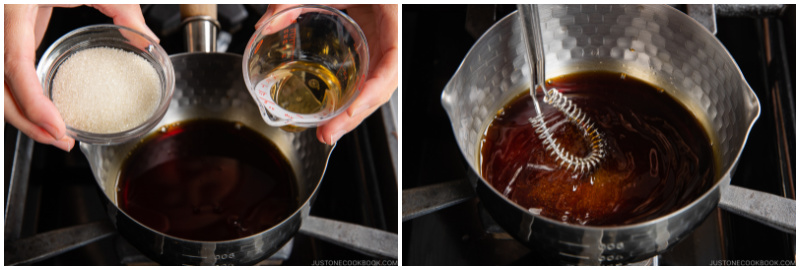
- In a medium saucepan, combine 2 Tbsp soy sauce, 2 Tbsp rice vinegar (unseasoned), 1 Tbsp mirin, and 2 Tbsp sugar. Bring the mixture to a gentle simmer on medium heat. Once the sugar is completely dissolved, turn off the heat and set aside.
To Make the Fried Chicken
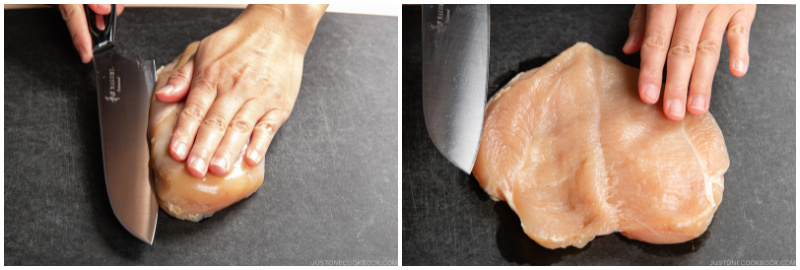
- Butterfly 1 boneless, skinless chicken breast by splitting it horizontally with a knife, stopping before you cut all the way through, opening it like a book. When you open the breast, it has two matching sides, resembling a butterfly.
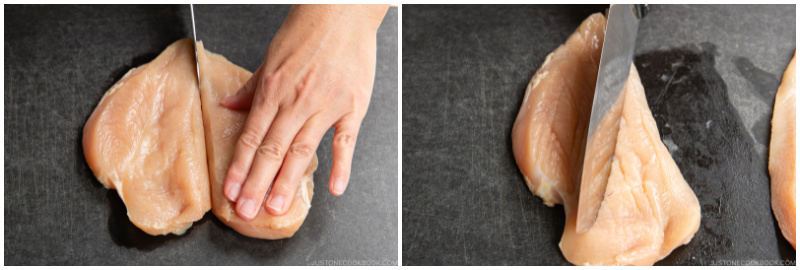
- Cut the butterflied chicken breast in half down the middle to create cutlets. Pound both sides of the meat with the back of the knife or a meat tenderizer/mallet.
- Season both sides of the cutlets with ⅛ tsp Diamond Crystal kosher salt and ⅛ tsp freshly ground black pepper and coat them with 1 Tbsp all-purpose flour (plain flour), dusting off any excess. Then, set aside. If the chicken cutlets are still cold from the refrigerator, leave them on the counter for 10 minutes or so while the oil is heating up.
- Add 2 cups neutral oil to a medium pot (I used this carbon steel pot) and bring it to 340ºF (170ºC) over medium heat. If you don’t have an instant-read thermometer, stick a chopstick in the oil; if tiny bubbles start to appear around the tip of the chopstick. the oil is ready.
- While heating the oil, crack 1 large egg (50 g each w/o shell) in a shallow tray or container and beat it until thoroughly blended. When the oil reaches 340ºF (170ºC), dip one floured cutlet into the egg and coat well.
- First deep-frying: Gently put one piece of chicken into the oil and cook for 4 minutes, flipping the chicken once at the halfway mark. Don‘t touch or flip the chicken for the first minute until the egg coating is solidified. Why do I deep-fry only one piece at a time? I do this so the oil temperature doesn’t drop drastically. Keep watching the oil temperature and make sure it doesn’t go over 340ºF (170ºC) or else the chicken will get dark too quickly while the inside will be undercooked. Scoop and discard any fried crumbs in the oil with a fine-mesh strainer so the oil doesn’t get darker and dirtier with burnt crumbs. After 4 minutes, transfer the chicken to a wire rack or paper towel and let it sit to remove the excess oil while you fry the next cutlet. The hot oil on the exterior will slowly continue to cook the meat as it rests. Continue to coat the remaining cutlet(s) in egg and deep-fry.
- Second deep-frying: Raise the oil temperature to 350ºF (180ºC) and carefully place the first piece of fried chicken in the oil again. Be careful of bigger oil splatters than during the first round of frying. This happens when the moisture below the crust of the fried chicken vaporizes and hits the hot oil, causing it to splatter. Fry the chicken again for 30 seconds on each side.
- Remove the chicken and place on the wire rack or paper towel and let it sit to remove excess oil. If you have the instant-read thermometer, check to make sure the internal temperature of the chicken is at least 165ºF (74ºC). Repeat the second frying with the remaining cutlet(s).
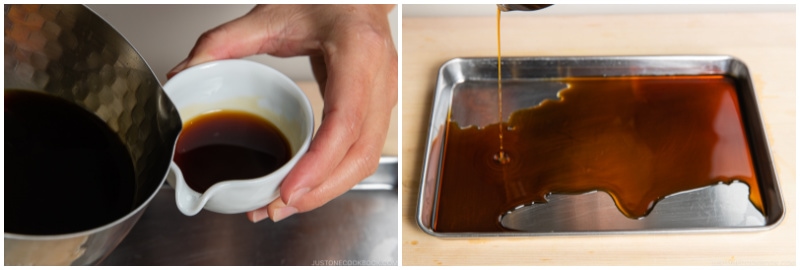
- Reserve 2 tablespoons of the Nanban Sauce in a little bowl or cup for serving. Transfer the rest of the sauce into a small shallow and rimmed tray.
- While the chicken cutlets are hot, coat them with the Nanban Sauce.
To Serve
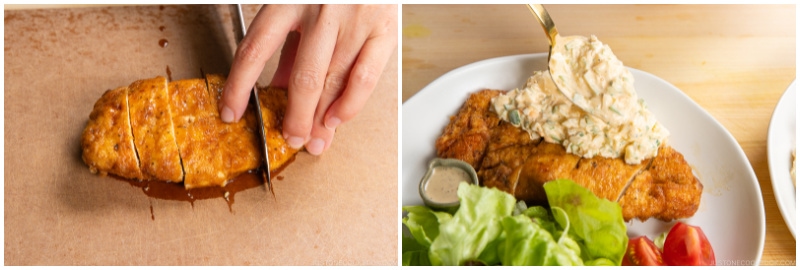
- Carefully slice each fried cutlet into pieces ¾ inch (2 cm) wide and transfer to individual plates. Here, I serve the chicken with a simple, leafy salad with sesame dressing in a small cup on the side and tomato wedges (optional). Place a generous amount of the Tartar Sauce on top of the fried chicken. Drizzle extra Nanban Sauce on top of the chicken and enjoy.
To Store
- You can store the leftover chicken in an airtight container in the refrigerator for three days or in the freezer for up to a month. However, I do not recommend keeping the tartar sauce in the freezer. Please make a new batch of the Tartar Sauce and Nanban Sauce when you serve any leftover fried chicken. To reheat, put the defrosted or frozen fried chicken on a baking sheet lined with aluminum foil or parchment paper. Bake at 350ºF (180ºC) for 15–20 minutes if defrosted, or 30–40 minutes if frozen. Ensure that the chicken is thoroughly warmed through before serving.
Nutrition
Editor’s Note: The post was originally published on January 22, 2011. The blog post has been completely updated with new content, new images, and the revised recipe on March 9, 2022.


This is incredible! It’s like Japanese Soul food! I replaced the onions with minced capers and it was lovely. Thank you.
Hi, Tania! Thank you for your kind feedback!
Capers also sound wonderful. Thank you for sharing your experiences!
Definitely good, if you want the tartar sauce to taste a little more like american tartar sauce i recommend adding a tsp of dijon mustard but it is still amazing without it
Hi Phillip, Thank you so much for trying Nami’s recipe and providing a great tip!
can we air fry instead of using deep fry?
Hello, Trish! Thank you for reading Nami’s post!
We have never tried this recipe in an air fryer, but we think it will work.
Please let us know how it goes if you try it!
This is excellent. I usually make double the nanban sauce and use it the next day for a pork and udon noodle stirfry.
Hi Lynn! We are so happy to hear you enjoyed Nami’s recipe.
Thank you for your kind feedback and for sharing your cooking experience with us.
Happy Cooking!