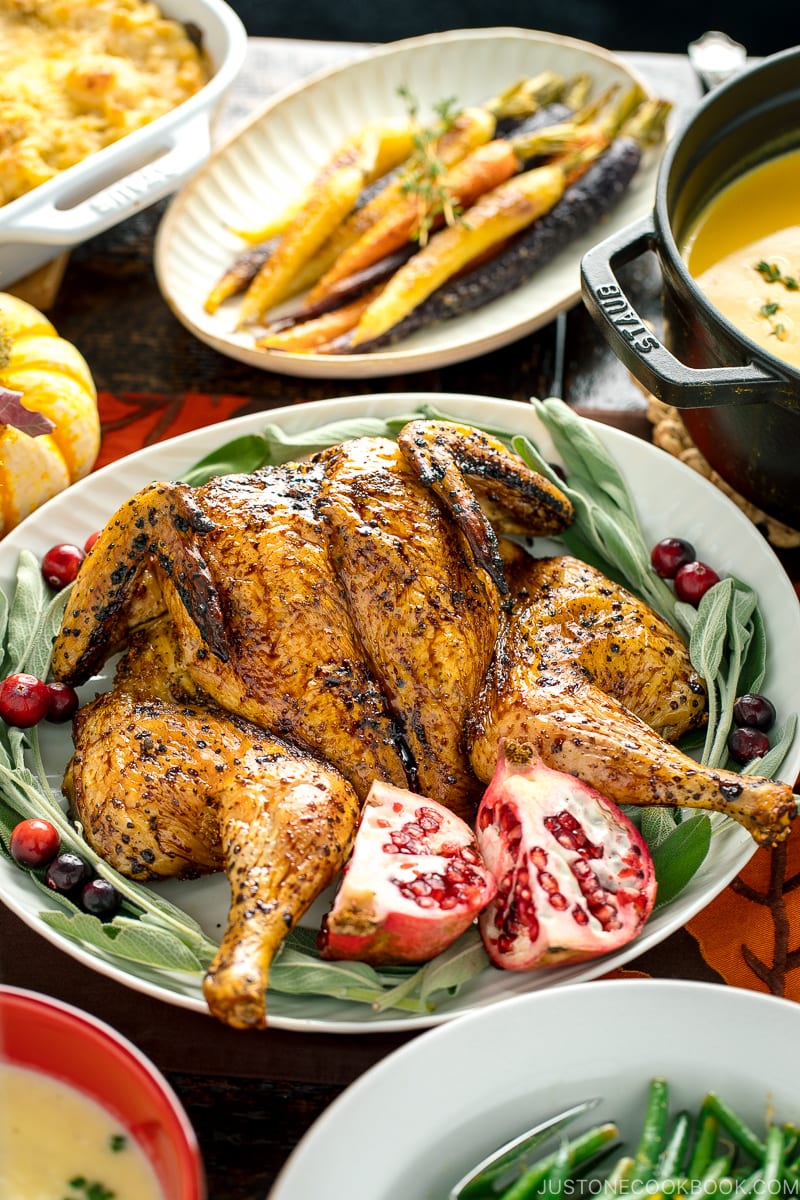
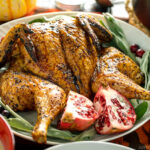
This Honey-Soy Glazed Spatchcock Chicken is juicy, savory, crispy, and so delicious. The umami-packed sauce is everything! I’ll show you a foolproof way to roast a perfect whole chicken at home. It‘s a fabulous centerpiece for Sunday dinner or any festive occasion.
What is Spatchcock Chicken?
Though the origin of the culinary term ‘spatchcock’ is unclear, it has been around since at least the 18th century. Spatchcock chicken (スパッチコックチキン) is also called ‘butterflied’ chicken, and it is a popular way to prepare a whole chicken. Essentially, it involves removing the backbone and sternum from a whole chicken and flattening it. Since the chicken is butterflied, it cooks quicker and more evenly than traditional roasting.
You can ask your butcher to remove the backbone for you, but it is actually not that hard. In the video and recipe below, we will show you a very easy way to tackle it at home.
Table of Content
Why Does This Recipe Work?
There are many reasons to prepare spatchcock chicken at home versus roasting a whole bird.
- Crispy skin: Since the skin is all facing up, the moisture is able to escape, resulting in crispier skin.
- Even cooking of white and dark meats: It’s tricky to cook both the white and dark meats of the chicken evenly, even when it is trussed. Laying it flat provides a wide surface, allowing uniform cooking.
- Fast cooking time: The general rule for roasting a whole chicken in the oven is 20 minutes per pound. Spatchcocking cuts the cooking time in half! I’ll discuss more in the next section.
- Easier to season: With the chicken flattened and facing up, it’s much easier to spread both dry and wet seasonings on the whole bird without them falling off.
- Foolproof results: With a meat thermometer, we’ll show you the easiest method to make the perfect juicy chicken every time.

Spatchcock Chicken Cooks Significantly Faster
This method cooks the chicken in half the time! Roasting a whole 4-pound chicken in the oven takes 1 hour and 20 minutes (general rule: 20 minutes per pound), but spatchcock chicken is done in around 40 minutes.
We recommend using a bird no larger than 5 lbs (2 to 2.3 kg) for spatchcock chicken. We like the skin-to-meat ratio for this size of chicken, and it cooks very quickly.
Some people recommend letting the cold whole chicken sit at room temperature to warm up before roasting, so it will cook evenly. With spatchcock chicken, you can throw it straight into the oven cold; no need to worry about whether the chicken is at room temperature.

How to Prepare Spatchcock Chicken
It is super easy to prepare spatchcock chicken, but you will need to get your hands dirty. Here are the steps:
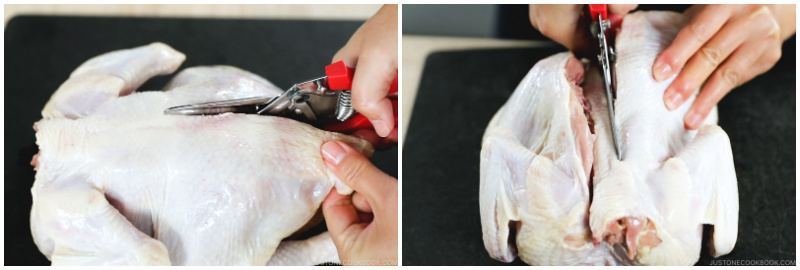
- Remove the backbone from the chicken with kitchen shears. A large, sharp chef’s knife will work, but I recommend using shears. We have tried various kitchen shears, and this Kuhn Rikon is clearly superior—it cuts through the chicken bone easily.
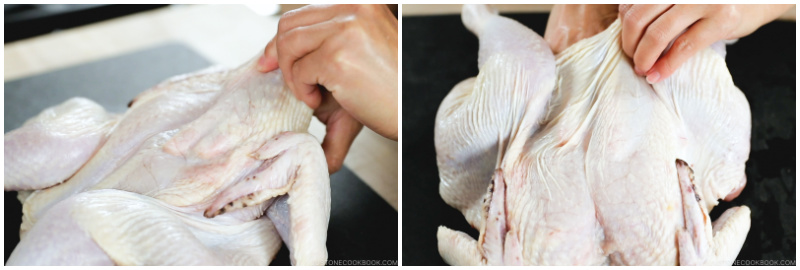
- Separate the skin and the meat on the chicken breast (and thighs, if you like).
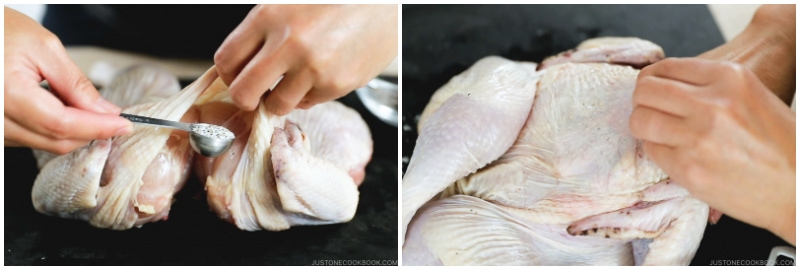
- Mix kosher salt and pepper and generously spread it all over the chicken, including between the breast skin and meat.
- Place on a baking rack and sit in the fridge for 24 hours uncovered. This removes the moisture from the skin, allowing it to crisp up easier, and the seasoning gets absorbed by the meat.
- Remove from the fridge and season with garlic, ginger, and oil. Avoid using butter as it introduces moisture, and the skin won’t be as crispy.
To Brine, or not to Brine: Dry, Wet, or None?
Brining a chicken is not a must, but we strongly recommend taking the time to do it. Why? Chicken is naturally lean meat, which means it’s prone to drying out.
For this recipe, dry brining is the best option compared to wet brining. Wet brining introduces moisture, so you won’t get crispy skin. It also dilutes the natural flavors of the chicken.
On the other hand, dry brining allows the meat enough time to absorb the seasonings all the way through. It also helps keep the meat moist and tender when you leave it in the refrigerator for 24 hours. Even if you overcook it slightly, the chicken will still come out juicy.
In short, the extra step of dry brining will leave you with tender, juicy meat and extra crispy skin. That’s exactly what we are after!
Ideal Temperature for Spatchcock Chicken
Most recipes will call for cooking the chicken to 165ºF (74ºC) because this is the temperature at which salmonella is destroyed for food safety. However, if you do this, you will end up with dry and overcooked chicken.
For killing salmonella in chicken, there are actually two factors: time and temperature. At 165ºF (74ºC), all the salmonella will be killed instantly. However, if you keep the chicken at 150ºF (66ºC) for 3 minutes, it has the same effect according to the USDA.
One thing to keep in mind is that the outer part of the chicken meat will be much hotter than the inner part. So when the thickest part of the chicken hits 150ºF (66ºC), the outer layers are around 180ºF (82ºC).
When the chicken is taken out of the oven, the remaining heat continues to increase the temperature. So when the meat thermometer says 150ºF (66ºC), the temperature is sustained or even keeps going up by 5-10ºF after removing it from the oven. For more details, check out the experiment from Thermoworks and Kenji’s Lopez’s article on Serious Eats.
This makes having an oven probe extremely important, as you don’t want to keep opening the oven door to test if the chicken is at 150ºF (66ºC).

If your oven doesn’t come with the probe function, we highly recommend this Thermoworks Chef’s Alarm for cooking.
Honey Soy Glazed Sauce
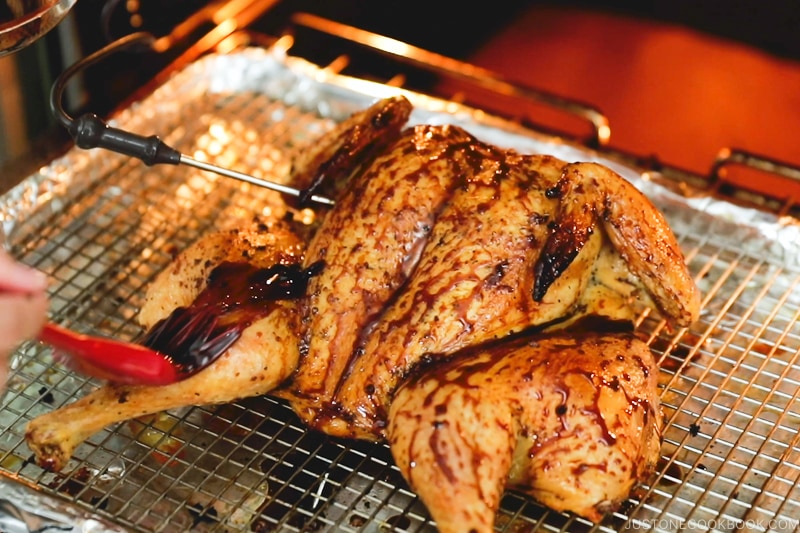
For this recipe, 10 minutes before the chicken is ready—when it’s around 135ºF (57ºC)—we brush our favorite gluten-free honey soy sauce on the chicken skin. The sauce adds a bit of sweetness and umami from the tamari soy sauce, enhancing the overall flavor combination. We use Kikkoman’s gluten-free Tamari Soy Sauce to create this sauce.
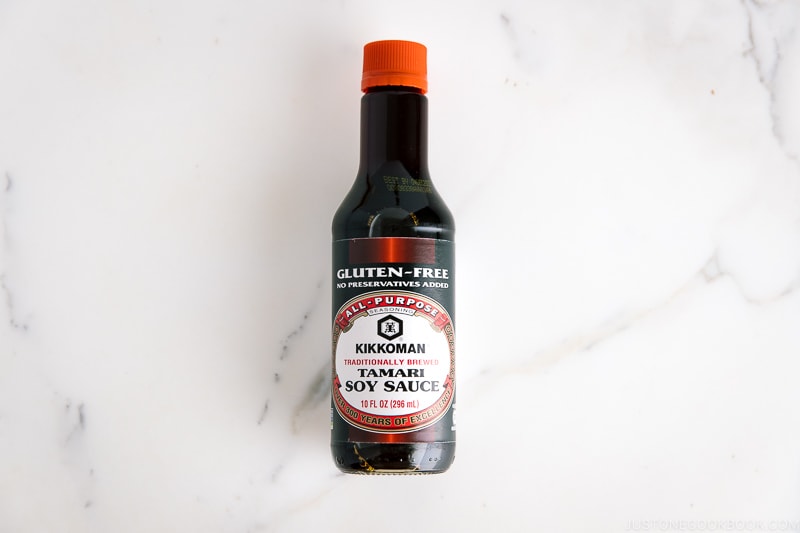
You can find this Kikkoman Gluten-Free Tamari Soy Sauce in your local grocery stores or Amazon.
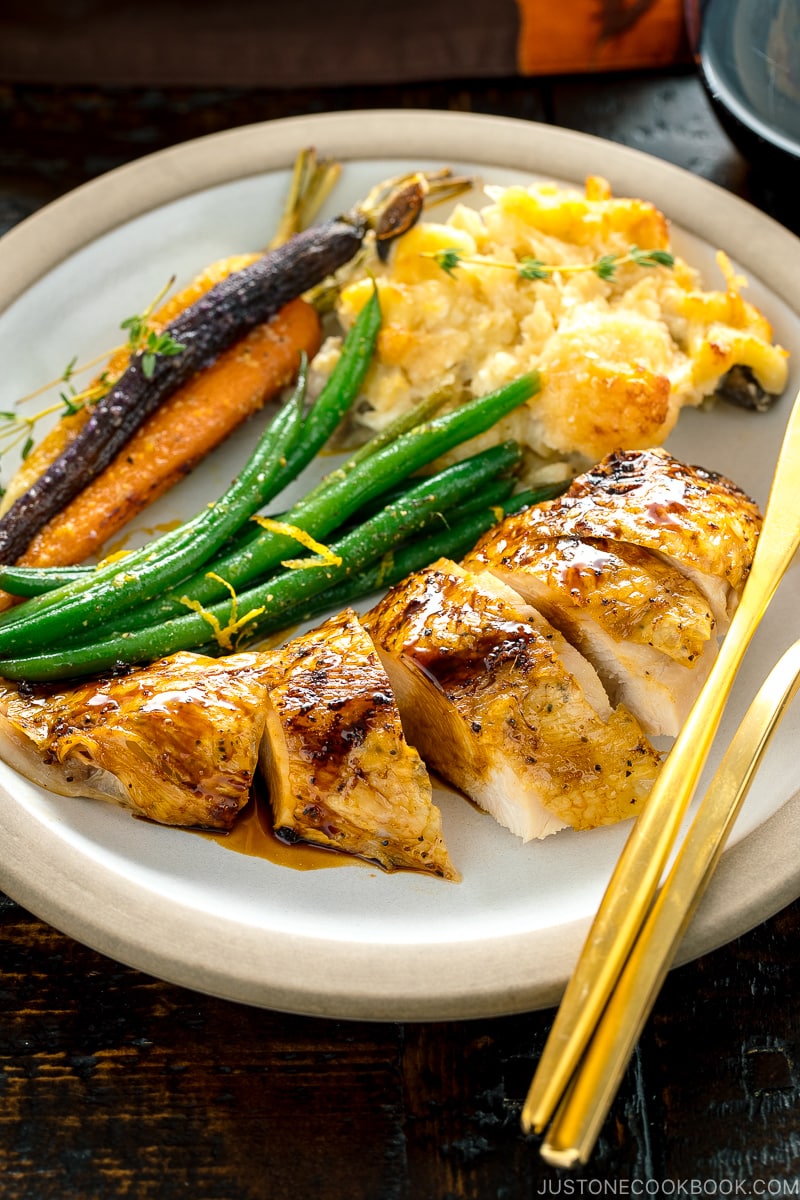
A Honey Soy Glaze gives the chicken a glossy, flavorful coating to complement the meat’s flavor and dress up its appearance.
Key Points and Important Tips
- Use a whole chicken (ideally “air-chilled”) no larger than 5 lbs (2.3 kg) for spatchcock chicken.
- Season the whole chicken liberally on all sides. I use Diamond Crystal Kosher Salt and 16-mesh coarse ground black pepper.
- Refrigerate the brined chicken, uncovered, for 24 hours before roasting. This allows the skin to dry out slightly and crisp up better during roasting.
- Roast at 450°F (232°C) with a convection oven or 475ºF (246ºC) with a conventional oven. Convection cooking uses a fan to evenly distribute hot air throughout the oven and promotes more consistent browning, particularly with meat.
- Baste the chicken with the glaze 10 minutes before the chicken is done cooking to avoid the sauce burning.
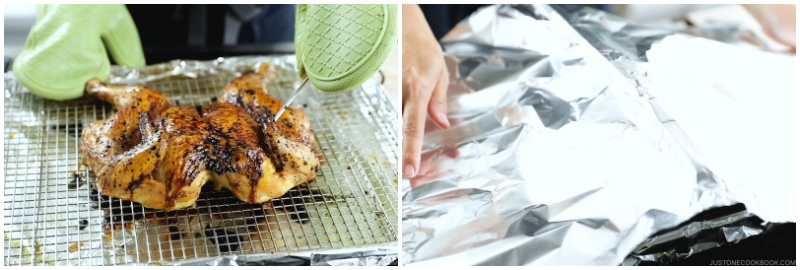
- Roast chicken until the thickest part of the breasts (close to the bone) registers 150°F (66°C) on the oven meat probe or on an instant-read thermometer.
- Tent loosely with foil for at least 10 minutes after removal from the oven, and allow the chicken to rest before carving. This allows the chicken to maintain 150°F (66°C) for 3 minutes (equivalent to the safe internal temperature for cooked chicken, 165ºF (74ºC), according to the USDA). Additionally, it allows the juices in the chicken to distribute more evenly throughout the meat, resulting in juicier meat.
Perfect for Every Occasion
Whether you are having a family dinner or planning a small gathering, I highly recommend giving this recipe a try. It’s really easy, as long as you spatchcock the chicken, dry brine it, and use a meat probe thermometer.
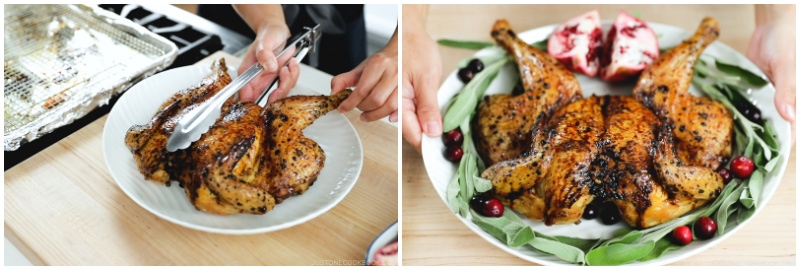
When the roasted whole chicken is ready to be served, we like to carve it into individual servings and pour the delicious, flavor-packed sauce on top. I’m getting hungry just thinking about how tasty this recipe is!
Delicious Sides to Serve With This Chicken
- Maple and Miso Glazed Roasted Carrots
- Roasted Kabocha Squash
- Creamy Mashed Potatoes with Shio Koji
- Kabocha Squash Soup
- Green Beans with Yuzu Vinaigrette

Wish to learn more about Japanese cooking? Sign up for our free newsletter to receive cooking tips & recipe updates! And stay in touch with me on Facebook, Pinterest, YouTube, and Instagram.
Honey Soy Glazed Spatchcock Chicken
Video
Ingredients
- 1 (4-pound) whole chicken (1.8 kg per chicken; no larger than 5 lbs, 2.3 kg per chicken; preferably air-chilled)
For the Dry Brine
- 3 tsp Diamond Crystal kosher salt (use ¾ tsp per pound of chicken)
- 1 tsp freshly ground black pepper (use ¼ tsp per pound of chicken; I use 16-mesh coarse ground black pepper)
For the Aromatics
- 1 Tbsp toasted sesame oil (I used Kikkoman Sesame Oil)
- 1 tsp ginger (grated, with juices; from a 1 inch, 2.5 cm knob)
- 1 clove garlic
For the Honey Soy Glaze
For the Garnish (optional)
- sage (for decoration)
- pomegranate (for decoration)
- cranberries (for decoration)
Instructions
12–24 HOURS BEFORE ROASTING
- Gather all the ingredients. If your chicken comes with giblets, remove them.
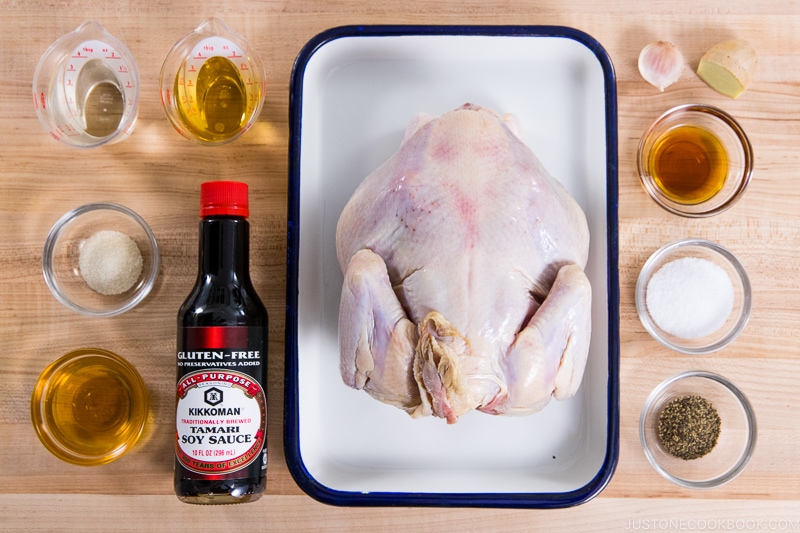
- In a small bowl, combine 3 tsp Diamond Crystal kosher salt and 1 tsp freshly ground black pepper.

To Spatchcock the Chicken
- Place 1 (4-pound) whole chicken breast side down on a cutting board with the tail end facing towards you. Using sharp poultry or kitchen shears*, remove the backbone of the chicken by cutting along both sides of the spine (cut close to the spine so that you do not remove any excess meat). *We have tried various kitchen shears and this Kuhn Rikon pair is the victor.
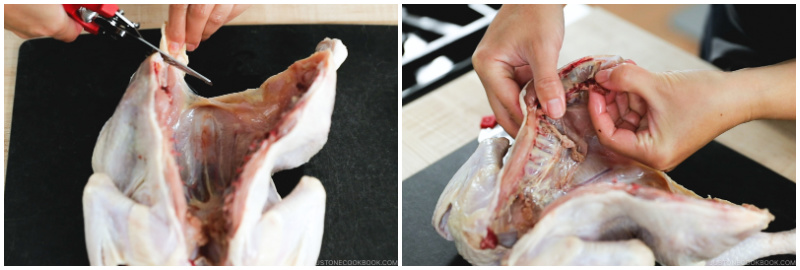
- Cut open the rib cage, trim off any fat, and clean up the inside of the chicken.
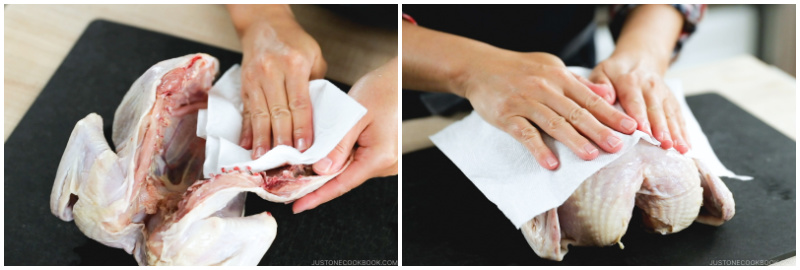
- Pat the chicken dry with paper towels on both sides.
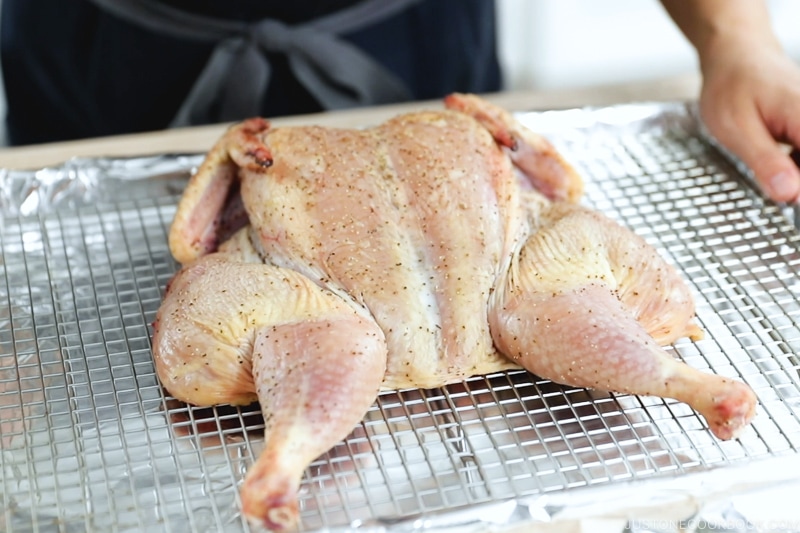
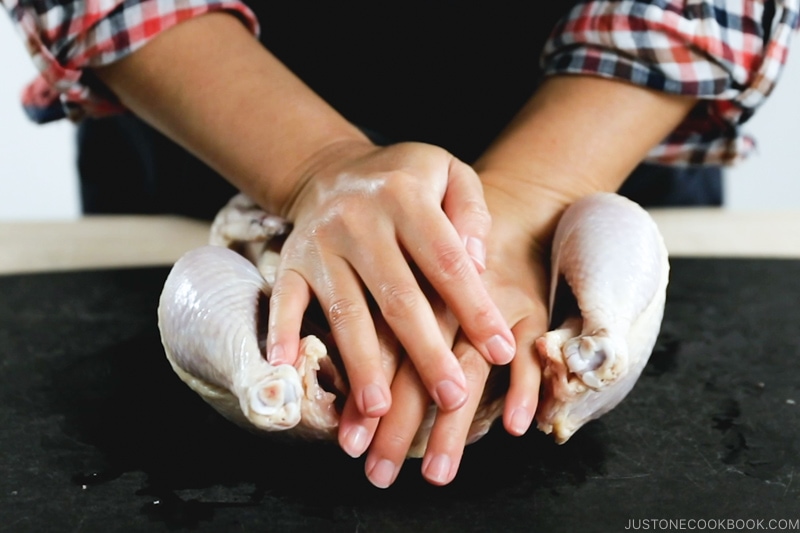
- Place the breast side up. Using the heel of your hands, flatten the chicken by pressing down firmly on the chicken’s breastbone until you hear a crack. The legs and breasts should lay completely flat so all parts of the chicken are roasted evenly.
To Dry Brine the Chicken
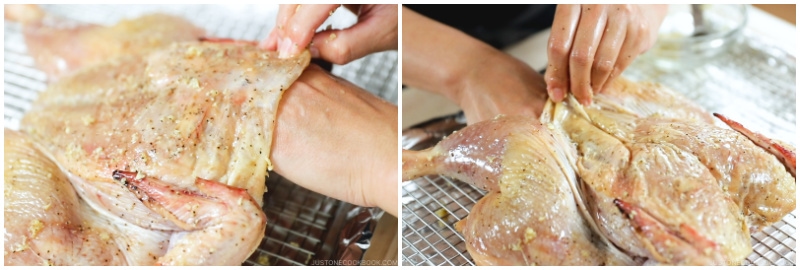
- Carefully separate the skin from the breasts (and thighs, if you‘d like), by gently lifting the skin.
- Rub the dry brine under the skin of the chicken breasts (and thighs, if you‘d like).
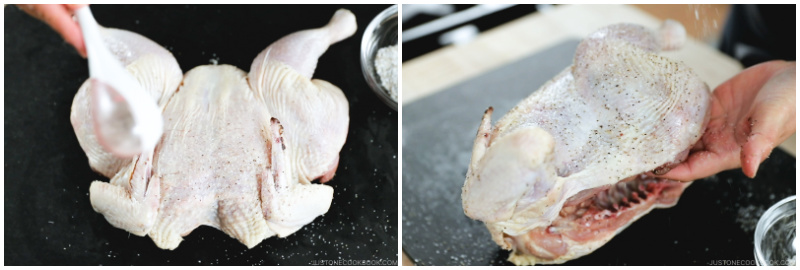
- Sprinkle the seasoning on all sides and rub it to distribute. I use a Maraca Sifter for even sprinkling.
- Transfer the chicken skin side up to a wire rack set in a foil-lined rimmed baking sheet. Position the chicken so the breasts are aligned with the center of the baking sheet. Store the chicken, uncovered, on the bottom shelf of your refrigerator for at least 12 hours or up to a full day. This allows the skin to dry out slightly and crisp up better during roasting. Make sure it is not touching other items in the refrigerator.

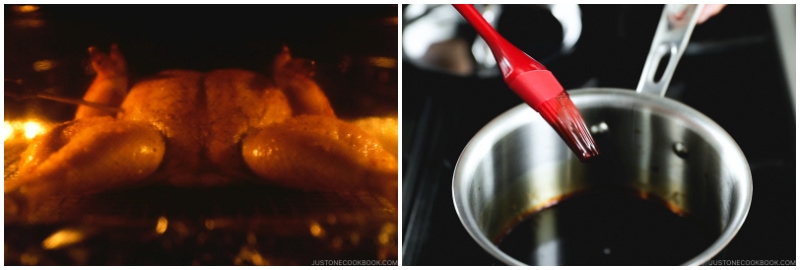
To Make the Honey Soy Glaze
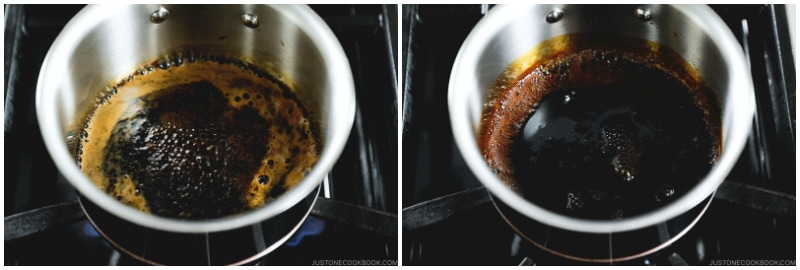
- In a small saucepan, whisk together the ingredients for the Honey Soy Glaze: ¼ cup soy sauce, ¼ cup sake, ¼ cup mirin, 2 Tbsp honey, and ½ Tbsp sugar. Bring the sauce to a boil over medium heat.
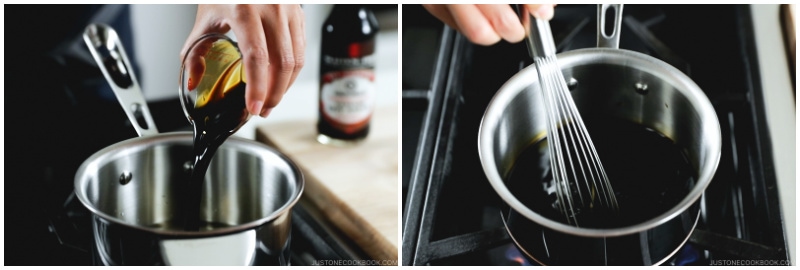
- When boiling, turn the heat to low to maintain a simmer and reduce the sauce in half, about 25 minutes. You can leave out the sauce overnight on the kitchen counter or you can refrigerate it if you live in a humid environment.
ON ROASTING DAY
- Preheat a convection oven, with a rack in the upper-middle position, to 450°F (232°C). Convection cooking uses a fan to evenly distribute hot air throughout the oven and promotes more even browning. If you don’t have a convection oven, preheat to 475ºF (246ºC).
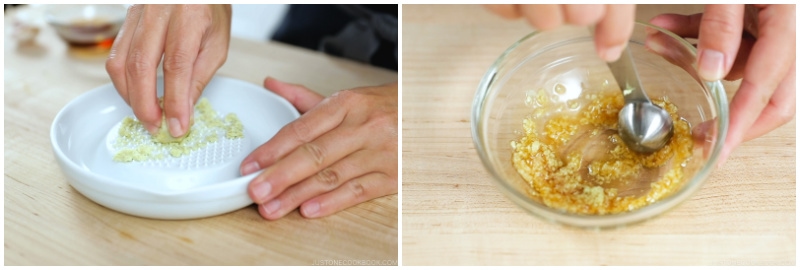
- Peel and grate the ginger and measure 1 tsp ginger (grated, with juice). In a small bowl, combine 1 Tbsp toasted sesame oil, the grated ginger, and 1 clove garlic (crushed).
- Rub the sesame oil mixture all over the chicken.
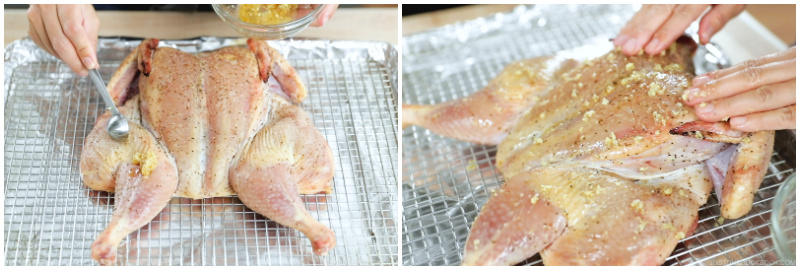
- Rub the sesame oil mixture under the chicken skin.
To Roast the Chicken
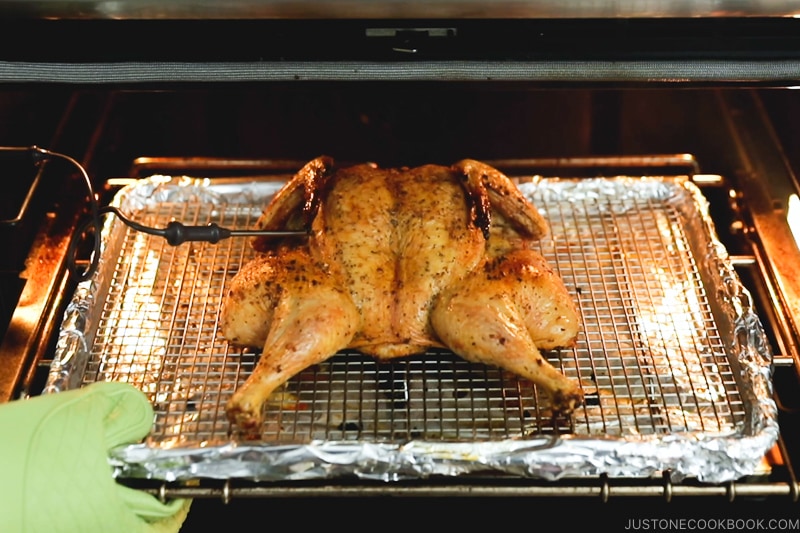
- Insert the oven meat probe thermometer into the thickest part of the breast close to the bone. Optionally, you can tuck the wing tips under the chicken so they don't burn (I skipped this step).
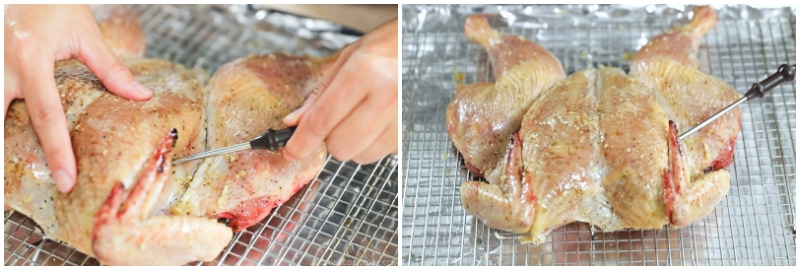
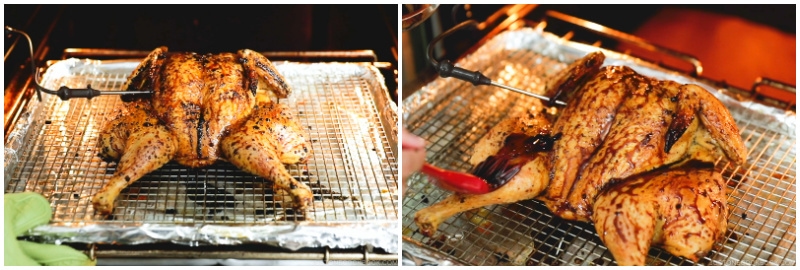
- Set the target temperature of the meat probe* to 150°F (66°C). Roast the chicken at 450°F (232°C on convection), for a total of 40–45 minutes. Roughly 10 minutes before the chicken is done, when the probe thermometer registers at 135ºF (57ºC), pull out the baking sheet and brush the Honey Soy Glaze on the chicken. *If your oven doesn’t come with the probe function, we highly recommend this Thermoworks Chef’s Alarm for cooking.

- While the chicken is roasting, prepare a brush and the Honey Soy Glaze. If you kept it in the refrigerator, bring it back to room temperature.
- As the chicken approaches doneness, around 135ºF (57ºC), pull out the baking sheet and apply the Honey Soy Glaze quickly so you don’t lose the heat.
- Continue to roast the chicken until the thickest part of the breast close to bone registers 150°F (66°C) on the meat probe or an instant-read thermometer. The temperature of the chicken will increase as much as 5–10ºF while it rests, so you do not want to remove the chicken any later, or the chicken breast will begin to dry out.
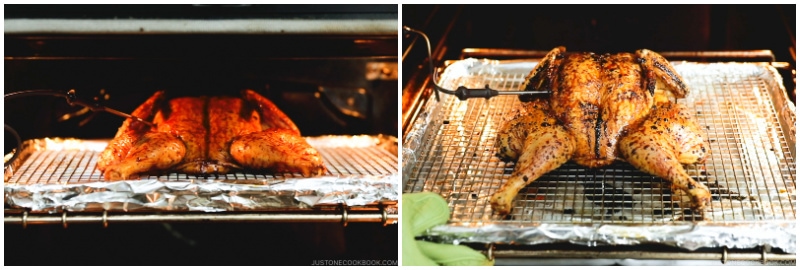
- Remove the chicken from oven, tent loosely with foil, and allow to rest for 10 minutes before carving. This allows the chicken to remain at 150°F (66°C) for 3 minutes (equivalent to the safe internal temperature for cooked chicken of 165ºF (74ºC), according to the UDSA). It also allows the juices in the chicken to distribute more evenly throughout the meat, resulting in juicier chicken.
To Serve
- Transfer to a serving platter or a cutting board and garnish the chicken with optional sage, pomegranate, and cranberries. Remove the legs (cutting the drumsticks from the thighs, if desired), then remove the entire chicken breasts and carve at a slight angle against the grain of the meat to create tender cuts of chicken breast.


This recipe is fire. We make it twice a month. Our preference is a bit thicker on the honey glaze so we double the recipe and then cook it down real nice. Mahalo for this
Hello Sean! Thank you for trying Nami’s recipe and sharing your feedback with us!
It sounds delicious with a heavier glazing as well. We’ll give it a try next time! Happy cooking!
I love this recipe and make it all the time! I intend to adapt it to roasting a duck for Christmas Eve this year. I really appreciate Nami’s ability to infuse Japanese flavors and technique into the more western approach of roasting a whole bird. Thank you!
Hi John! Thank you very much for reading Nami’s post and trying her recipes!
Nami and all of us at JOC are so happy to hear you enjoyed the Japanese flavors.
Thank you for your kind feedback! 🥰
This was delicious! I will use this method for brining and roasting chicken from now on. Skin was browned and crispy and breast meat was not overcooked. The sauce was great. I boiled it too long so it was like taffy, but revived it with a little water and heat. This recipe will be a staple for us.
Hi Lisa! Thank you very much for trying Nami’s recipe and for your kind feedback!
We are so happy to hear you enjoyed this recipe!😊
Great Recipe! Made it twice, good at first try with great tips. It came out much better the second time with practice of the first try. Tips and steps made it so easy to make.
Hi Jenny, Thank you very much for trying this recipe and for your kind feedback!
We are so happy to hear you enjoyed this dish and Nami’s tips were helpful!
This recipe is fantastic! Thanks so much for sharing it and I love all your recipes.
Hi Chinnaddington,
Thank you very much for your kind words!
Hi Nami, I’m not on Facebook so I can’t post on your page there, but I wanted you to know that I made the Honey Soy Glazed Spatchcock Chicken. It is now our favorite way to make chicken. It is simply delicious. Thank you for sharing all your recipes.
Angelo Dalpiaz
Hi Angelo!
Awww… Thank you very much for trying this recipe and for your kind feedback!
We are so happy to hear this became your favorite way to make chicken. Thank you!☺️
Is there any other place that sells your uchicook maracas sifter? Amazon is out of stock.
Thank you.
Hi Colleen,
We are sorry, we don’t know the other online shop that carries this sifter. Hopefully, they will back in stock soon.
Hi Nami,
I enjoyed your video. What is the he name of that sprinkle/sifter like gadget you used for sprinkling salt n pepper in chicken?
Also, what is the brand name of your kitchen shears?
Where would I purchase these gadgets?
Thank you and I love all your recipes.
Happy Thanksgiving!
Aloha from Hilo, Hawaii
Colleen Iwata
Hi Colleen,
The shaker is from UchiCook and is called Maraca Sifter.
You can see all Nami’s favorite cooking tools in this link include the shears:
https://www.amazon.com/shop/justonecookbook?listId=JD39FUPH6SRN
We hope this is helpful.🙂
Where can I purchase the seasoning shaker?
Hi LeeAnn!
It’s from UchiCook, one of Nami’s favorite cooking tools.
https://www.amazon.com/dp/B01N9VYSTQ/?ref=exp_justonecookbook_dp_vv_d
Hopefully, they will have it back in stock soon.